Braze
Overview
This guide provides step-by-step instructions for integrating PostGrid's mailing services with Braze, enabling you to automate the process of sending letters, postcards, cheques, and self mailers to your users. By leveraging PostGrid's API and Braze's webhook functionality, you can easily create webhook templates, ensuring a seamless and efficient mailing experience.
Use this guide as an additional resource to the Braze webhook documentation.
Prerequisites
- A PostGrid account
- PostGrid API keys
Add custom attributes to users
To create an order on PostGrid, you need to specify the recipient's mailing information, such as:
- firstName
- lastName
- addressLine1
- addressLine2 (optional)
- city
- provinceOrState
- postalOrZip
- countryCode
These are the essential data fields you must provide. For a comprehensive list of all attributes your contact can have, refer to the PostGrid API documentation.
Some of these properties are not available by default in Braze. However, you can add custom attributes to your Braze users to add your recipient mailing information and any other additional attributes that you need (if you are using merge variables, for example).
There are two ways of adding custom attributes to Braze.
You can create new custom attributes in Data Settings > Custom Attributes. Learn more about adding custom attributes in Braze’s documentation.
We will cover an alternative way of adding custom attributes in the next section (Update Braze users).
Update Braze users
After creating the custom attributes, you can update your Braze users’ mailing information. You can update users via API or CSV upload.
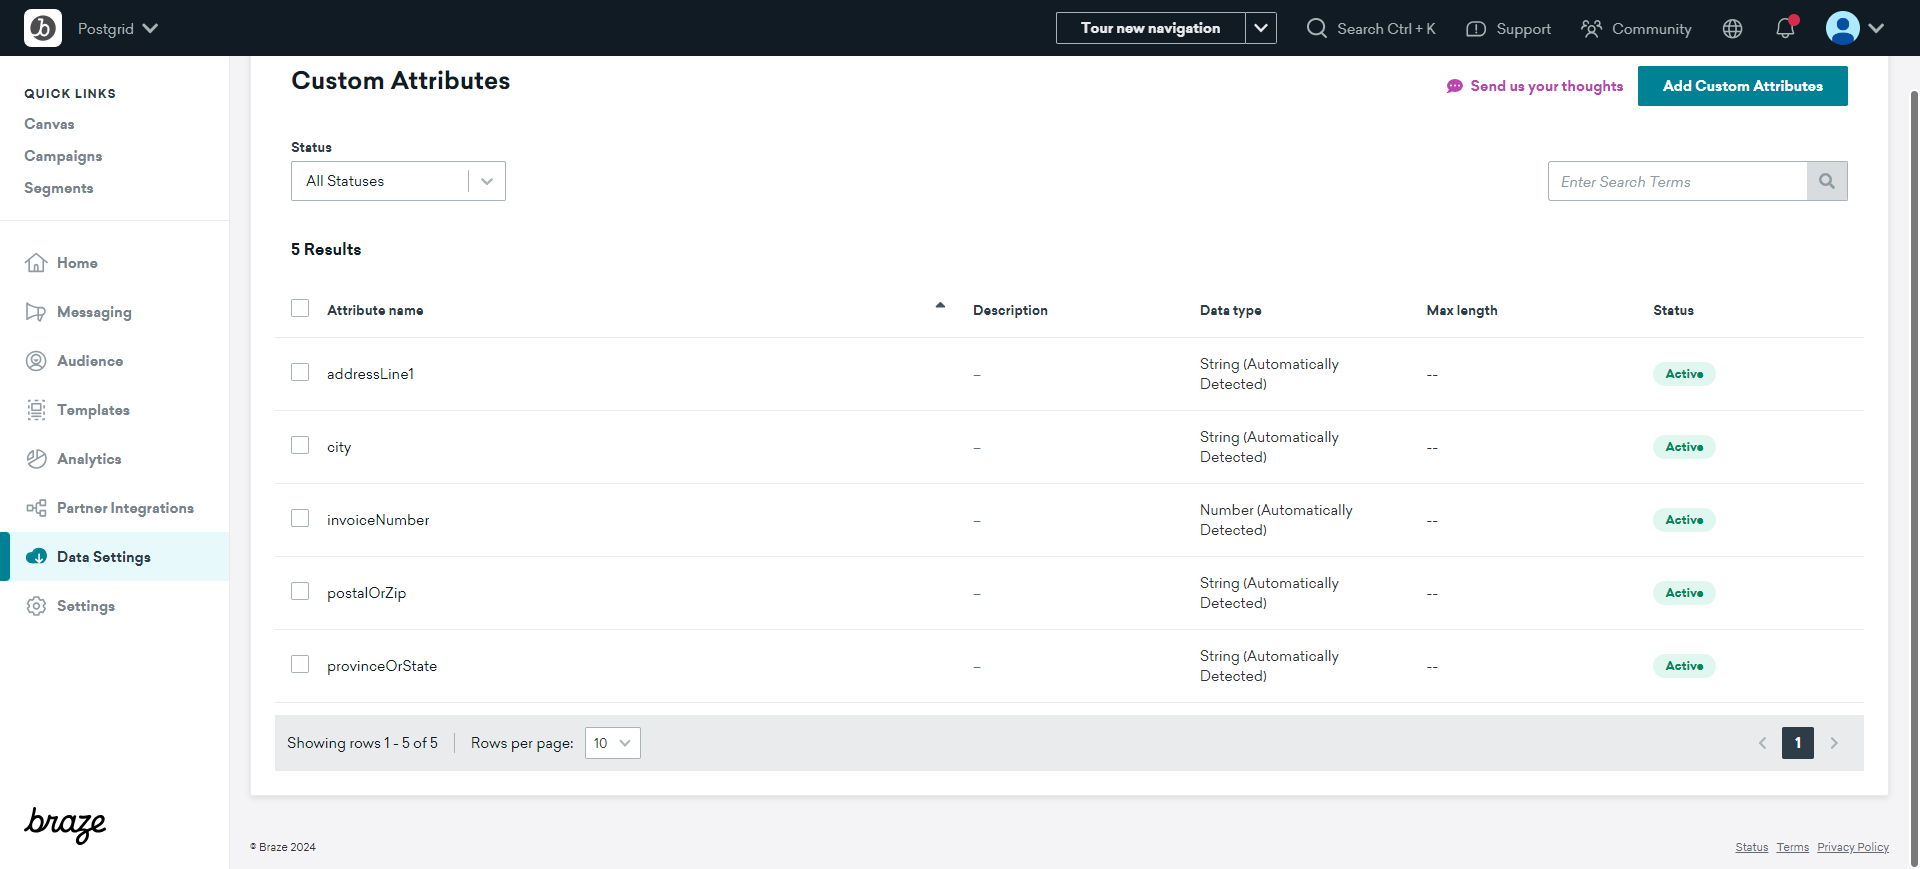
Sending custom attributes in your API request or during the CSV upload will create those custom attributes if they have not already been created. Braze will automatically set their name and data type, and you will be able to view them on the Custom Attributes page.
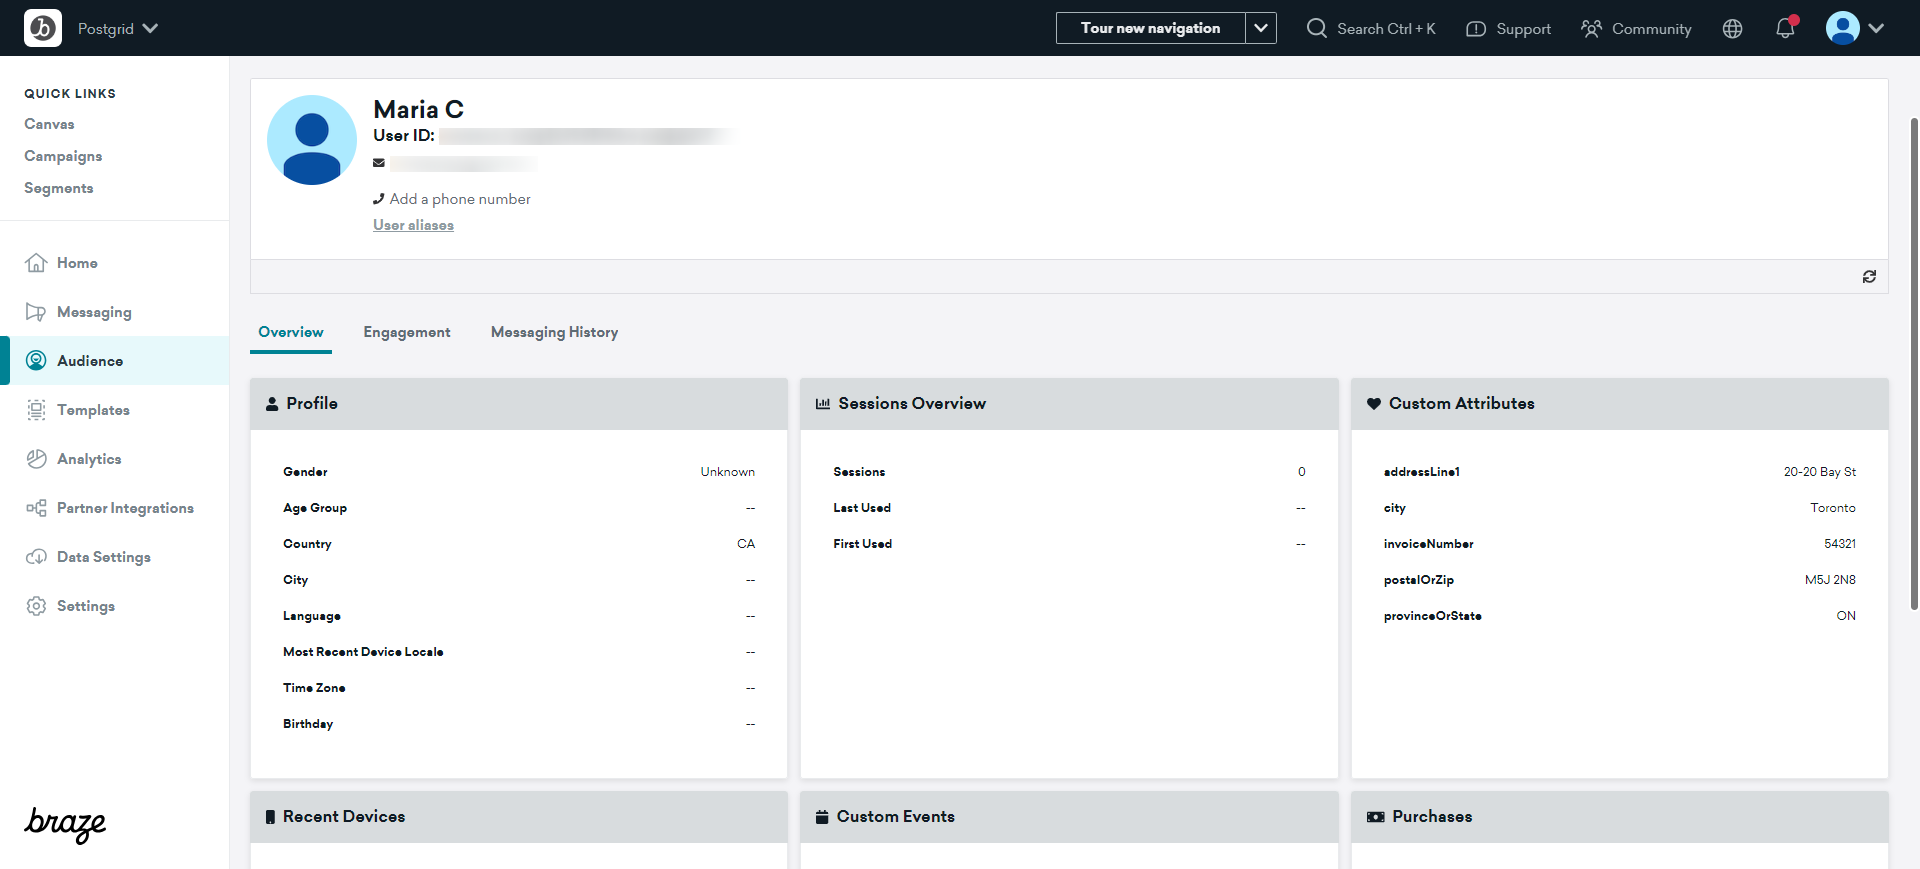
Once updated, you’ll be able to view users’ custom attributes on their profile page.
Note that for this example, we also added the additional property invoiceNumber which we will be using as a merge variable on our request.
Create a webhook template
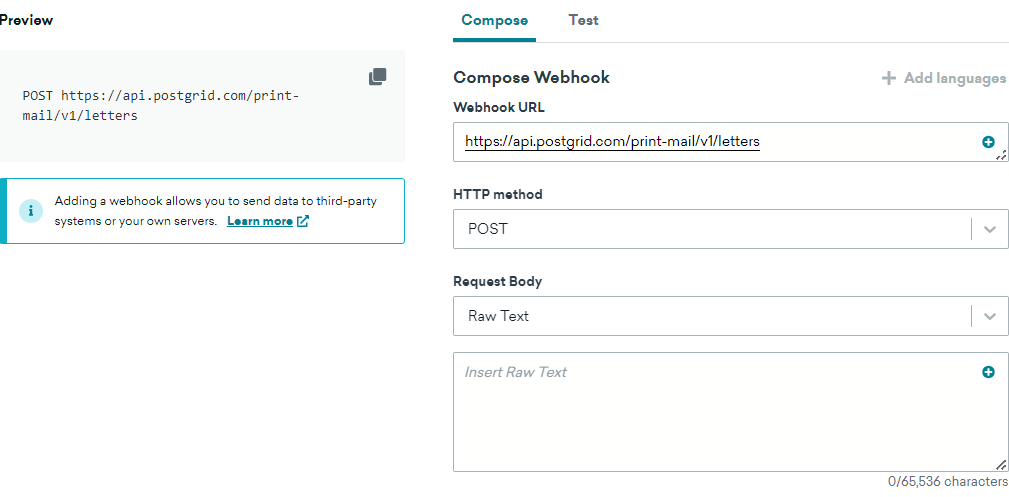
Follow the steps on Braze documentation to create a webhook template. On the creation page, fill out the following fields:
Webhook URL: <POSTGRID_ENDPOINT>
HTTP method: POST
Request Body: Raw Text
You will need to replace <POSTGRID_ENDPOINT> with the PostGrid endpoint you would like to use, depending on the action you’d like to perform on your PostGrid account. The available Print & Mail endpoints include:
| Host | Endpoint |
|---|---|
| https://api.postgrid.com/ | print-mail/v1/letters print-mail/v1/postcards print-mail/v1/self_mailers print-mail/v1/cheques?expand[]=bankAccount |
Check the PostGrid API documentation for a complete list of endpoints.
In the following sections, we will cover some key points to consider when creating an order with PostGrid.
Select a template for your mailing
To send your mailings, you will need to select a template (the document containing the actual mailing content). On PostGrid, you can either use raw HTML, a PDF file, or an existing template that you have created on PostGrid’s Template Editor.
When working with PDF files, you will need to supply a link to a PDF hosted somewhere publicly accessible in your request. See the example below for creating a letter:
{
"description" : "Braze Webhook test",
"to" : {
"firstName" : "<CONTACT_FIRST_NAME>",
"lastName": "<CONTACT_LAST_NAME>",
"addressLine1" : "<CONTACT_ADDRESS>",
"addressLine2" : "<CONTACT_ADDRESS2>",
"city" : "<CONTACT_CITY>",
"provinceOrState" : "<CONTACT_PROVINCE_OR_STATE>",
"postalOrZip" : "<CONTACT_ZIP>",
"countryCode": "<CONTACT_COUNTRY_CODE>"
},
"from" : "<FROM_CONTACT_ID>",
"pdf": "https://pg-prod-bucket-1.s3.amazonaws.com/live/usr_9m6FVmm78VxXhtkKjARXnE/ltr_6YgdBFHXL2axmqzKY8EEu8.pdf",
"color" : "true",
"addressPlacement" : "insert_blank_page",
"doubleSided": false
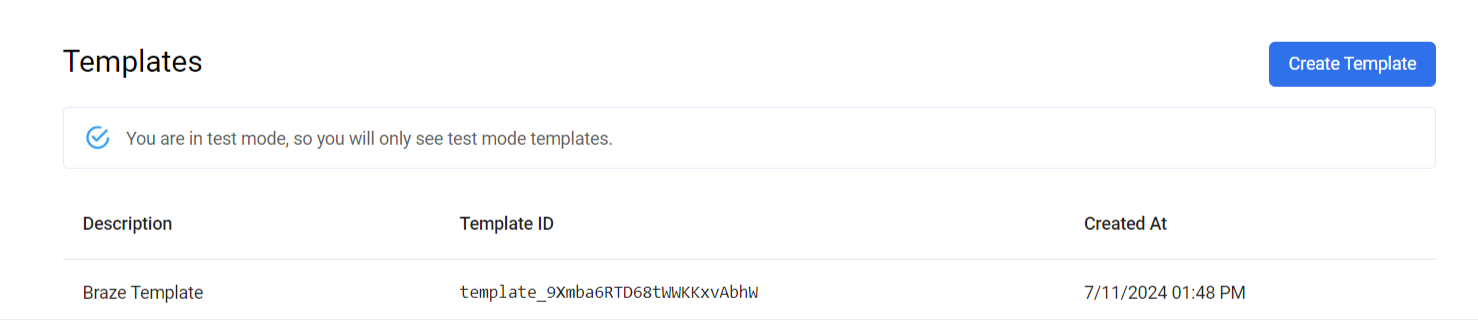
}You can also use an existing template created on the Template Editor by supplying its ID on the request. You can find your template ID on the Templates page on PostGrid’s dashboard:
{
    "description" : "Braze Webhook test",
    "to" : {
        "firstName" : "<CONTACT_FIRST_NAME>",
        "lastName": "<CONTACT_LAST_NAME>",
        "addressLine1" : "<CONTACT_ADDRESS>",
        "addressLine2" : "<CONTACT_ADDRESS2>",
        "city" : "<CONTACT_CITY>",
        "provinceOrState" : "<CONTACT_PROVINCE_OR_STATE>",
        "postalOrZip" : "<CONTACT_ZIP>",
        "countryCode": "<CONTACT_COUNTRY_CODE>"
    },
    "from" : "<FROM_CONTACT_ID>",
   "template": "template_2tsUt2Nu1UEVMvuuATBT1g",
    "color" : "true",
    "addressPlacement" : "insert_blank_page",
    "doubleSided": false
}
You can also send raw HTML in your request instead. For example:
{
    "description" : "Braze Webhook test",
    "to" : {
        "firstName" : "<CONTACT_FIRST_NAME>",
        "lastName": "<CONTACT_LAST_NAME>",
        "addressLine1" : "<CONTACT_ADDRESS>",
        "addressLine2" : "<CONTACT_ADDRESS2>",
        "city" : "<CONTACT_CITY>",
        "provinceOrState" : "<CONTACT_PROVINCE_OR_STATE>",
        "postalOrZip" : "<CONTACT_ZIP>",
        "countryCode": "<CONTACT_COUNTRY_CODE>"
    },
    "from" : "<FROM_CONTACT_ID>",
   "html": "<b>Hello</b>, {{to.firstName}}!",
    "color" : "true",
    "addressPlacement" : "insert_blank_page",
    "doubleSided": false
}
In this example, we used merge variables in our HTML and you are also able to use them with existing templates. Check PostGrid’s documentation on merge variables and our guide on adding merge variables to a template for more information.
Keep in mind that different types of mailings require different templates. Letters and cheques require one single template while postcards require front and back templates. Similarly, self mailers require inside and outside templates. The same logic for selecting a PDF, existing template, or raw HTML apply when selecting templates for postcards and self mailers.
Design guidelines
You can send four different types of mailing with PostGrid: letters, postcards, cheques and self mailers. Each one of these options have design guidelines that must be followed, including different size options.
For letters and cheques, the document size will be determined by the destination country. For postcards, there are three different sizes to choose from (and your chosen templates must follow the same size):
- 6x4
- 9x6
- 11x6
For self mailers, we have the following option:
- 8.5x11_bifold
Please refer to the PostGrid documentation for more information on design guidelines.
For this demo, we will choose the Create Letters endpoint for our webhook:
Request headers
All requests to the PostGrid API are authorized via an x-api-key header. Retrieve your API key from the dashboard on the Settings page and replace <POSTGRID_API_KEY> with it.
- Request headers
- Content-Type: application/json
- x-api-key: <POSTGRID_API_KEY>
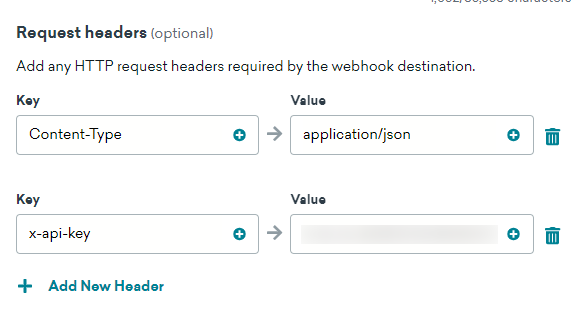
Note: Orders made with your Live API key will be sent to your recipients. It is highly recommended to use your Test API key to ensure everything works as expected before placing live orders.
Request body
Here’s an example request body for Create Letter endpoint. In this example, we are using an existing template that contains the merge variable invoiceNumber.
These properties can change depending on the endpoint you are using. Check PostGrid’s API documentation to see the necessary fields for the endpoint you’d like to use and update your Liquid fields accordingly.
{
    "description" : "Braze Webhook test",
    "to" : {
        "firstName" : "{{${first_name}}}",
        "lastName": "{{${last_name}}}",
        "addressLine1" : "{{custom_attribute.${addressLine1}}}",
        "addressLine2" : "{{custom_attribute.${addressLine2}}}",
        "city" : "{{custom_attribute.${city}}}",
        "provinceOrState" : "{{custom_attribute.${provinceOrState}}}",
        "postalOrZip" : "{{custom_attribute.${postalOrZip}}}",
        "countryCode": "{{${country}}}"
    },
    "from" : "contact_cobebxUxopuz9183dwsD3C",
    "template" : "template_bTZDhA7vx61B3L9CYdVuQX",
    "mergeVariables": {
        "invoiceNumber": "{{custom_attribute.${invoiceNumber}}}"
    },
    "color" : "true",
    "addressPlacement" : "insert_blank_page",
    "doubleSided": false
}
Test your request
At this point, you should be ready to test your webhook. On the Test tab, you are able to select from a random user, an existing user or create a custom user for the test. Please ensure that your selected user has the necessary custom attributes to send the request.
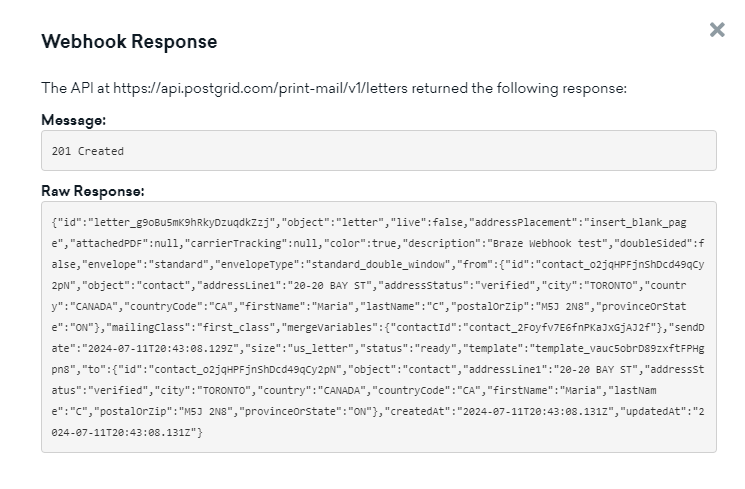
Once this is done, click “Send test” to send your request.
A pop-up window containing the response details should be displayed, indicating if your request was successful and displaying any error messages if applicable.
You can also check your newly created order or API logs on PostGrid’s dashboard.
Common errors
401 Unauthorized
This error message can appear due to a missing or incorrect API key.
Make sure that you set the x-api-key header and that your API key is correct.
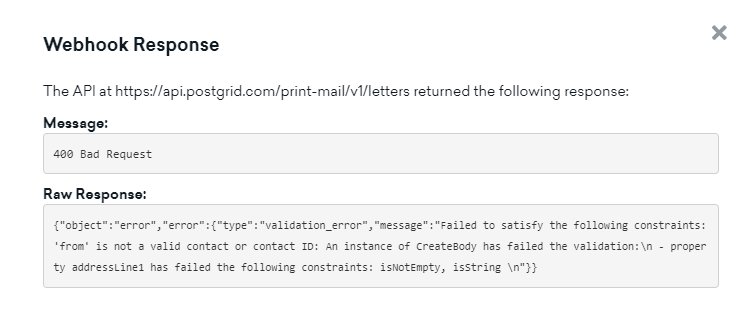
400 Bad Request
This error may indicate that your request payload is formatted incorrectly. Remember that your request headers and body need to follow JSON formatting.
It is also possible that your request body is missing a parameter required by PostGrid. In this case, check the webhook response for more information on the error and refer to PostGrid’s API documentation for details on the expected parameters.
Use webhook in a campaign or Canvas
Your webhook is now ready to be used in a Braze campaign or Canvas.
Braze allows webhooks to be delivered on a scheduled time, an action of your choice or based on an API trigger.
For instance, you can choose to deliver the webhook everytime a change is made to a specific custom attribute:
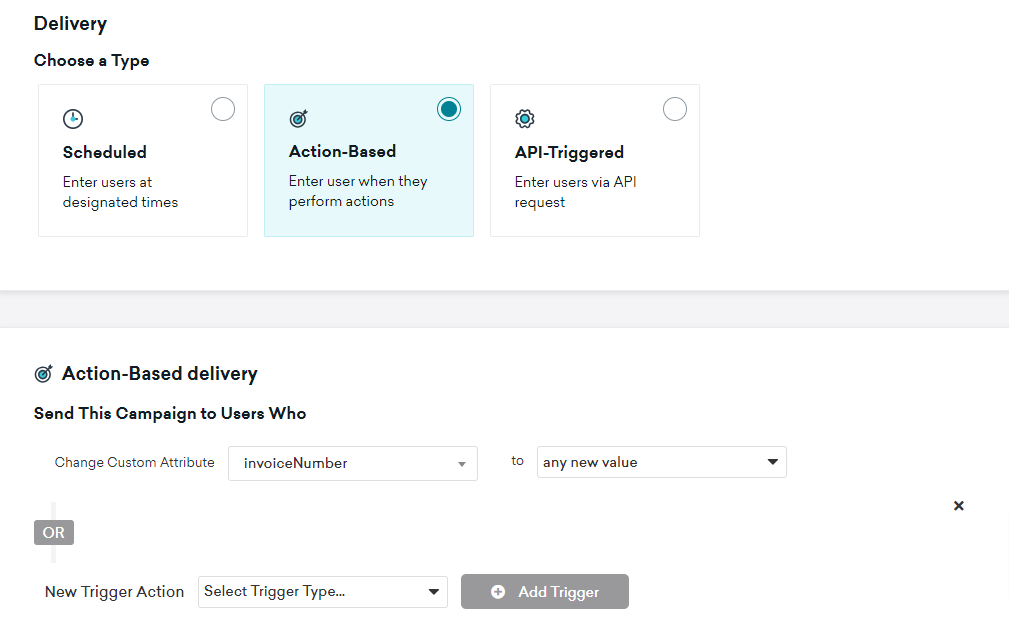
There are many other triggers available to choose from. Please refer to the Braze documentation for more information on scheduling a webhook delivery or trigger.
PDF Previews
We provide PDF previews for all orders, including those created in test mode. These previews should be available a few seconds after you create an order.
You can access them on the dashboard by clicking View PDF on the top-right of the order details page. Alternatively, you can use the Get Letter endpoint to retrieve the created letter and use the url property to view the generated PDF.
For cheques, the previews will censor the account number by padding the last 4 digits with zeros.
Tracking your order
PostGrid can provide the exact status of an order as reported by the underlying mail carrier, but this feature is only available when an appropriate mailingClass is used (e.g., USPS certified mail). You can learn more about this feature here.
Updated 11 months ago