Sending your first Cheque
With either of your templates or PDFs ready to go, it is time to figure out how to send actual mail. If you are still unsure of how the mail will turn out, create an order in test mode and check the preview to be sure.
Creating Bank Accounts
To send a cheque, you must first add a bank account from which the amount will be transferred to the recipient.
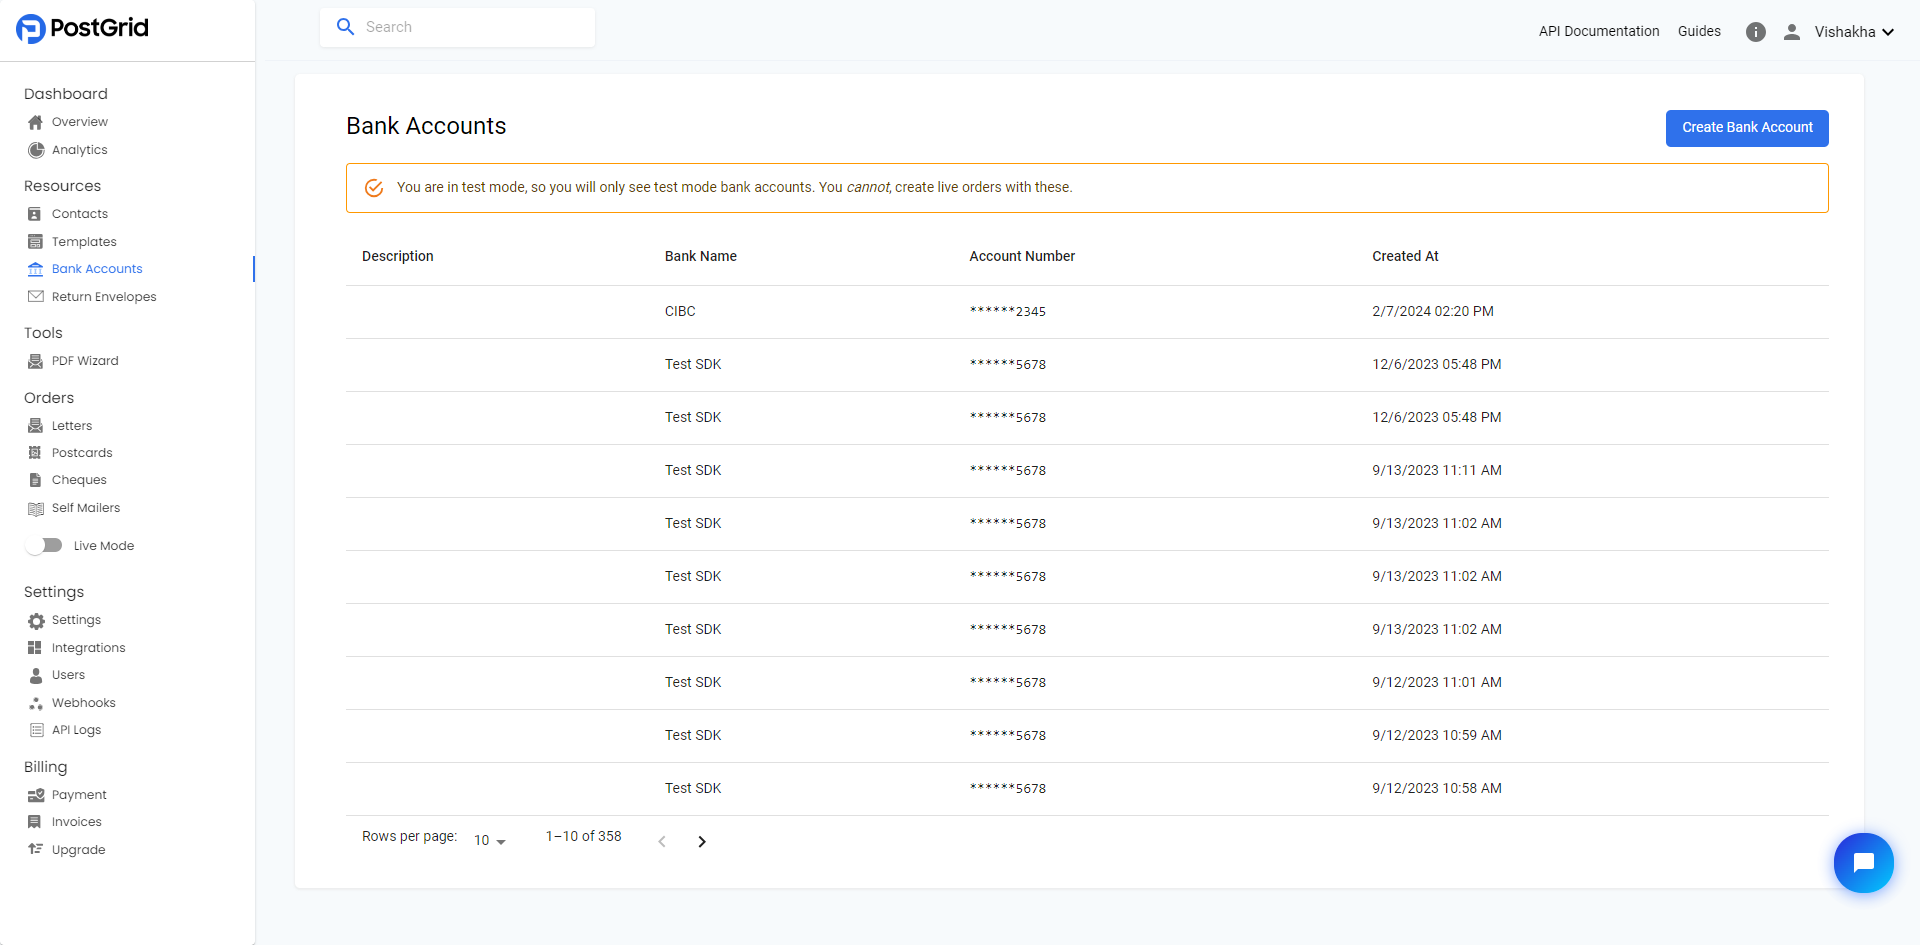
PostGrid simplifies this process by providing the option to create bank accounts directly within the dashboard. To do so, go to 'Bank Accounts' under Resources, which can be found on the left side of the navigation bar.
On this page, you can find existing bank accounts and select them to access more information. You can also use the search bar at the top to search for bank accounts using any known information. To create a new bank account and enable check sending, click on 'Create Bank Account' in the top-right corner.
PostGrid supports bank account creation for the US and Canada through the dashboard. Depending on the selected country, you will need to provide the necessary information to create the bank account. For the signature, you can either upload an image in PNG/JPEG format or simply add the text.
Signature Text Note: the reasonable character limit to enter for the signatureText is 6 capital letters OR 20 lowercase letters, anything exceeding that will likely overflow onto a new line. If you need to use a large signature, it would be best to insert an image instead
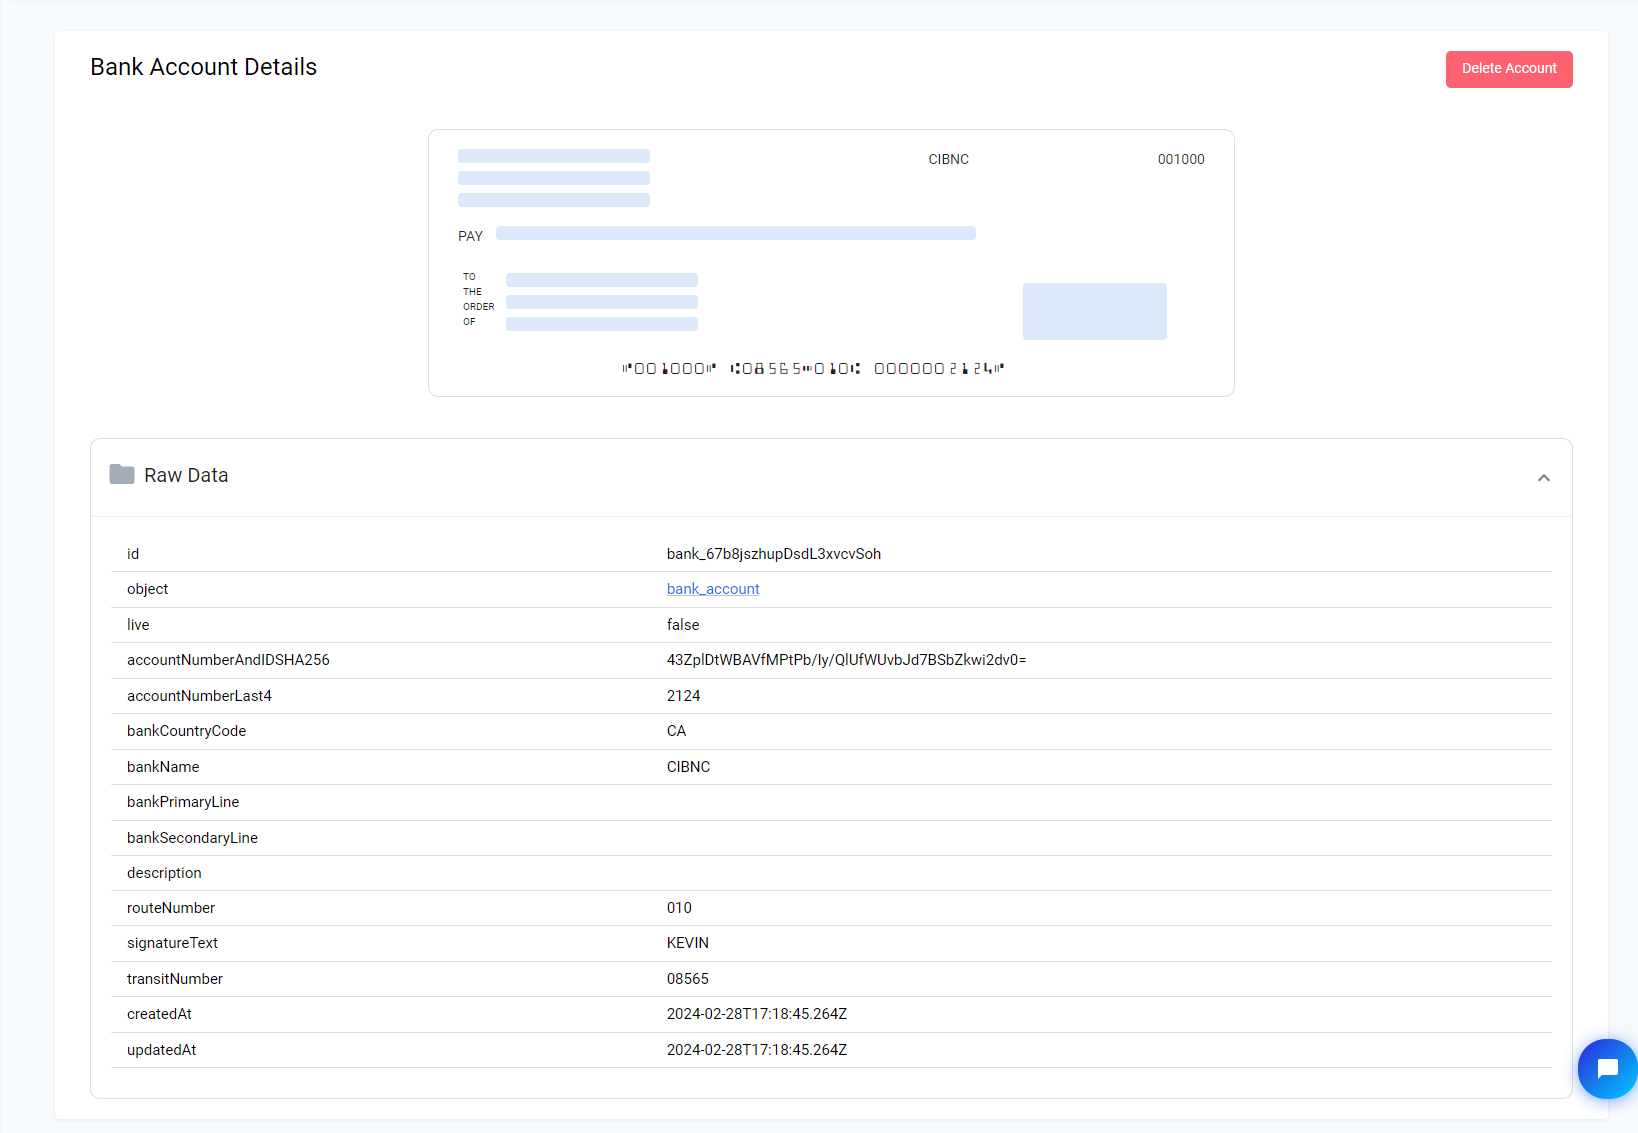
Once you have filled in the appropriate details, click on 'Create' to return to the page displaying all bank accounts, with the newly created bank account listed at the top. To view information, delete a bank account, or access the cheque template, simply select the bank account from the list to be redirected to a page with these options.
Creating Templates for Optional Letter
PostGrid allows users to send checks along with an optional attached letter. You can refer to the Design Guidelines section to understand how to create templates.
Sending Individual Cheques to Contacts
To begin, click on 'Cheques' under the 'Order' page using the navigation panel on the left. On this page, you will find a list of all your previously sent checks. If you are looking for something specific, you can use the search bar at the top of the page to find mail sent to specific contacts, at a specific stage, and more. To create a new check, click on 'Create' at the top right.

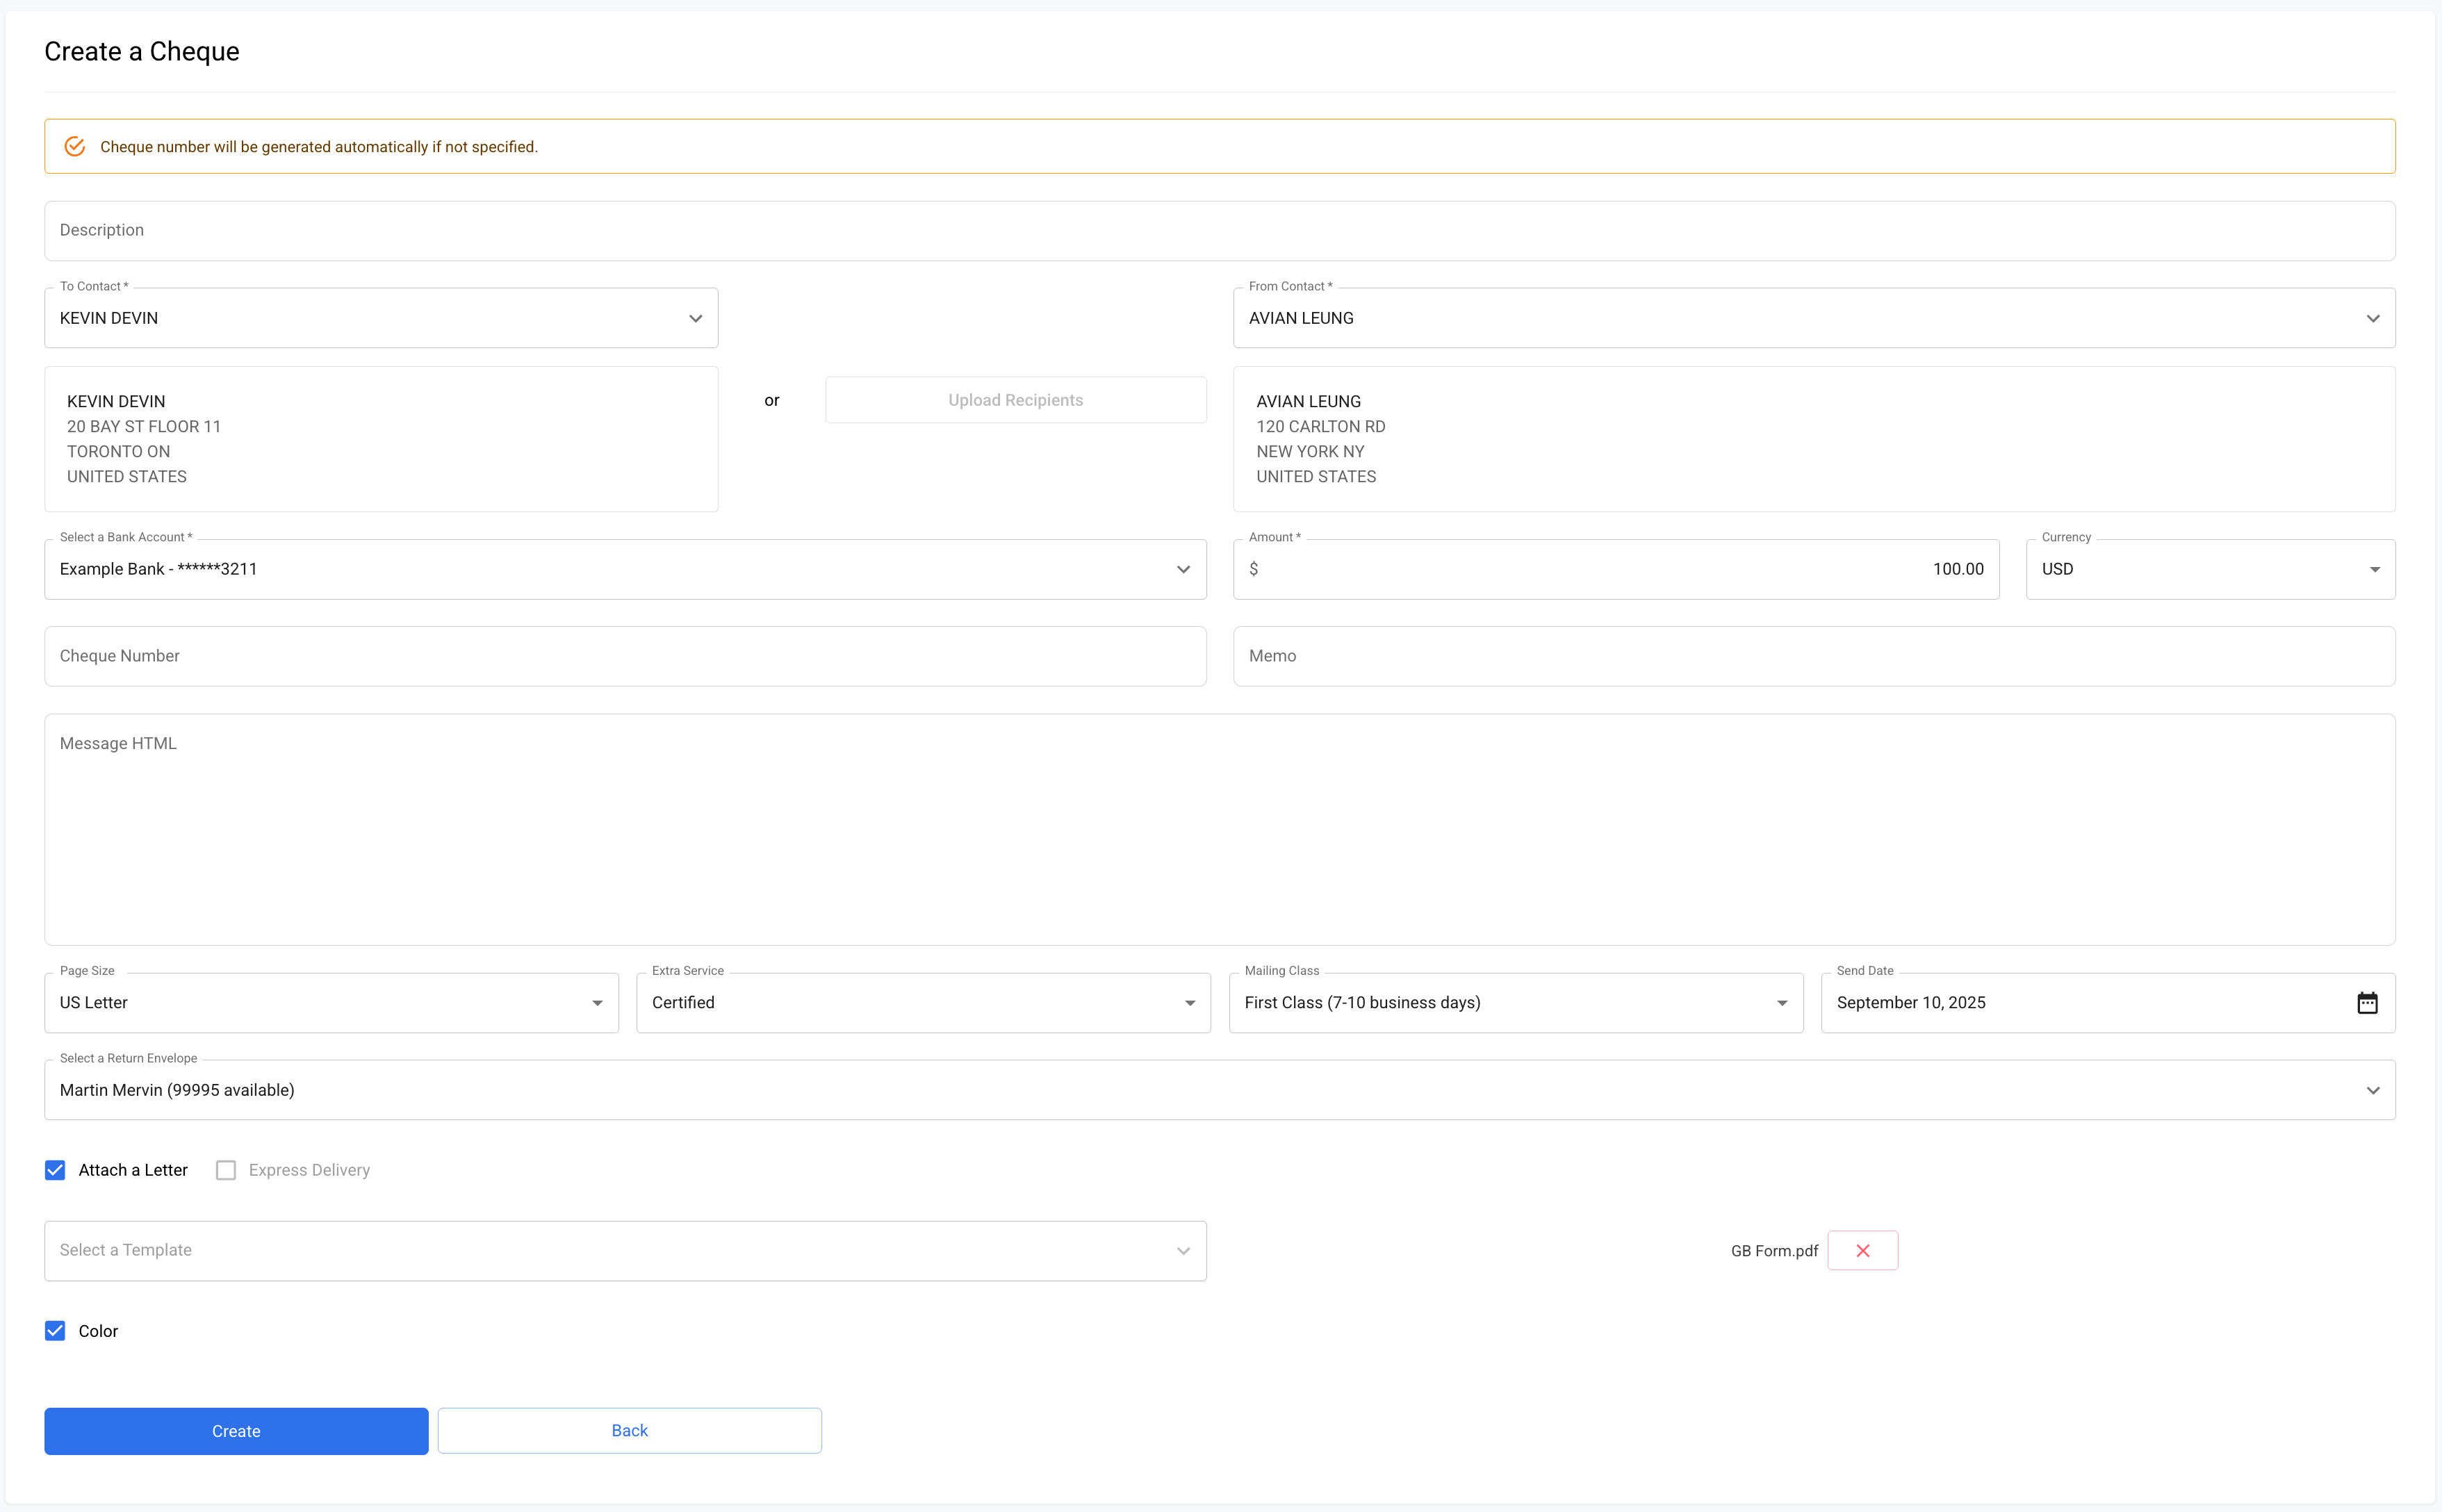
Once you are on the page, you will find all the fields required to fill out for cheque creation, including a bank account and your contacts.
To add contacts, you can either start typing a name or use the arrow to drop down a list of recently created contacts. Select the contact from which you wish to send the cheque, and choose the desired recipient contact.
Now that you have selected the contacts for both the sender and the recipient, you are ready to choose the bank account. To select a bank account, either start typing a name or use the arrow to display a list of recently created bank accounts.
Next, enter the amount (in USD or CAD) that you want to send to the recipient.
Note: Please double-check this amount as it will be withdrawn and transferred from the selected bank account in the previous step.
The Cheque Number and Memo fields are optional. A cheque number will be generated automatically, but you can also specify one using the Cheque Number field. Any text entered in the Memo field will be displayed on the cheque in a small font.
The Message HTML field allows the mail to have a message printed above the cheque on the same page. This message should be written in HTML and can include merge variables for variable data. For example, {{to.firstName}} would be replaced with the first name of the recipient contact. The template editor in the "Template" section on the left side of the dashboard can be helpful in generating HTML content to populate this field.
If you want to include a letter with your cheque, you can select the 'Attach a Letter' checkbox. You have the option to choose an existing template for the attached letter or upload a PDF of the letter you wish to send along with the cheque. The letter will be printed on additional single-sided pages in black and white, and it will be sent in the same envelope as the cheque.
Now, you only have a few remaining options at the bottom.
- Return Envelope: If you have pre-ordered return envelopes and they are available in stock, you can select the desired return envelope by clicking on the dropdown.
- Extra Service: You can choose this service if you want to send out registered or certified mail. These mailing options are available only for sending letters and checks.
- Mailing Class: By default, all mail is sent as First Class or the fastest non-express postage available in the destination country. This can be overridden by selecting Standard Class by clicking on the drop-down.
- Send Date: You can either schedule the mailing to be sent out on a future date, or by default, it will be sent out to the printer the next day for printing.
- Express Delivery: You can select Express Delivery only if you have not opted for the Extra Service option.
Next, click the on 'Create' to generate your cheque. Once created, you will be redirected back to the list of your cheques. You can view the individual orders on the 'Cheques' Order List page. To preview the PDF, you have two options: either click on the 'View PDF' link under the 'Preview' column on the list page, or click on the specific cheque order and then click on 'View PDF'.

Note that you can cancel the orders that you create by 12 AM EST of the send date.
Details about tracking will be covered in a later section.
Sending Cheques to Multiple Contacts
Now that you know how to send mail to individual contacts, let's explore how you can send mail to multiple contacts at once. To accomplish this, you will need a CSV file containing your list of contacts, and you can use the 'Upload Recipients' button.

For properly formatting your contact information, see the example found here. This file contains Amount, Memo and Cheque Number columns, which are now disabled on the dashboard, to define each of those fields for the respective cheques.
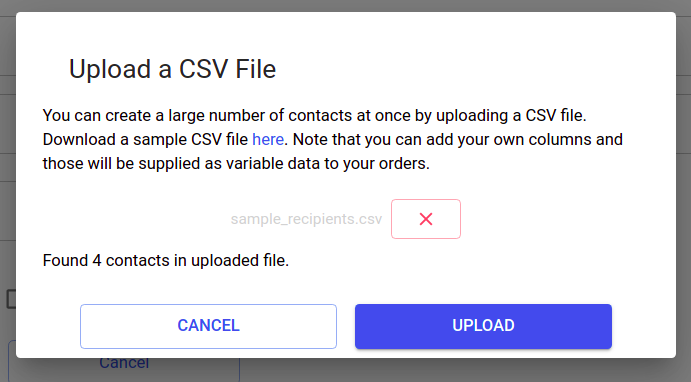
Once you upload the CSV, if your template contains merge variables, they will automatically be mapped with the information available in the CSV.
If you are using your own CSV, make sure the following columns are available:
- First Name and Last Name or Company Name
- Address
- Address 2
- City
- Province or State
- Postal or Zip
- Country Code
Next, click on 'Create' to finalize the cheque. Once the order is successfully created, a downloadable report will be generated for all the orders created. The report will include the order ID, recipient name, and status for each order. You can view the individual orders on the 'Cheques' Order List page. To preview the PDF, you have two options: either click on the 'View PDF' link under the 'Preview' column on the list page, or click on the specific Cheque order and then click on 'View PDF'.
Updated 4 months ago