Sending your first Postcards
With either of your templates or PDFs ready to go, it is time to figure out how to send actual mail. If you are still unsure of how the mail will turn out, create an order in test mode and check the preview to be sure.
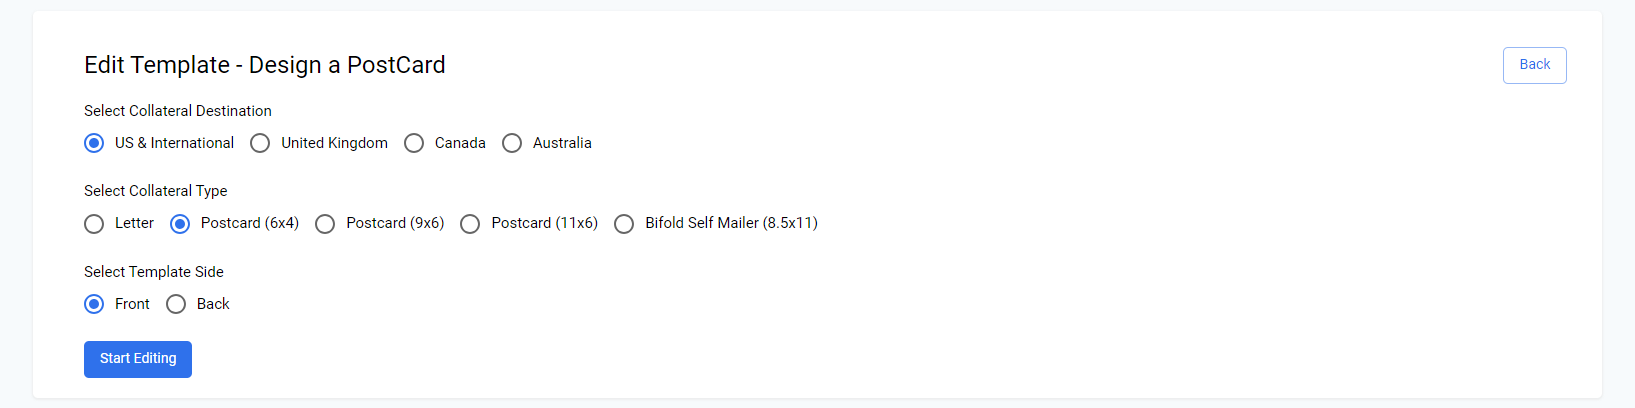
Design a Postcard Template
Postcards can be designed in a similar way to letters, with the only difference being that you need to design the front and back side of a postcard separately.
Sending Individual Postcards to Contacts
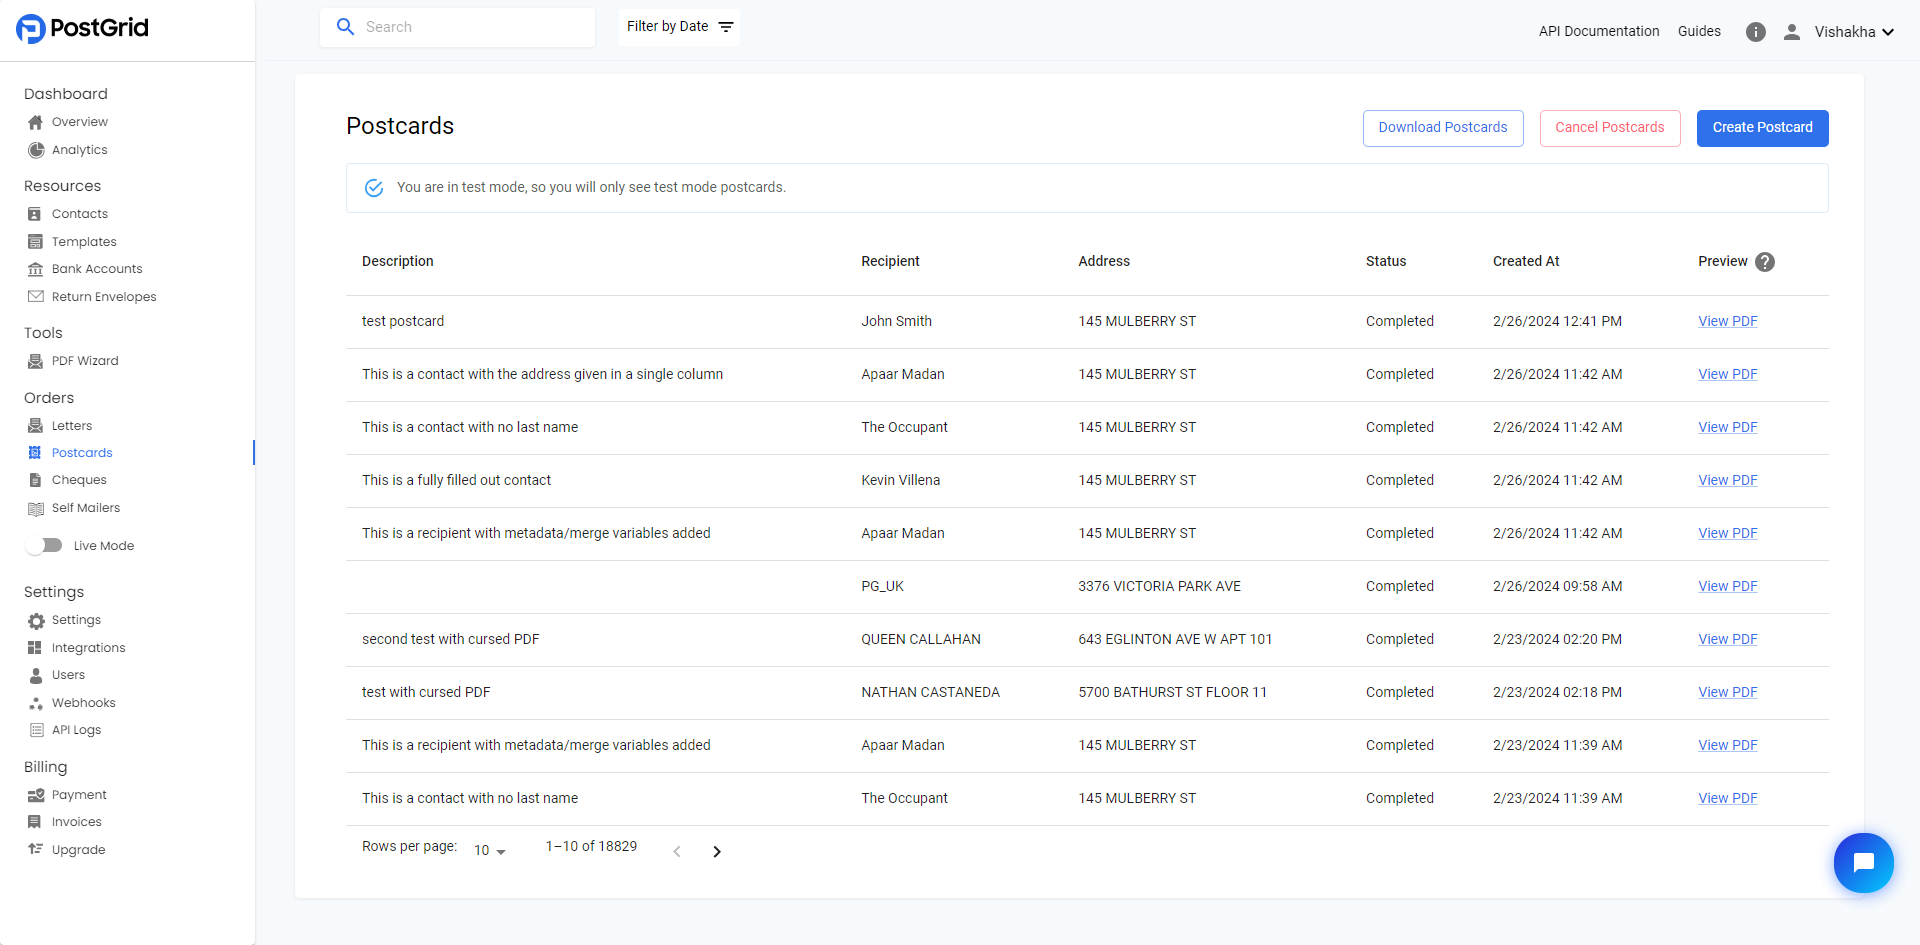
To get started, go to the ‘Postcards’ page under Resources using the navigation panel on the left. On this page, you will find a table containing all the postcard orders you have created. If you are looking for something specific, you can use the search bar at the top of the page to find mail sent to specific contacts or at a specific stage, among other options. To create a new Postcard, click on 'Create Postcard' located at the top right corner of the page.
Once you are on the 'Create a Postcard' page, you will find all the required fields to fill out in order to create the postcard. These fields include the postcard size, front and back templates, and the recipient's contact information. Please note that selecting a 'from' contact is optional.
To add a contact, you can either start typing a name or use the dropdown arrow to select from a list of recently created contacts. Note that selecting a sender address is not mandatory for mailing out a postcard. The default postcard size is 6x4, but you can select any other available size if desired.
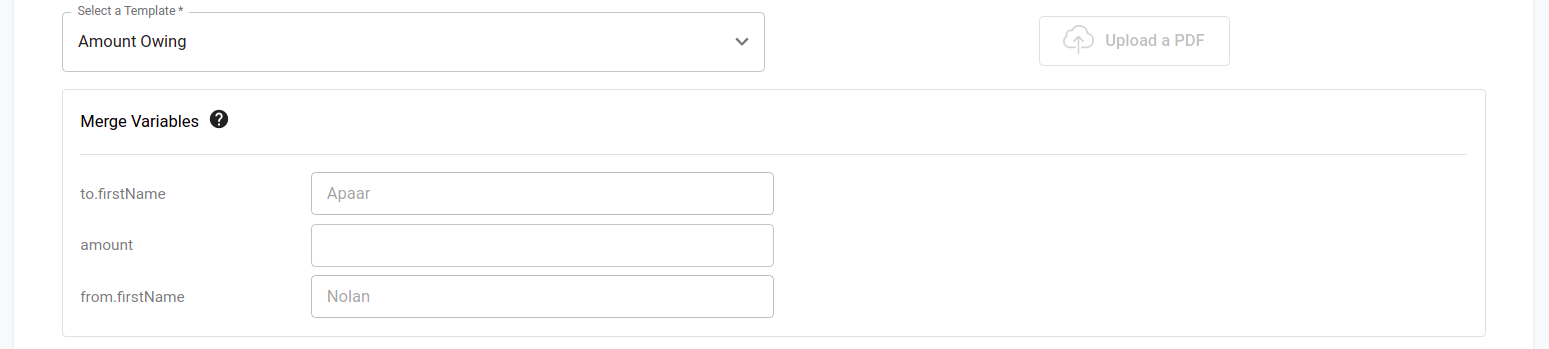
Next, add the template. If you want to send out a postcard without any merge variables, it is usually more appropriate to upload a PDF of your postcard using the 'Upload a PDF' button. Alternatively, you can select the front and back HTML from the dropdown. If you choose to upload a PDF, make sure that it contains both the back and front side of the postcard.
With the PDF uploaded or the template selected, as well as contacts chosen, you only have a few remaining options at the bottom.
- Mailing Class: By default, all mail is sent as First Class or the fastest non-express postage available in the destination country. This can be overridden by selecting Standard Class by clicking on the drop-down.
- Send Date: You can either schedule the mailing to be sent out on a future date, or by default, it will be sent out to the printer the next day for printing.
- Express Delivery: You can select Express Delivery only if you have not opted for the Extra Service option.
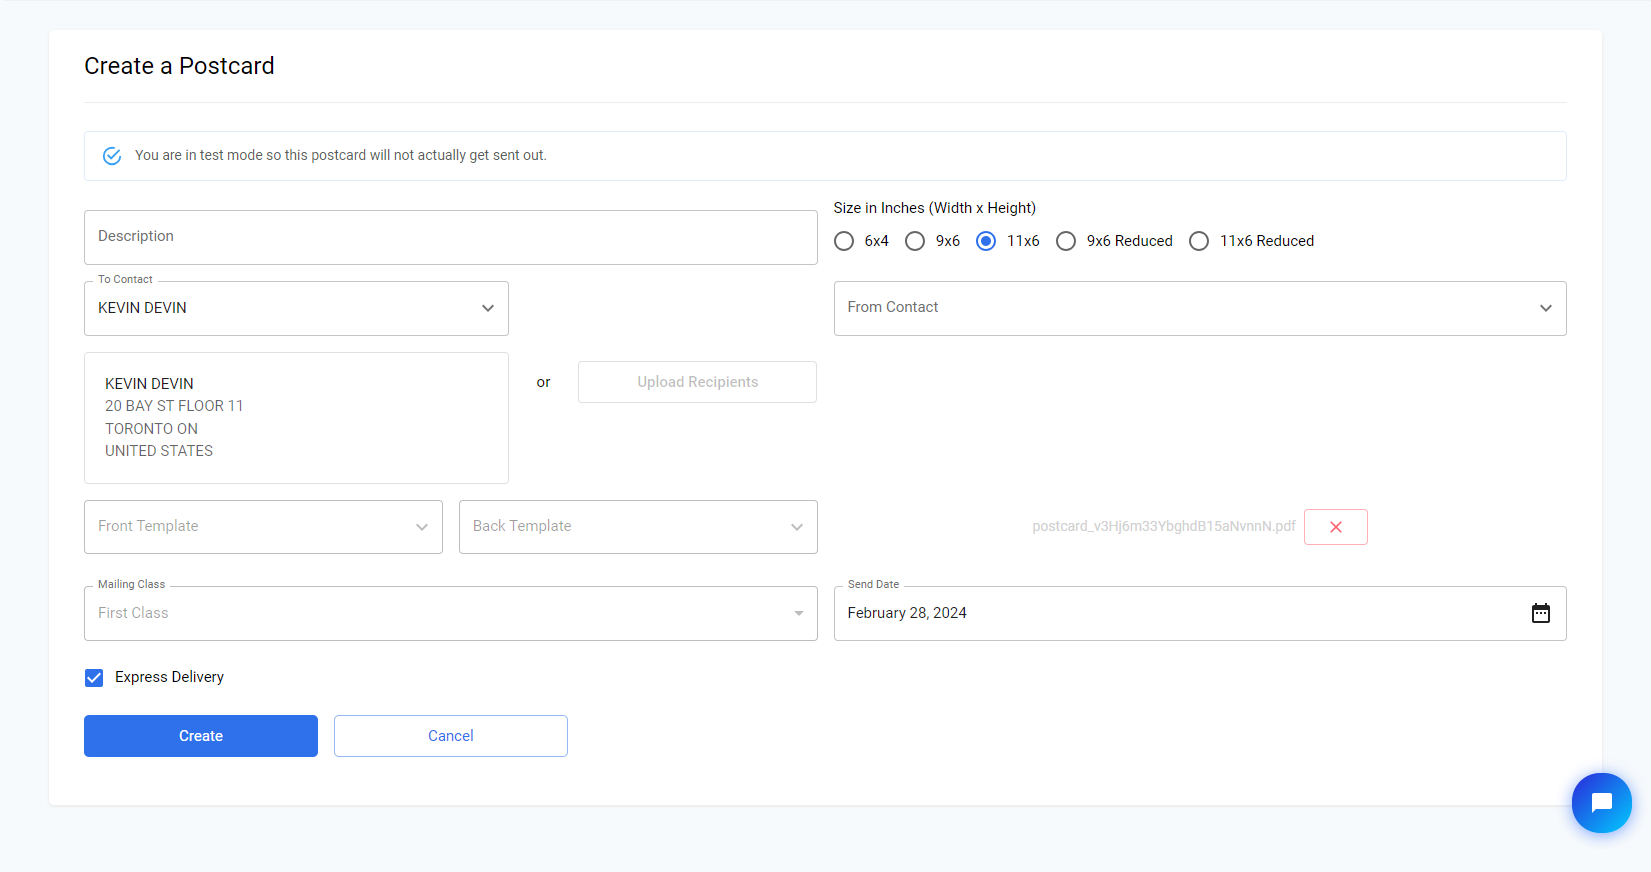
Next, click on 'Create' to finalize the postcard. Once the order is successfully created, you will be redirected to the list of sent postcards. To preview the PDF, you have two options: either click on the 'View PDF' link under the 'Preview' column on the list page, or click on the specific postcard order and then click on 'View PDF'.
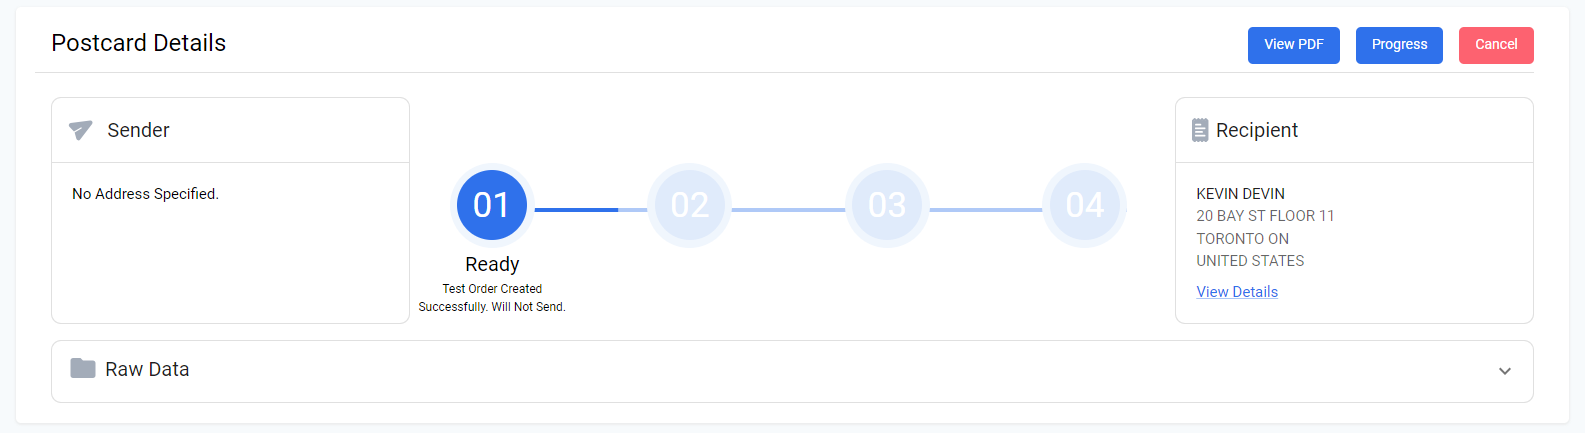
Note that you can cancel the orders that you create by 12 AM EST of the send date.
Details about tracking will be covered in a later section.
Sending Postcards to Multiple Contacts
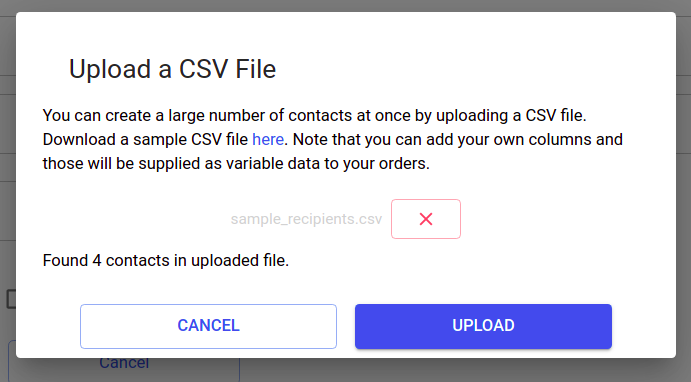
With an understanding of how you can send mail to individual contacts, let's look into how you can send mail to multiple contacts at a time. To do so, you will need a CSV of your list of contacts and you will need to click on 'Upload Recipients'.

To properly format your contact information, refer to the example found here. If you need to adjust it to include different variables for different contacts, you can either remove the columns from 'code' to 'datedue' or replace these columns with the required information for your templates. Fill in the individual values under each column and remember to save or export it as a CSV file.
If you are using your own CSV, make sure the following columns are available:
- First Name and Last Name or Company Name
- Address
- Address 2
- City
- Province or State
- Postal or Zip
- Country Code
In addition to these, you can also include Description, Email ID, Phone Number, or any other required information you wish to add for individual contacts to send personalized mailings.
Once you upload the CSV, if your template contains merge variables, they will automatically be mapped with the information available in the CSV.
Next, click on 'Create' to finalize the postcard. Once the order is successfully created, a downloadable report will be generated for all the orders created. The report will include the order ID, recipient name, and status for each order. You can view the individual orders on the 'Postcards' Order List page. To preview the PDF, you have two options: either click on the 'View PDF' link under the 'Preview' column on the list page, or click on the specific postcard order and then click on 'View PDF'.
Updated 6 months ago