Creating letter orders using PDF Wizard
Overview
PostGrid's PDF Wizard feature enables you to mail letters without the need to manually identify the sender and recipients' mail addresses for each letter.
This feature is especially advantageous for large mail-outs, as it eliminates the manual process of sifting through each letter to find the addresses. By utilizing the PDF Wizard, you can greatly reduce your preparation time and improve the operational efficiency of your mailing process.
Please note, this feature is paid and available only upon request. Please reach out to our sales team at [email protected] to get more details on the pricing.
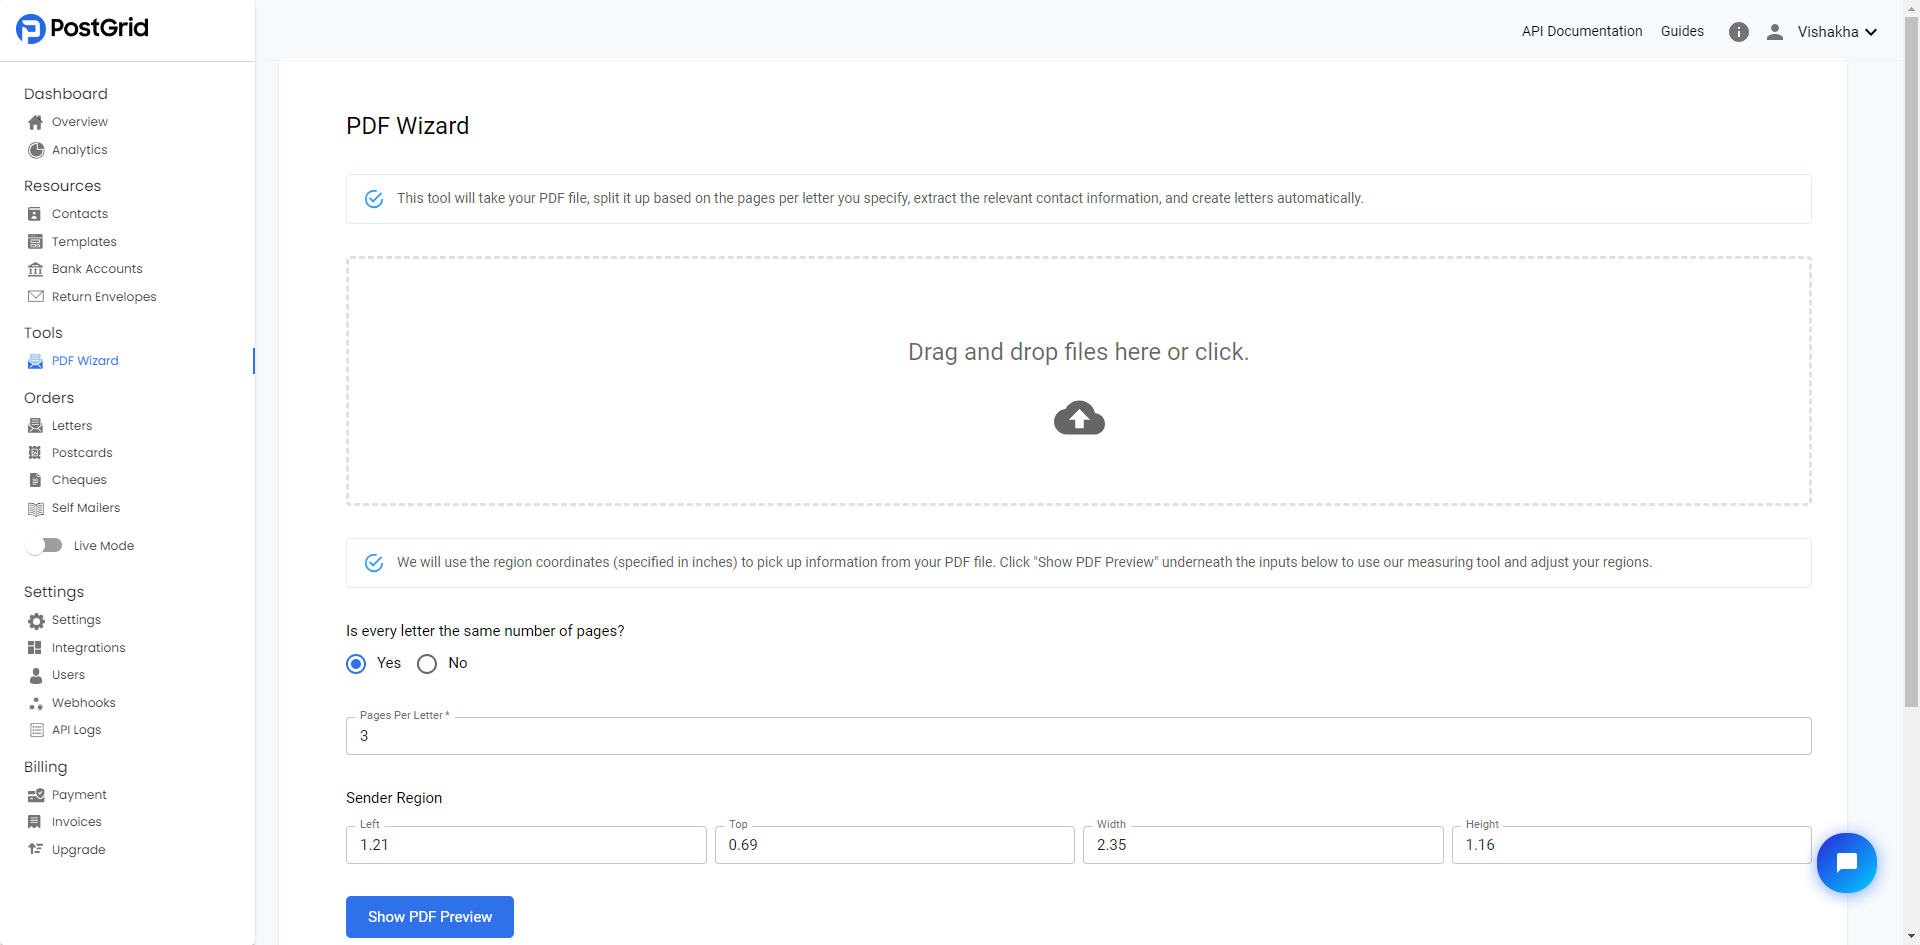
Once you have the tool enabled for your account, click on 'PDF Wizard' under Tools on the left side panel of your PostGrid Dashboard.
Using the PDF Wizard Feature
To use the PDF Wizard feature, follow these three steps:
- Uploading files to the PDF Wizard: This step involves adding the PDF files that will be mailed. The files should follow a consistent format with regards to the placement of sender and recipient addresses.
- Specifying address regions on the PDF: After uploading the files, you need to define the areas on the page where the sender's and recipient's addresses are located. Simply mark the area around the respective sender and recipient address, and the system will automatically measure the area metrics for the corresponding regions.
- Reviewing information and mailing letters: After defining address regions, the PDF Wizard will extract the addresses. You can review these details and ensure their accuracy. Once verified, you can customize the letters by adding color print or inserting a blank page. Finally, click "Create" to send out the letters.
Step 1: Uploading files to the PDF Wizard
On the PDF wizard page, you'll find a box designed for uploading your files. You can either click on this box to select your files or drag and drop them directly into it.
Keep in mind that the PDF files should follow a similar format, particularly in terms of the placement of sender and receiver addresses, for optimal operation.
Step 2: Specifying address regions on the PDF
With your files uploaded, the next step involves marking the areas on the PDF that contain the sender's and recipient's addresses.
Before marking the address regions, specify whether each letter has the same number of pages.
- If you select the option 'Yes', then enter the value for "Pages Per Letter".
- If you select the option 'No', then specify the "New Letter Marker". This is a text value that will help the system identify where to split the PDF. By default, this marker indicates the start of a new letter. If you want the marker to indicate the end of a letter, check the box labeled "Marker indicates the last page of a letter.".
To mark the recipient and sender address regions, click on 'Show PDF Preview' and select the region around the respective addresses.
If you do not have a sender contact on your PDF's you can opt to use an existing contact as the sender for each letter by selecting the checkbox labeled "Use existing sender contact".

Step 3. Reviewing information and sending mail
After uploading your PDF letters and defining the address regions, you can review the extracted data from the PDF Wizard before mailing.
Once you complete Step 2 and click 'Next', the PDF Wizard will display the sender's and recipients' names and addresses.
Ensure that this information is accurate. If there are any errors or extra details, recheck your markings and make sure that no additional information is overlapping with the address region, like a phone number. Once you're satisfied, click 'Next' to customize your letter.
Finally, customize your letters as needed, such as opting for color printing or including a blank page for the addresses. Click 'Create' to finalize and send your letters.

Click on 'Download Report' to get details about the orders you have created, whether they were successful or not. To view the orders, click on 'View Letters'. This will take you to the Letters order list page. To preview the PDF, you have two options: either click on the 'View PDF' link under the 'Preview' column on the list page, or click on the specific letter order and then click on 'View PDF'.
Note: Uploading the filesIt's recommended to upload only 100 files in one go to avoid any service errors.
Updated about 2 months ago