Creating Templates using Template Editor
Navigating the Template Editor
If you don't already have an HTML format ready to paste or find it a hassle to use markup, PostGrid comes with its own built-in editor. Add a description for the template, and click on 'Create' to use the Template Editor.
Next, select the destination and type of collateral before using the editor. In this guide, we will focus on creating a letter for the destination US & International. We also have options for creating postcards of various sizes. Once you have selected the necessary information, click on 'Start Editing' to use the Template Editor.
Once you are on the Editor Page, you will notice that the page is set up based on the collateral destination and type, with elements along the left side that you may want to add to the blank canvas. Let's briefly look at each feature in this intuitive drag-and-drop editor.
Basic Functions
To add an element to the canvas, simply click on the desired element on the left-hand side. Once added, you can modify the element in various ways. In addition to adding elements, you can zoom in or out of the canvas without affecting the size of everything by using the magnifying glass icons at the bottom center. Click on the percentage value and select 'Reset' to restore the zoom level to the default setting.
To add or duplicate the current page, click on the icons located in the top right corner above it. You can navigate to different pages by scrolling or using the arrow buttons that appear in the top-right corner, just above the page. Additionally, you can delete pages by using the trashcan icon located just above the page. This icon appears once multiple pages are being used.
Adding Text
To add text, navigate to the text section to see some predefined examples of text elements to add.
To add a text element to your mailing template, click on any of the pre-defined examples.
All examples can be edited to include your own words while maintaining the styling.

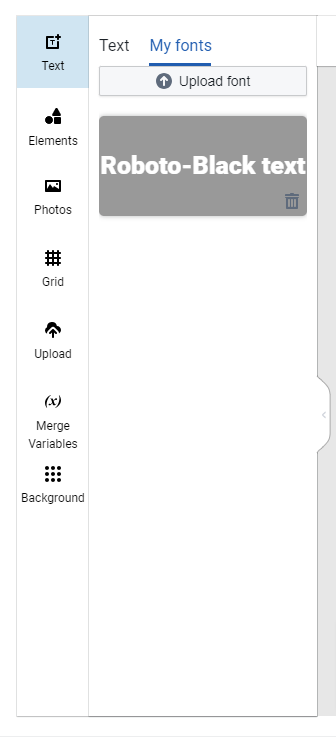
If you do not wish to use the pre-defined examples, you can also create your own header, sub-header, or body text. While editing the text, note that along the top of the editor, we can now find our basic text editing options such as alignment, color, font, font size, and more. If you'd like to use alternative fonts, note that you can upload a font by selecting 'My fonts', which is located on the top-left.
Once you click on 'Upload font' and select your downloaded font, the font will appear below the upload button.
Adding Images
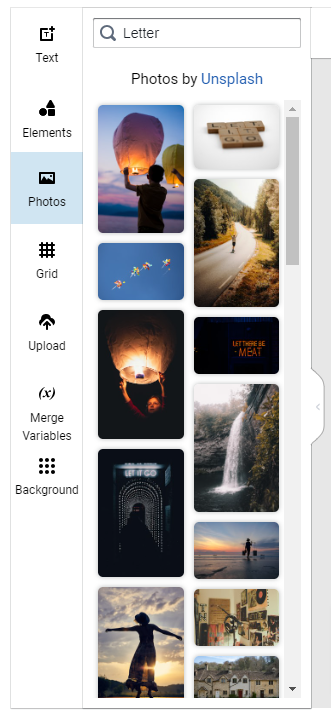
To add images to your canvas navigate over to the photos tab along the left-hand side. Click on the desired image to add to the canvas.
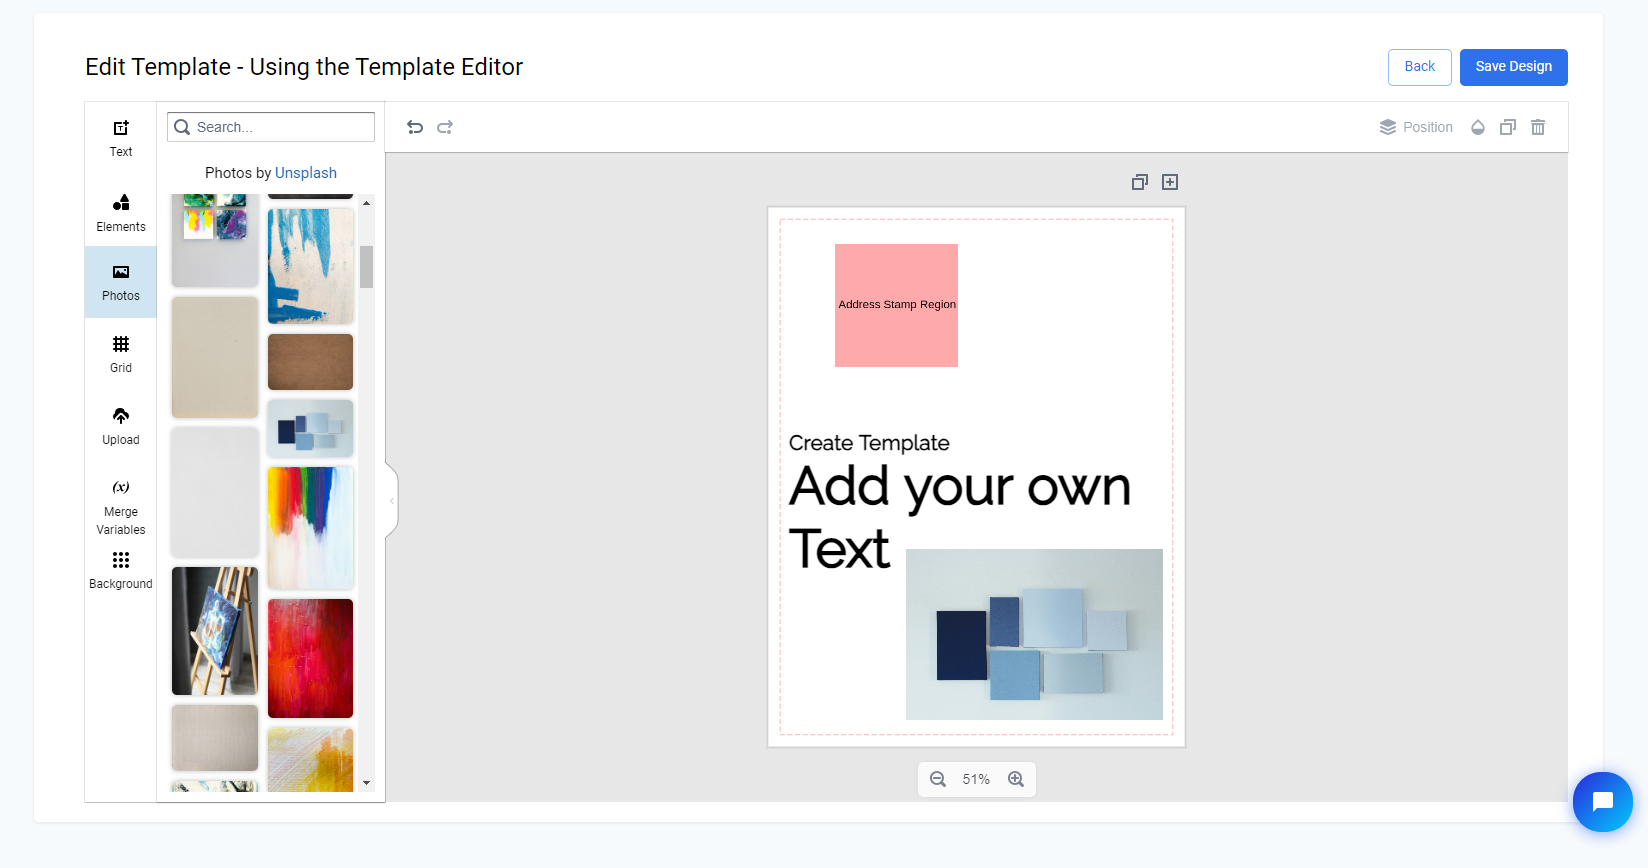
With your photo on the canvas and selected, you will notice some new options compared to editing text. Unique to editing images, you will be able to flip the image (horizontally or vertically), fit it to the background, as well as crop the image. You can also open the crop tool by double-clicking on the photo.
If you wish to use your own images, navigate over to the ‘Upload’ tab on the left. When you select an image, it will appear below the 'Upload Image' button as so
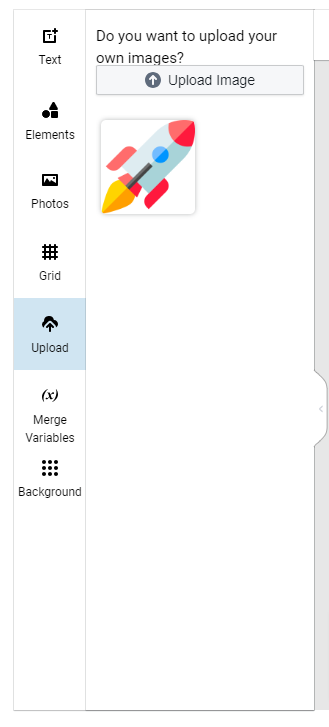
Simply click on the image to add it to your canvas and you will have access to the same options as you had for any other image. If you need to find a photo to add, you can use the search bar on the 'Photos' tab in order to find an image.
Adding Icons
In addition to adding images to the canvas, you can also place a variety of customizable icons from the Elements tab. If you're looking for a specific shape, you can use the search functionality to find it.Once you have added your icon to the canvas, several customization options become available.
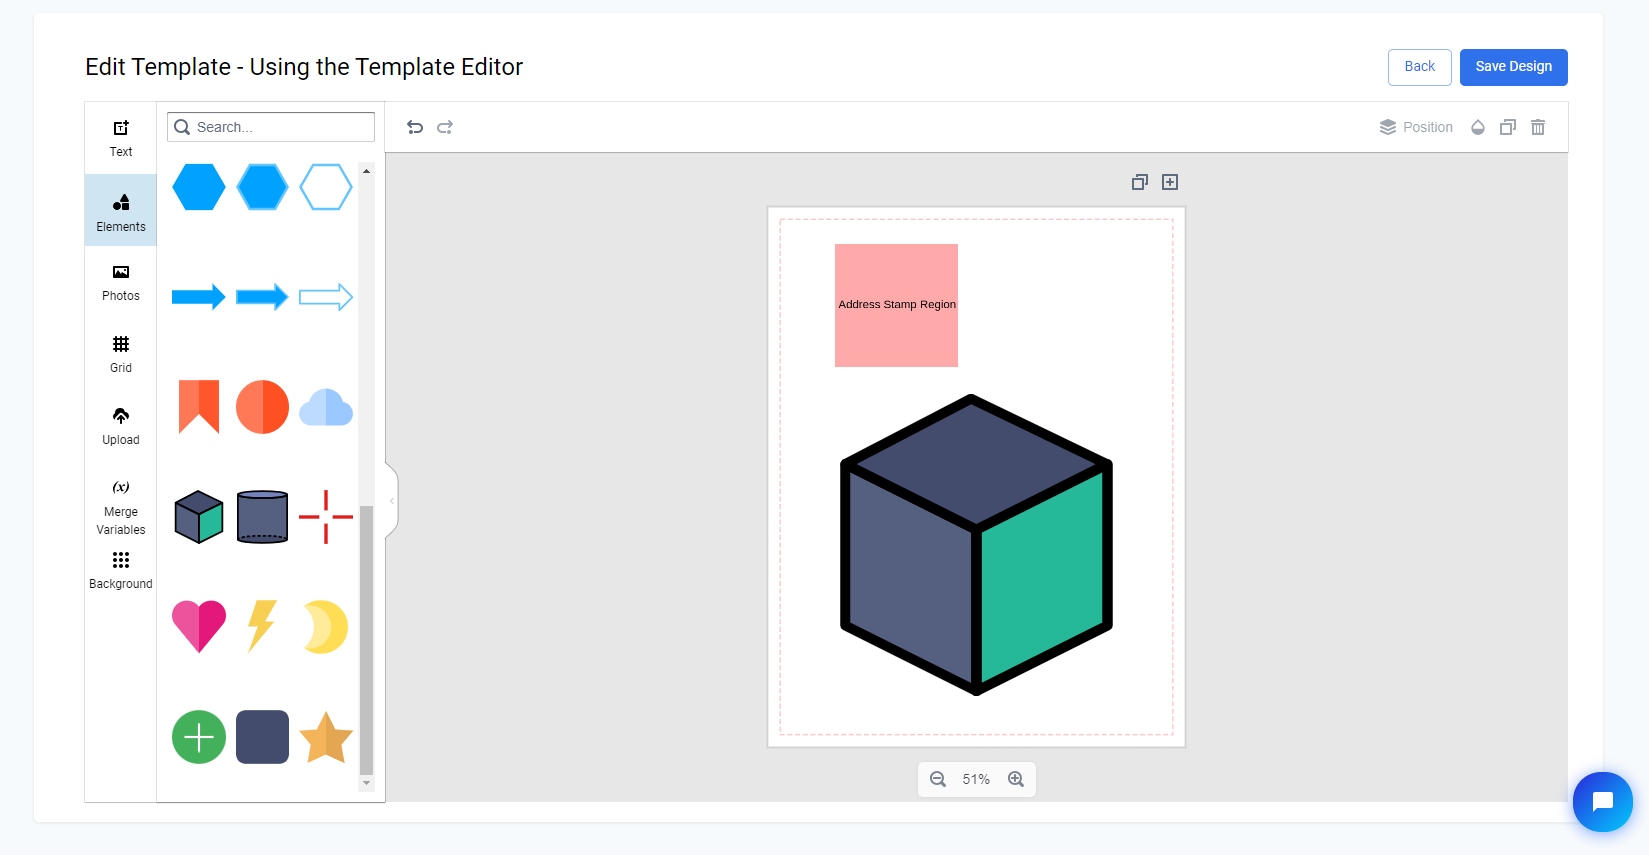
Apart from the 'Flip' functionality, which works the same as when editing photos, there may be a row of colors along the top. These colors make up the palette used to color the icon and can be customized according to your preferences.
Placing and Sizing
Moving and resizing elements on the canvas is simple. To move an element, click and drag it, and it will follow your mouse. For more precise movements, you can also use the arrow keys when an element is selected.
When using the mouse, the template editor provides placement guides to help center images and align them along the edge.
In addition, opening the position tab will provide various other useful position information. It also includes layer controls to adjust the display order of elements.
Also in the same area at the top-right of the editor, there are a few other helpful tools.
- The half-filled drop allows you to edit the transparency of the element.
- The lock allows you to prevent further changes to the element and can be enabled or disabled.
- The square-over-square icon duplicates the element.
- The trashcan icon will delete the element, which can also be done using the backspace and delete keys.
In addition to position, size and orientation are crucial for editing elements. When an element is selected, you can use the white squares on the light-blue box around the icon to control the size. The box that extends along a line directly above the element allows you to control the rotation of the object.
Adding Effects
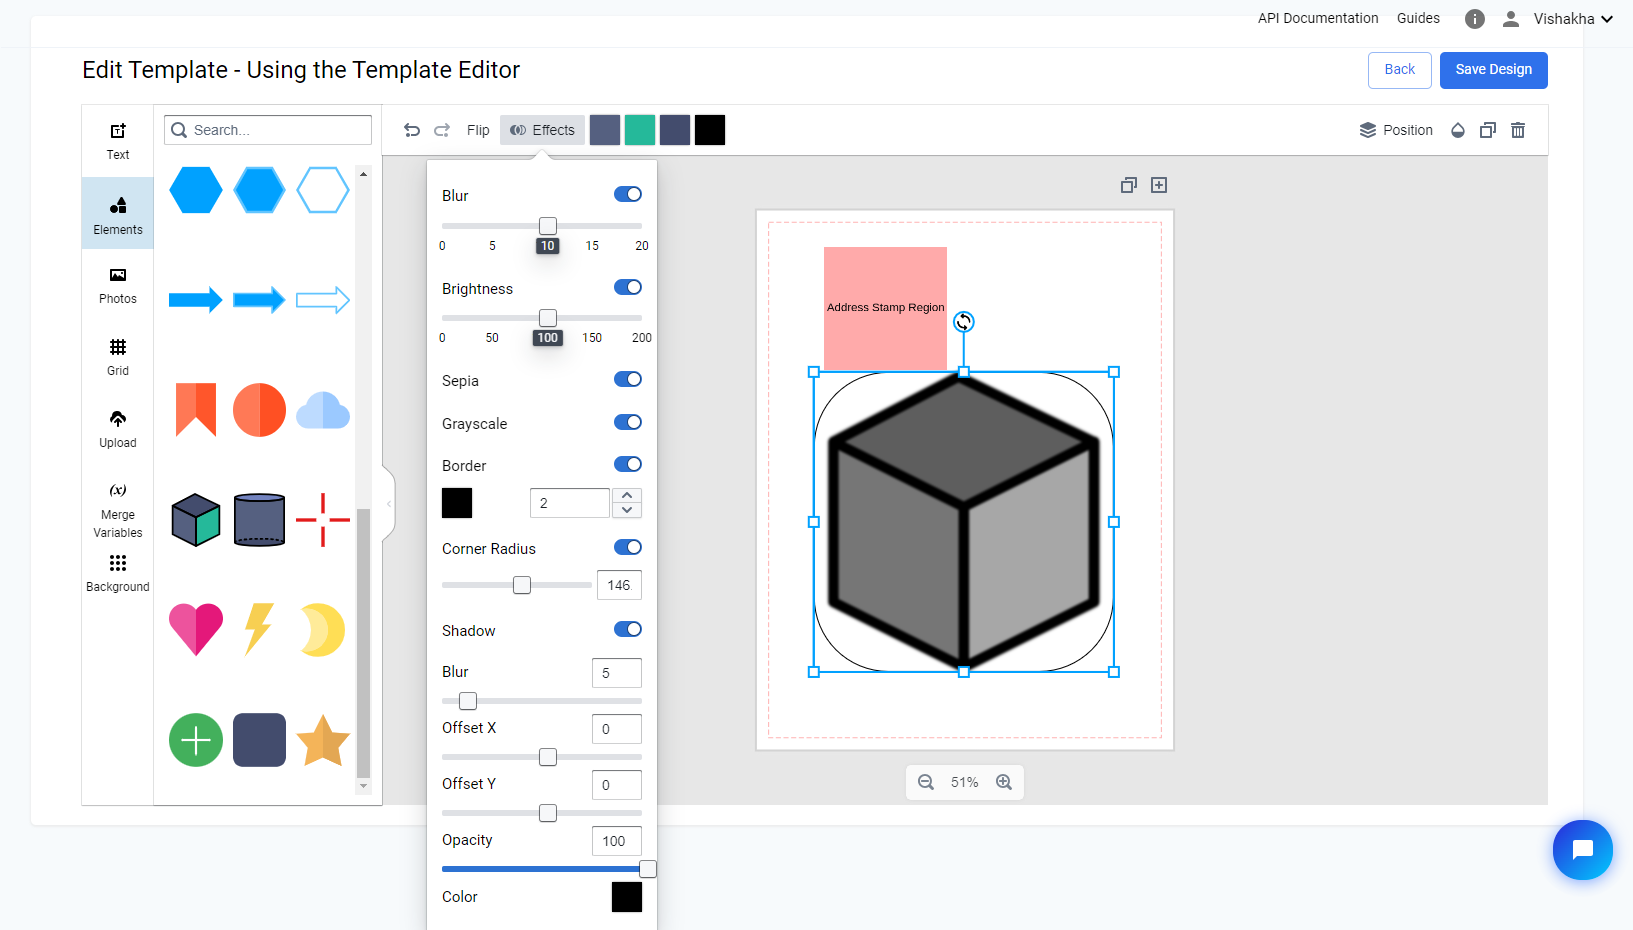
Finally, let's explore additional manipulations that can be applied to the elements added to the canvas. Whether you are adding text, images, or icons, you have the option to add various effects.
When editing text, you have the following options:
- Blur: Use a slider to adjust the blurriness of the text.
- Brightness: Use a slider to change the brightness of the text color.
- Sepia: Toggle to apply a sepia filter to the text.
- Grayscale: Toggle to apply a grayscale filter to the text.
- Text Stroke: Select a color and width for an outline around the text.
- Shadow: Use a slider to control the size of the shadow behind the text.
For photos and icons, the effects options and functionality are nearly the same, except for the 'Text Stroke' option, which is replaced by a border. You can select a color and width for the border. For icons, shadows follow the outline of the icon, rather than just being behind it as they behave for pictures. The border will be rendered inside the light-blue rectangle around the icon, which appears when you select the icon to edit.
Adding Merge Variable to the Template
While being able to send a mailing with no variable data can be useful, there are often times when you would like to quickly send mail to different contacts with different pieces of information that can be easily substituted.
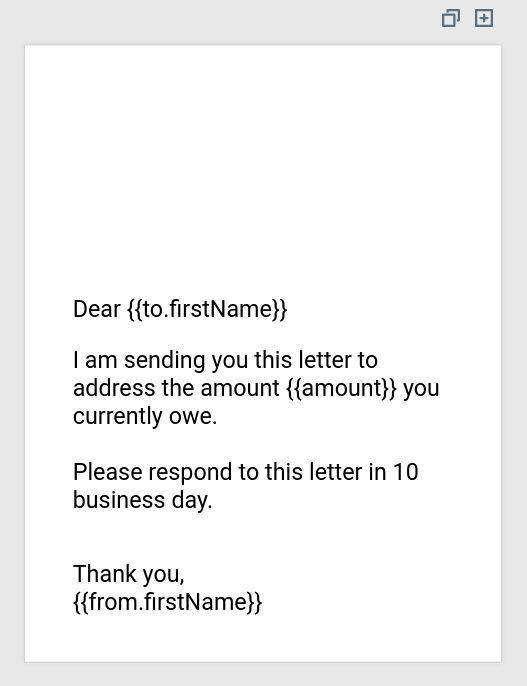
Take the example of the letter below, which was created using the template editor with customized variables added to the template through text. Note that for the sender and recipient contacts, the merge variables should always have the 'from.' component for the sender and 'to.' component for the recipient. This will allow the system to substitute the correct values.
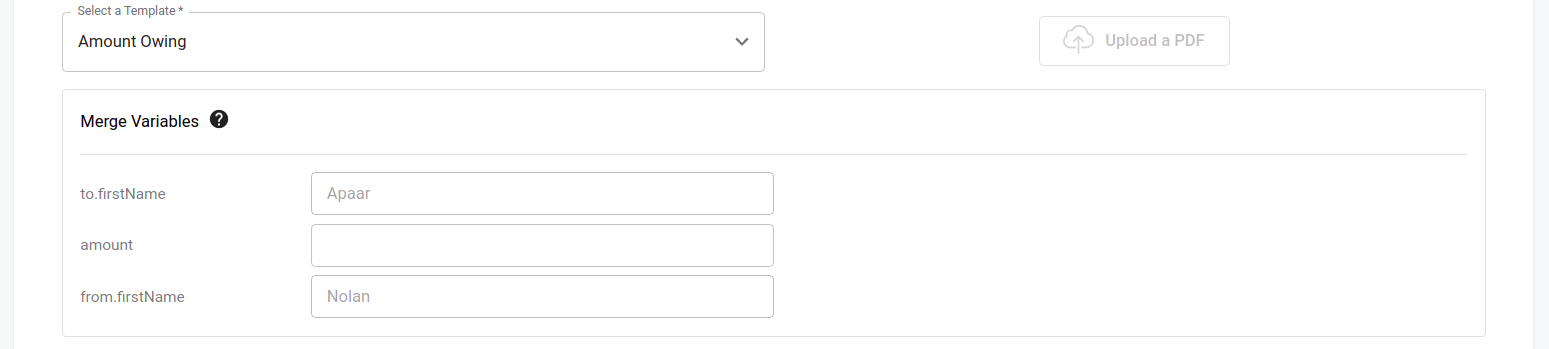
Now, when you select the template while creating the order, you will notice that the merge variables appear on the order creation page and the values are automatically mapped. Remember that you will not be able to edit the mapped variables. Don't worry if you occasionally see a variable not mapped correctly. You can create a test order to confirm whether the value is being substituted correctly in the final collateral. If it is not, please check the column name for that property in the uploaded contact CSV and the corresponding text used in the merge variable.
To specify merge variables, use curly braces like {{variableName}}. You can also access the following predefined merge variables in your template.
| Name | Type | Description |
|---|---|---|
| to | Contact | The recipient info e.g. {{to.firstName}}, {{to.companyName}} |
| from | Contact | The sender info e.g. {{from.firstName}}, {{from.companyName}} |
Acceptable Default Merge Variable Values for Contacts
The following values are default values for contacts that can be used in the {{to.variable}} format.
Recipient Merge Variables
| Name | Format |
|---|---|
| Address Line 1 | {{to.addressLine1}} |
| Address Line 2 | {{to.addressLine2}} |
| Province or State | {{to.provinceOrState}} |
| City | {{to.city}} |
| Postal or Zip | {{to.postalOrZip}} |
| Country | {{to.country}} |
| First Name | {{to.firstName}} |
| Last Name | {{to.lastName}} |
| {{to.email}} | |
| Phone Number | {{to.phoneNumber}} |
| Company Name | {{to.companyName}} |
| Job Title | {{to.jobTitle}} |
Sender Merge Variables
| Name | Format |
|---|---|
| Address Line 1 | {{from.addressLine1}} |
| Address Line 2 | {{from.addressLine2}} |
| Province or State | {{from.provinceOrState}} |
| City | {{from.city}} |
| Postal or Zip | {{from.postalOrZip}} |
| Country | {{from.country}} |
| First Name | {{from.firstName}} |
| Last Name | {{from.lastName}} |
| {{from.email}} | |
| Phone Number | {{from.phoneNumber}} |
| Company Name | {{from.companyName}} |
| Job Title | {{from.jobTitle}} |
Non-default Merge Variables
To add any other dynamic variables to the template, ensure that the curly brackets have the exact same value (case sensitive) as mentioned in the CSV upload for contacts.
| Name | Format |
|---|---|
| Revenue | {{Revenue}} |
| amount | {{amount}} |
| Renewaldate | {{Renewaldate}} |
Adding Customizable Images and Background
If you have access to individual images that you would like to include with every mailing you send out, this guide will explain how to achieve this easily. While adding text can be great for personalizing your mailings, incorporating images can enhance the impact of your communications.
Setting up a Template
The easiest way to incorporate customizable images and backgrounds into your templates is by using our template builder with placeholders.
This feature allows you to see how a custom logo or QR code would fit in terms of size and location. For optimal results with custom images, it is recommended that all replacements have the same size. However, you can configure your templates to accommodate changes in size, although the visual behavior may be difficult to predict.
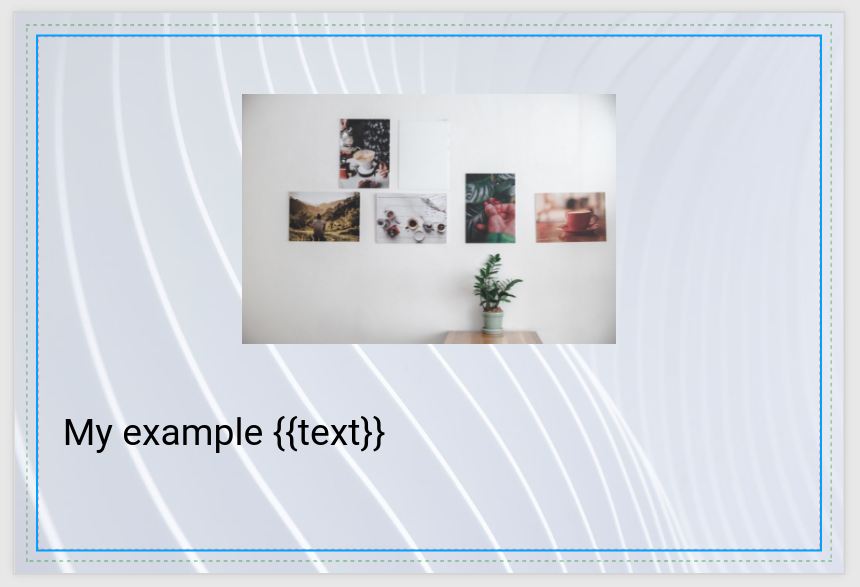
With this in mind, let's create a basic postcard template that includes a background image and picture as placeholders, along with a standard text merge variable.
Identifying Images and Backgrounds in HTML
Now that the placeholder template is ready, save it and click 'Back' to view the automatically generated HTML. From this generated HTML, you can make the necessary adjustments and set up the merge variables.
Before we proceed with the exact process, let's discuss how you can locate the saved background and images.
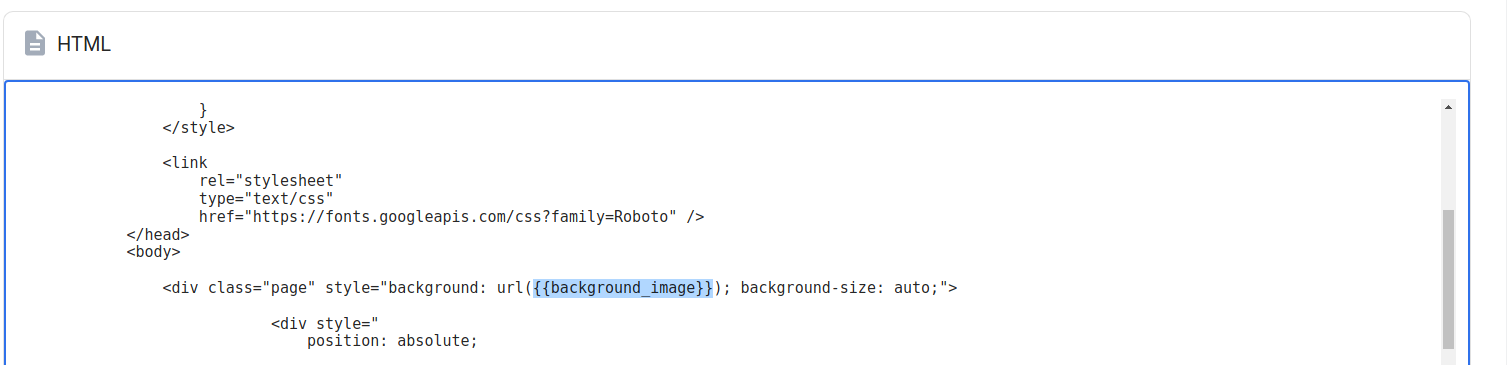
Let's start with the background. Here is how it appears in the HTML format:
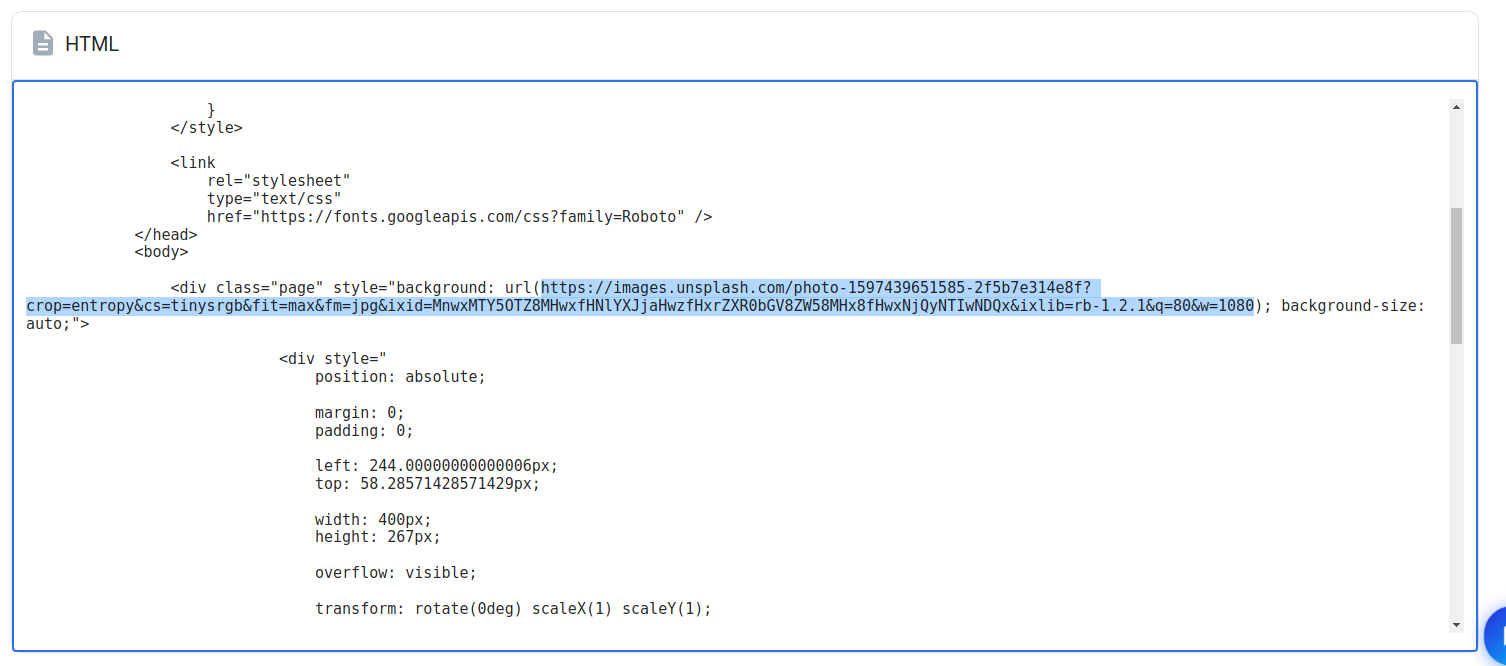
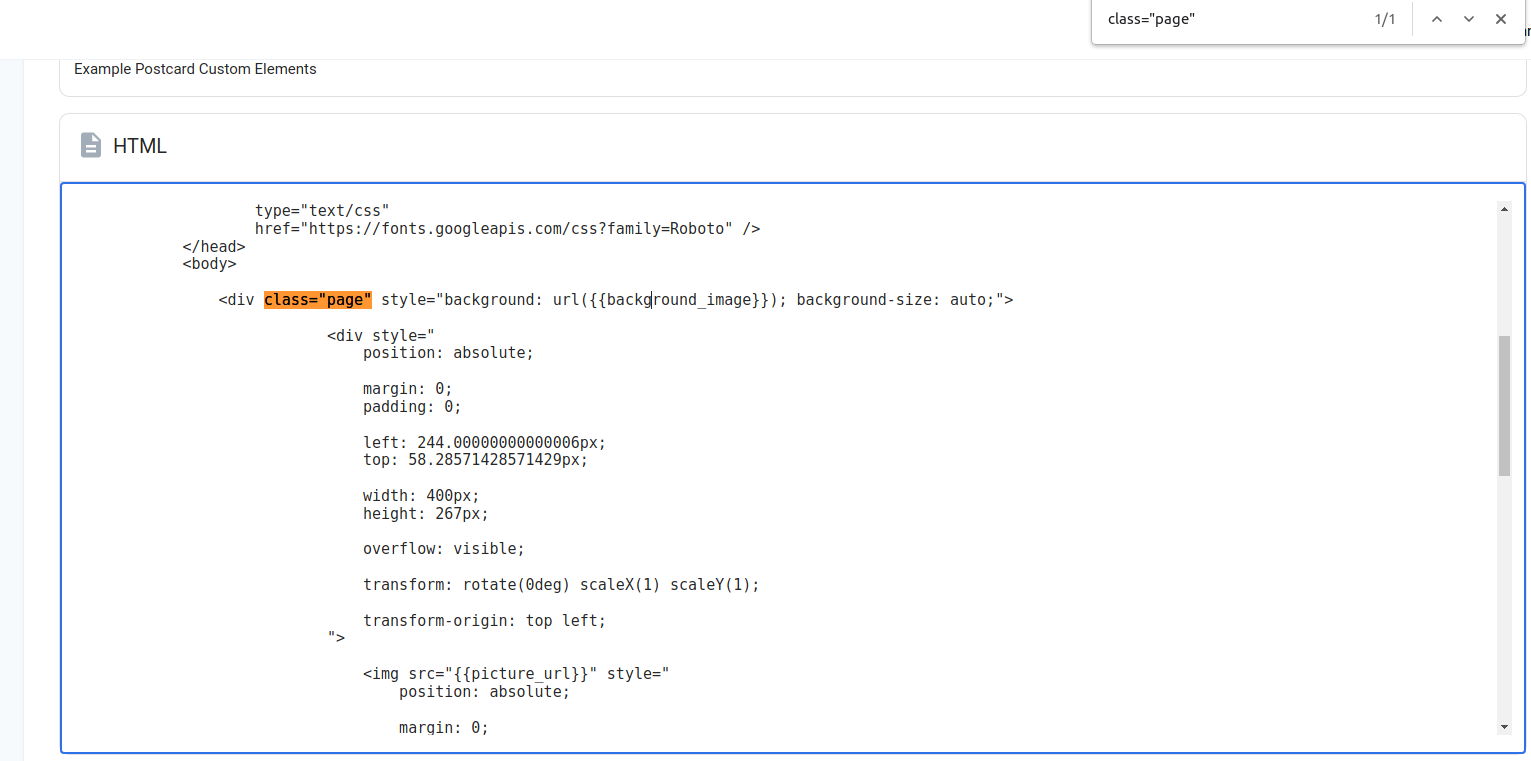
If you were to follow the highlighted URL, you would actually be taken to the image that was used as the background. To identify this systematically for all pages, you can use the browser's built-in search functionality to quickly navigate to each page by searching for class="page". This search is useful as the background corresponds to each page.
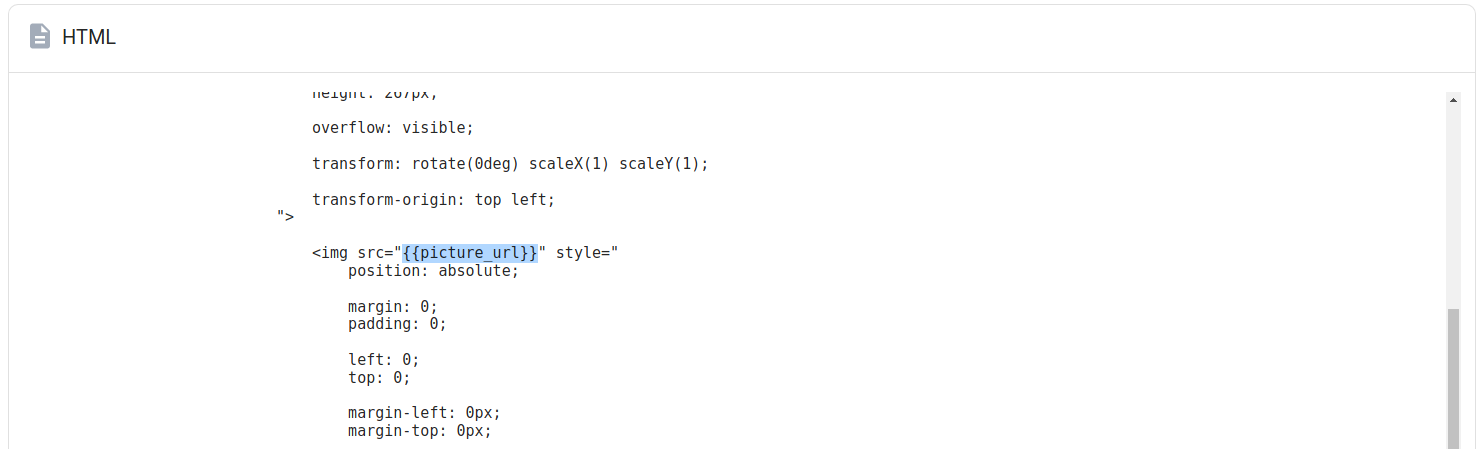
Moving on to the image, let’s see how that appears in the HTML
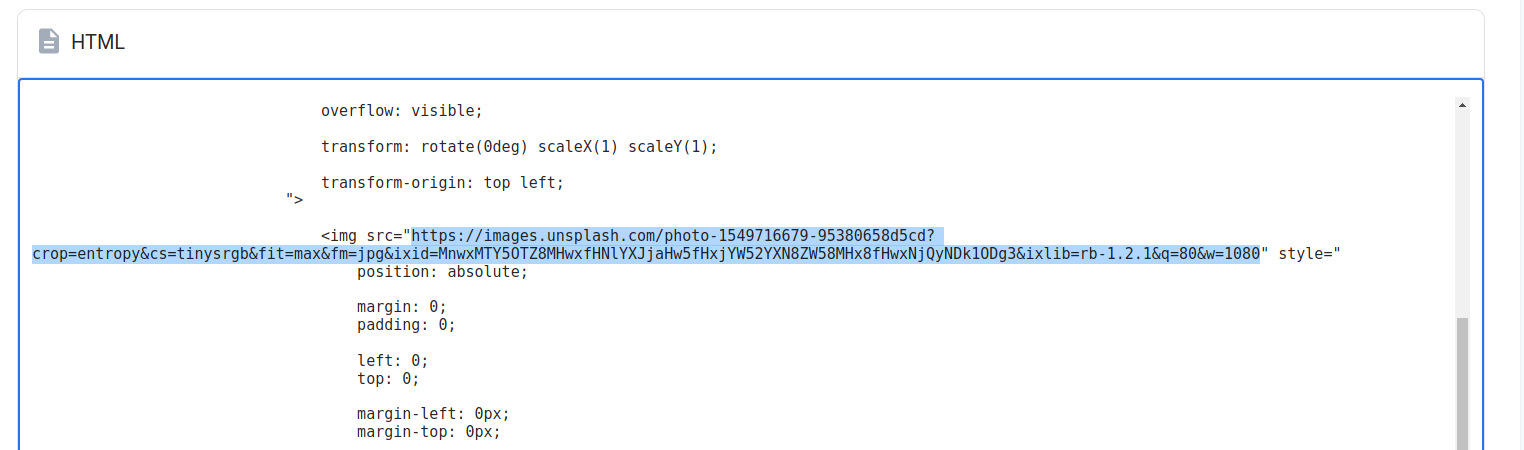
To access the image included as a placeholder, you can follow the URL.
To locate all images in the document, you can use the same search technique and verify the URL to ensure that it is indeed the specific image you are looking for.
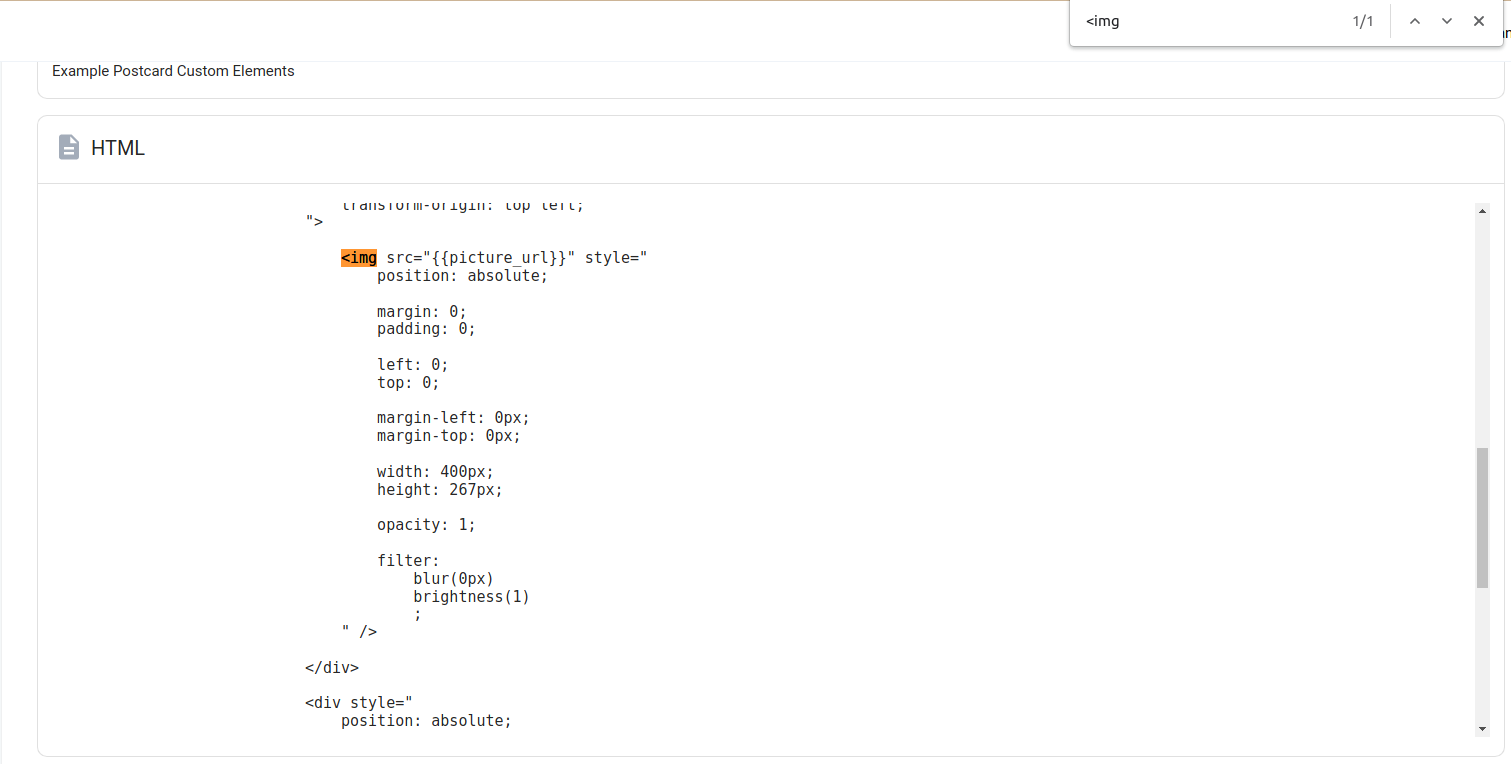
In this case, searching for <img is appropriate as it will identify where all images are stored in the document.
Having a general understanding of how HTML documents are structured, as well as how they are styled with CSS, will be advantageous in easily identifying the location of images and backgrounds in the document.
It is important to note that if a color is used for the background instead of an image, a CSS color value will be provided instead of a URL to an image, and background will be replaced with background-image.
Colors can be specified in different ways, and below are a few examples:
background-color: rgb(232, 72, 72)background-color: #e84848background-color: red
To set up colors, you can use an online color picker for convenience.
Setting up Merge Variables
Now that you have identified the backgrounds and images in the HTML document, you are ready to edit the document and set up the merge variables.
To do this, simply replace the URL for the image with a merge variable using the syntax you are already familiar with.
Below is an example of how you can handle the replacement for the background image.
And here's how the replacement goes for the image URL.
Once you have set up the merge variables in the template, save the changes and go to the corresponding orders tab. There, you will be able to preview which variables have been included.
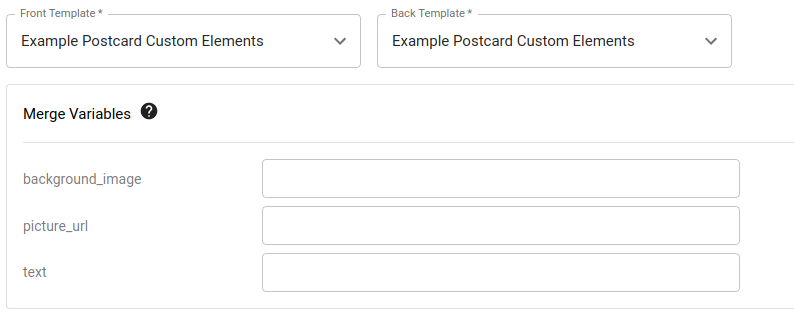
Another way to add a customizable image to the template is by clicking on ‘Merge Variables’ on the left side and selecting the Image element. After adding the element to the template, you can resize the image and change the merge variable name to your desired one.
Updated 6 months ago