Figma
Created for designers and developers, PostGrid's Figma plugin allows you to export Figma designs into PostGrid's HTML templates. This lets you leverage all the power of Figma to design fully personalized direct mail.
Step 1- Installing the Plugin
Follow the steps below to add the plugin to your Figma workspace:
- Go to the Figma Community
- Search for PostGrid
- Click on "Open in Figma"
OR
- Click on the link to open the Figma PostGrid Design Plugin
- Open the plugin in your Figma workspace.
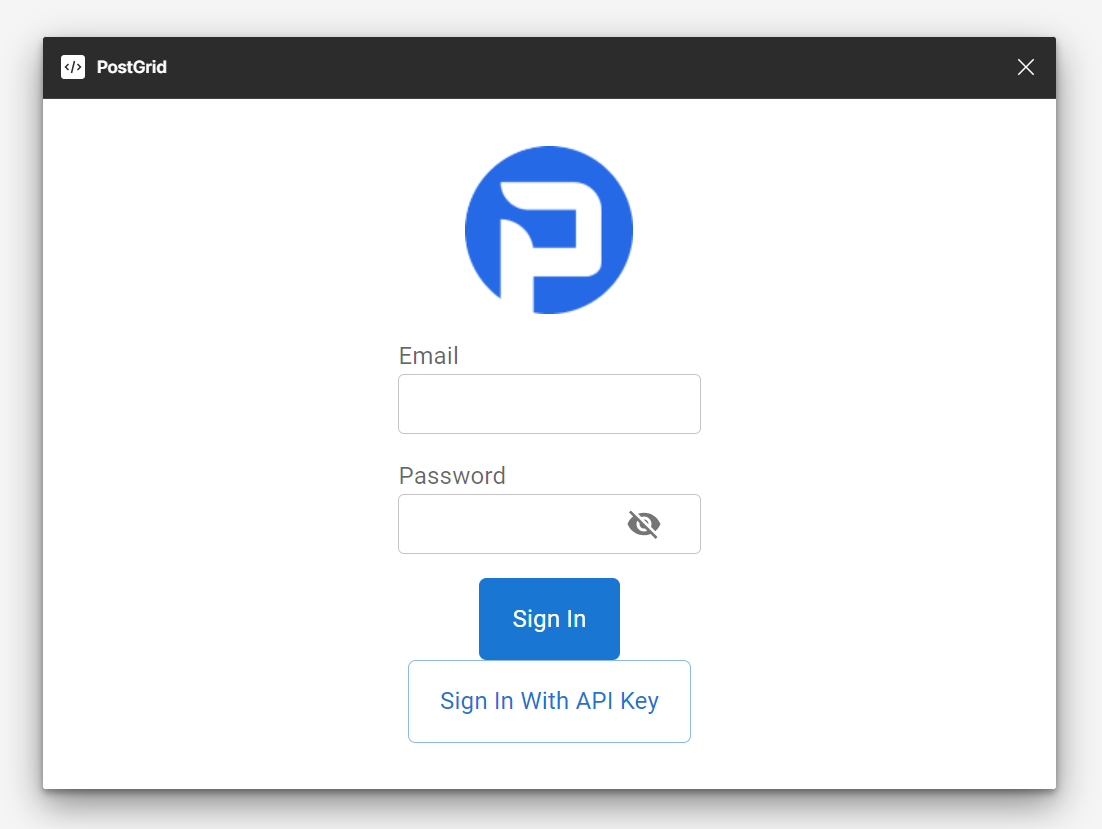
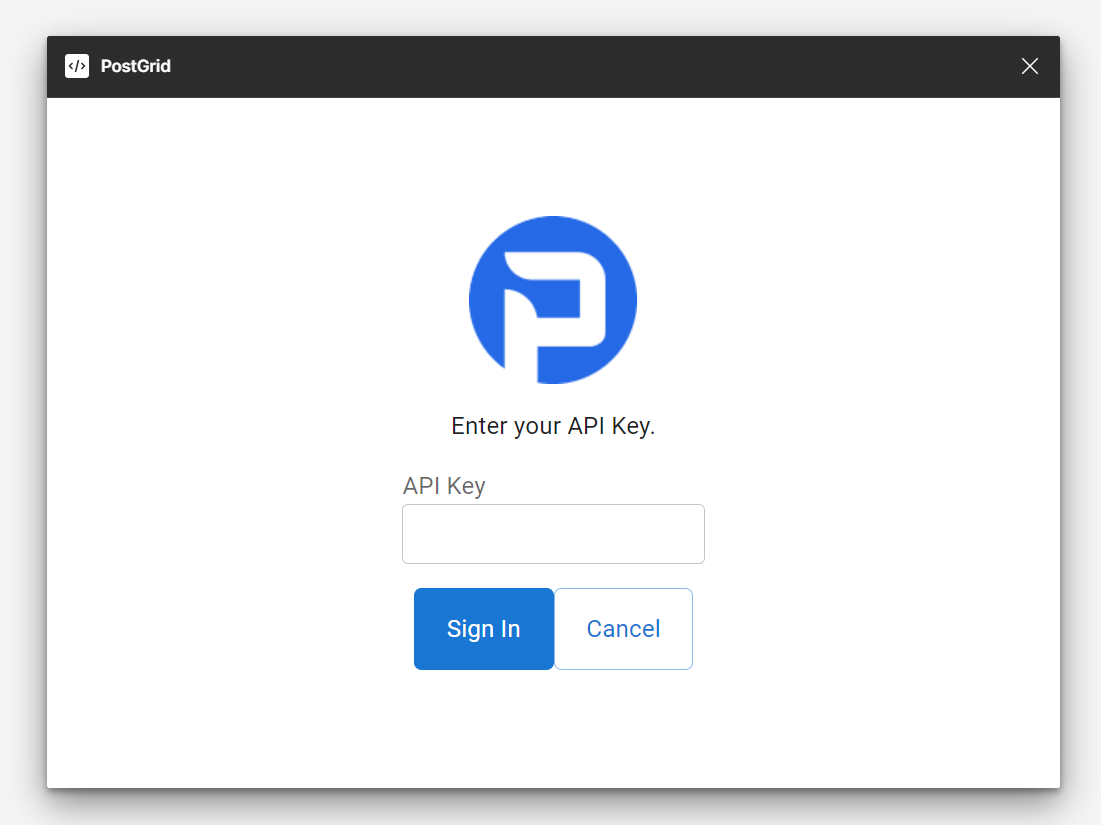
- You can either sign in with your PostGrid credentials or using the api key from "Settings" on the PostGrid dashboard
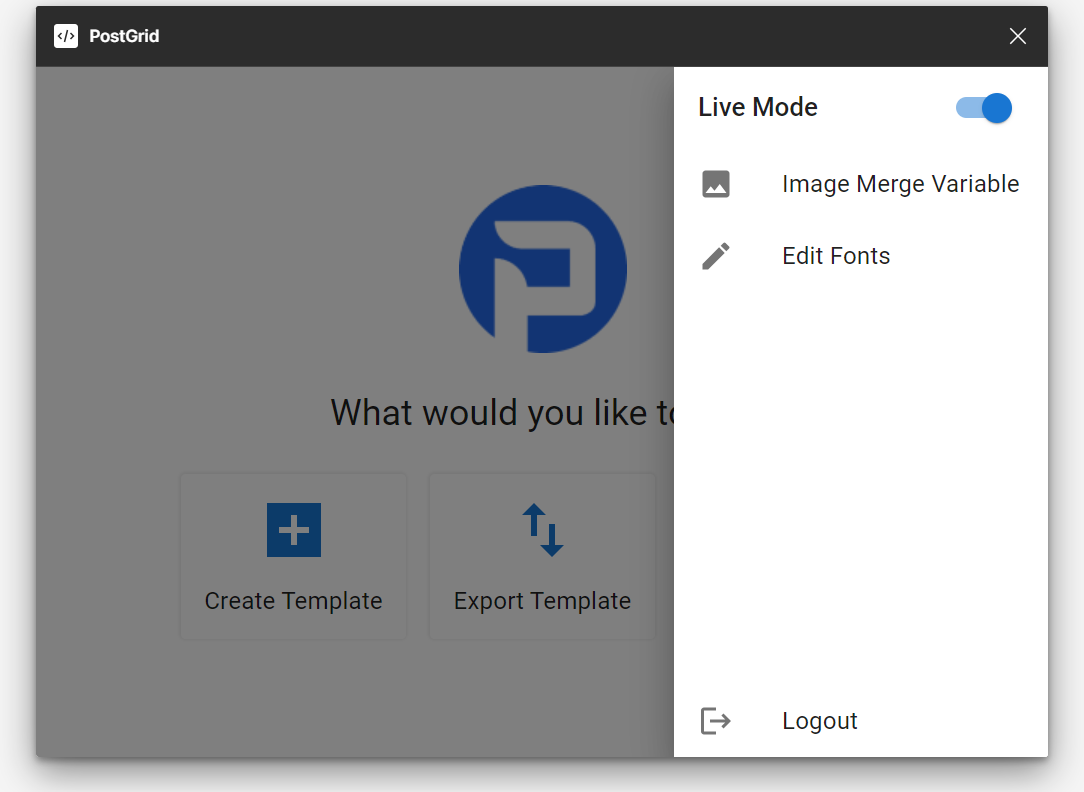
Switching between Test and Live mode
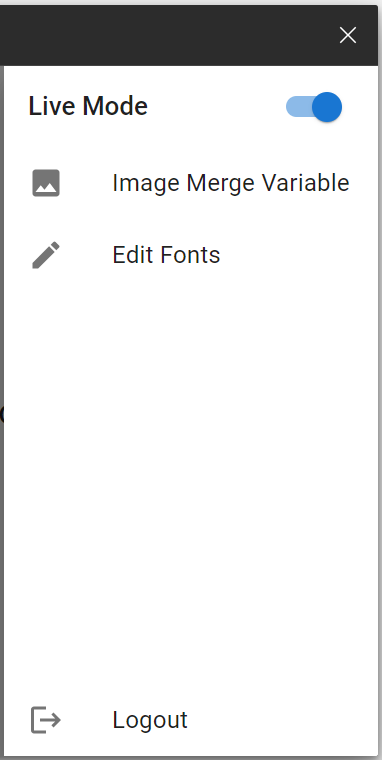
If you are logged in with your account credentials, you can switch between Test and Live modes by clicking on the arrow button on the right side of the panel and switching the toggle.
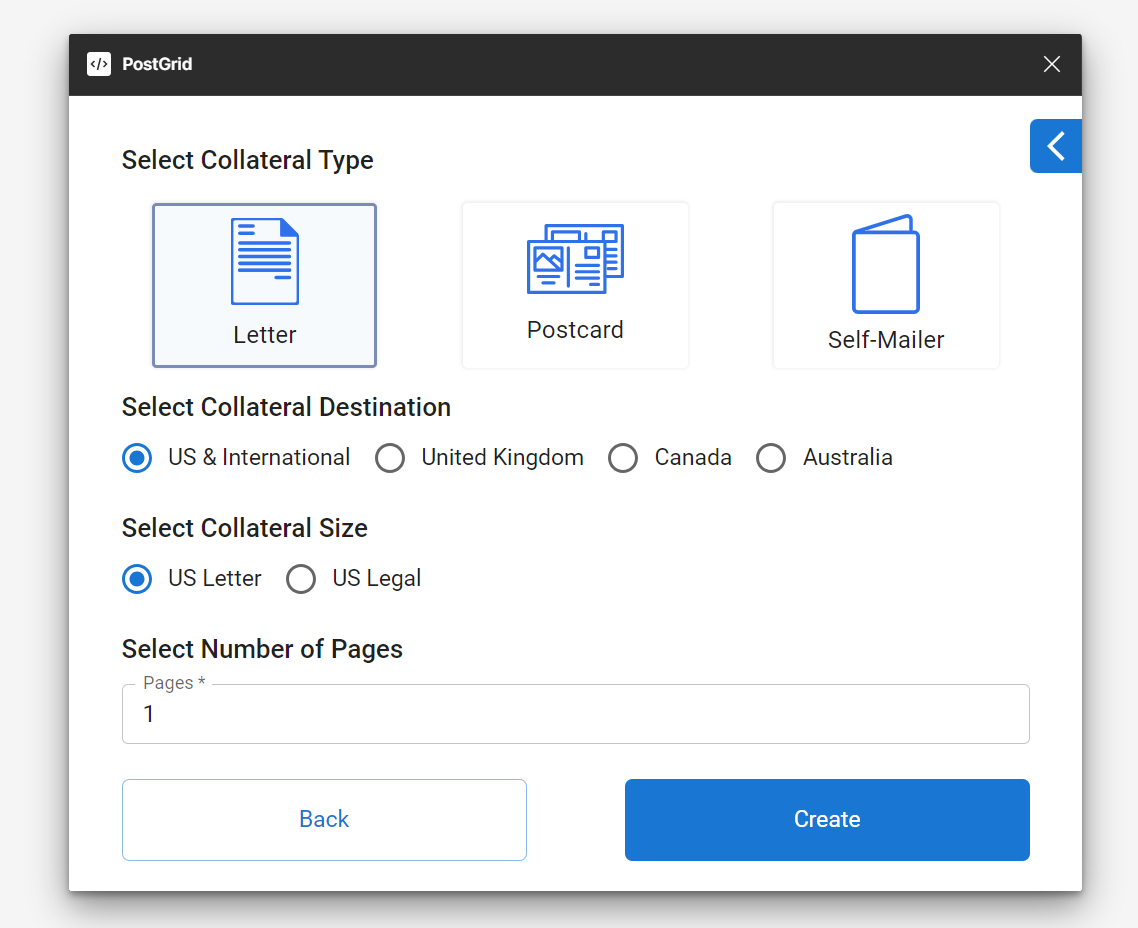
Step 2- Creating a template
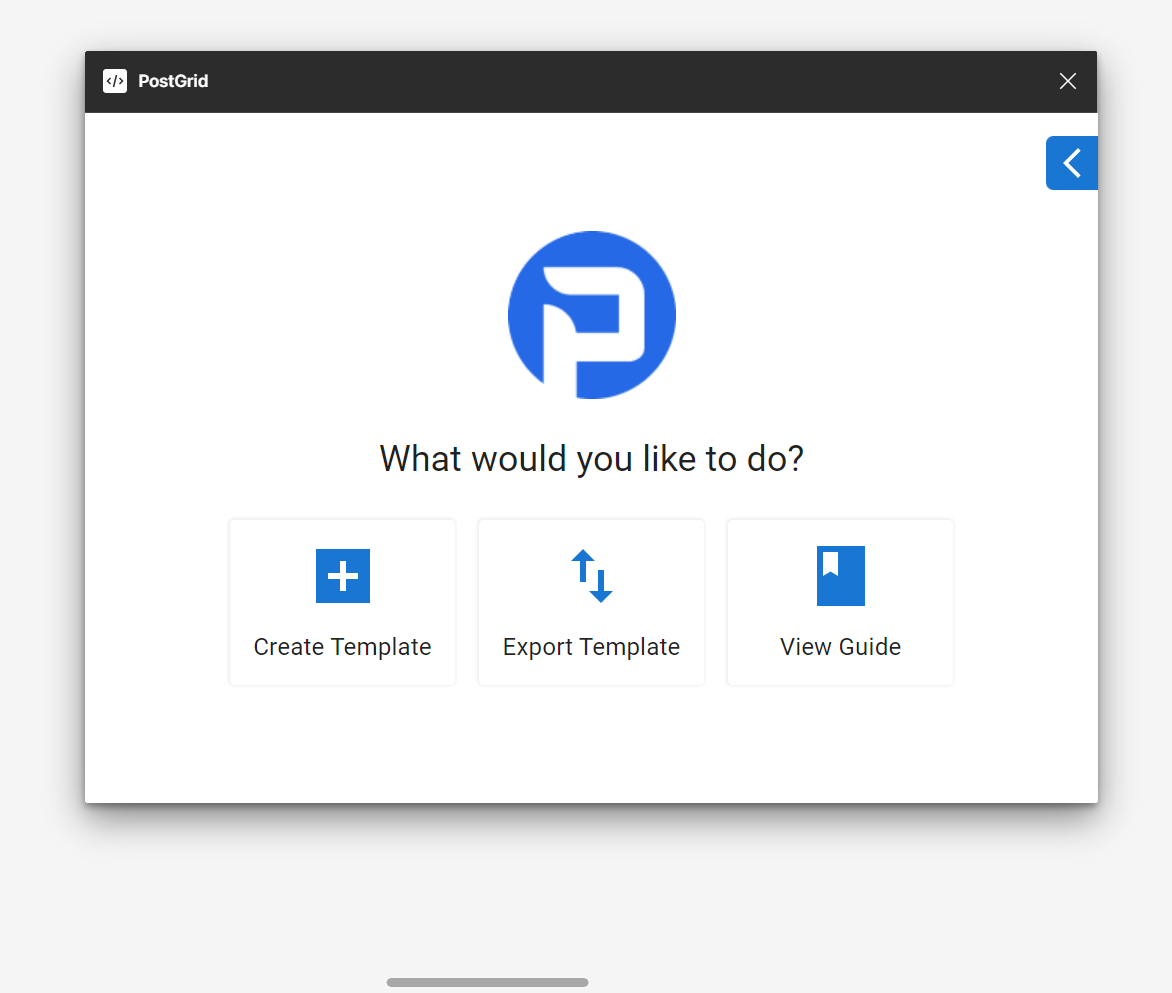
- To create a template from scratch, run the plugin and click on "Create Template"
- Select the collateral type, collateral destination, collateral size, and add the number of pages you want to include in the design. Next click on "Create".
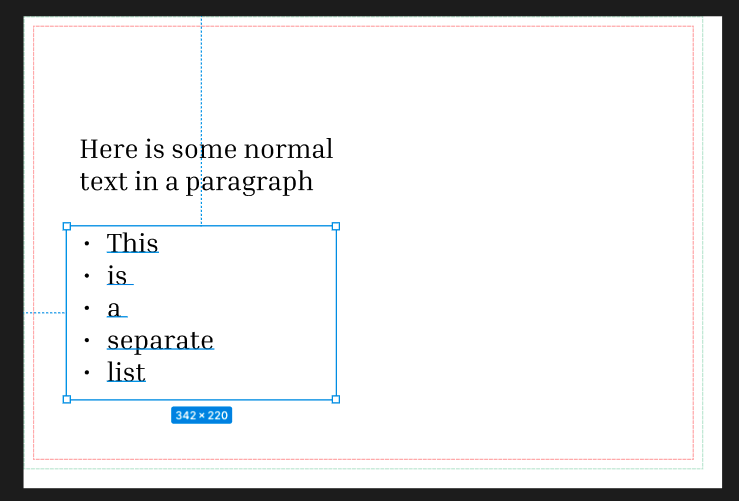
Adding text to the template
When adding text to the template keep in mind that text boxes containing lists and text boxes containing paragraphs should be separate entities. Otherwise, your design may not render correctly once you create your order.
Adding Customizable Images to the template
While adding text can be great for personalizing your mailings, incorporating images can enhance the impact of your communications.
To add a customizable image to the template, click on the arrow icon on the right side of the panel to access the menu. Next, click on the Image merge variable to add the image element. After adding the element to the template, you can resize the image and change the merge variable name to your desired one.
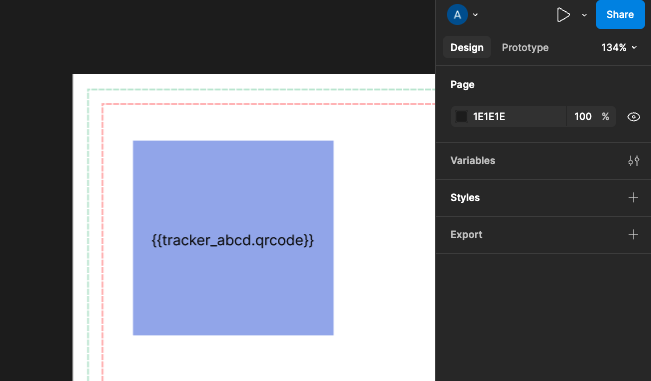
Adding a QR Code Tracker to the template
To reference a PostGrid generated tracker you should format the merge variable like so: {{your_tracker_id.qrcode}}. This will generate the PostGrid Tracker that you created in place of the image merge variable block.
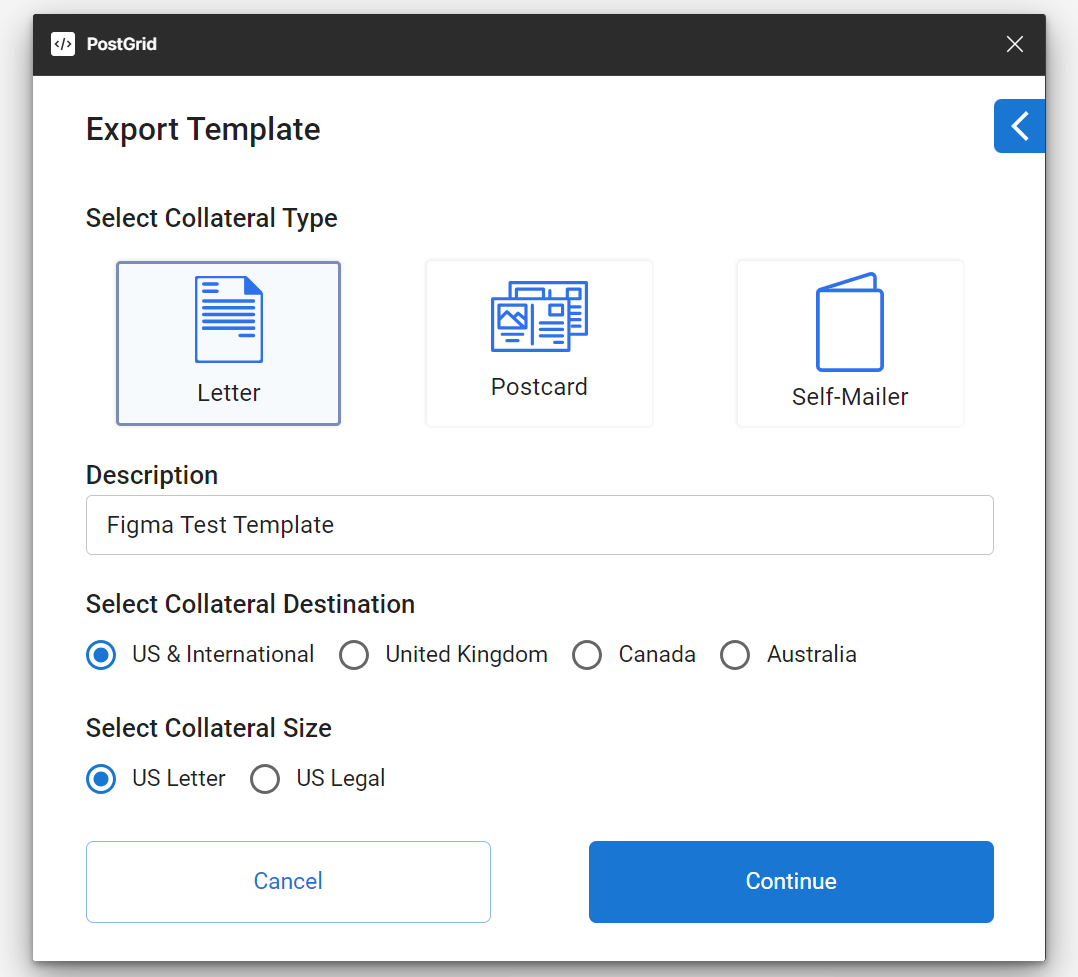
Step 3- Exporting a Template
- Open the Plugin and click on "Export Template"
- Select the collateral type, collateral destination, collateral size, and add the description for the design design. Next click on "Continue".
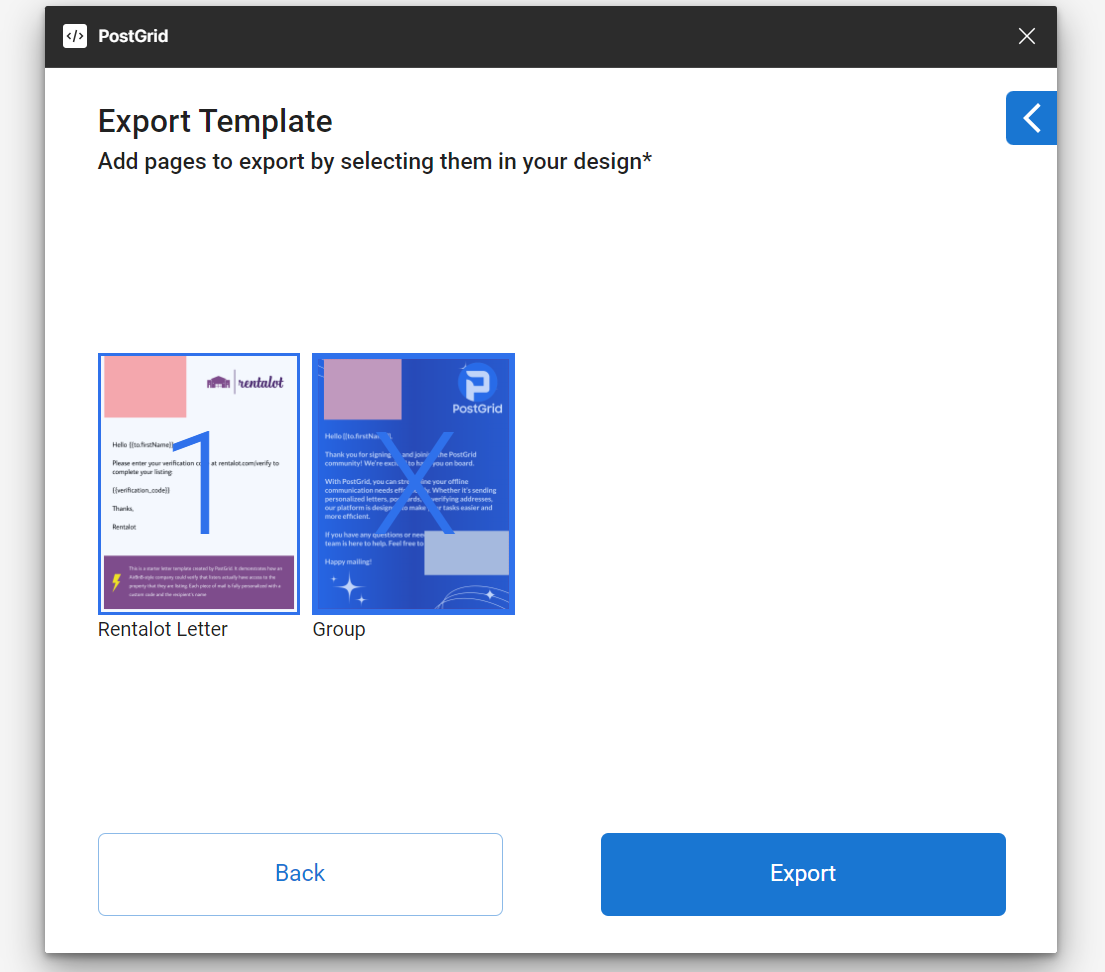
- Select the designs from your workspace, and they will appear on the screen. Each frame you select will become a page and will be numbered. If you wish to delete a page, hover over it to see the cross sign and click on it. Next Click on "Export".
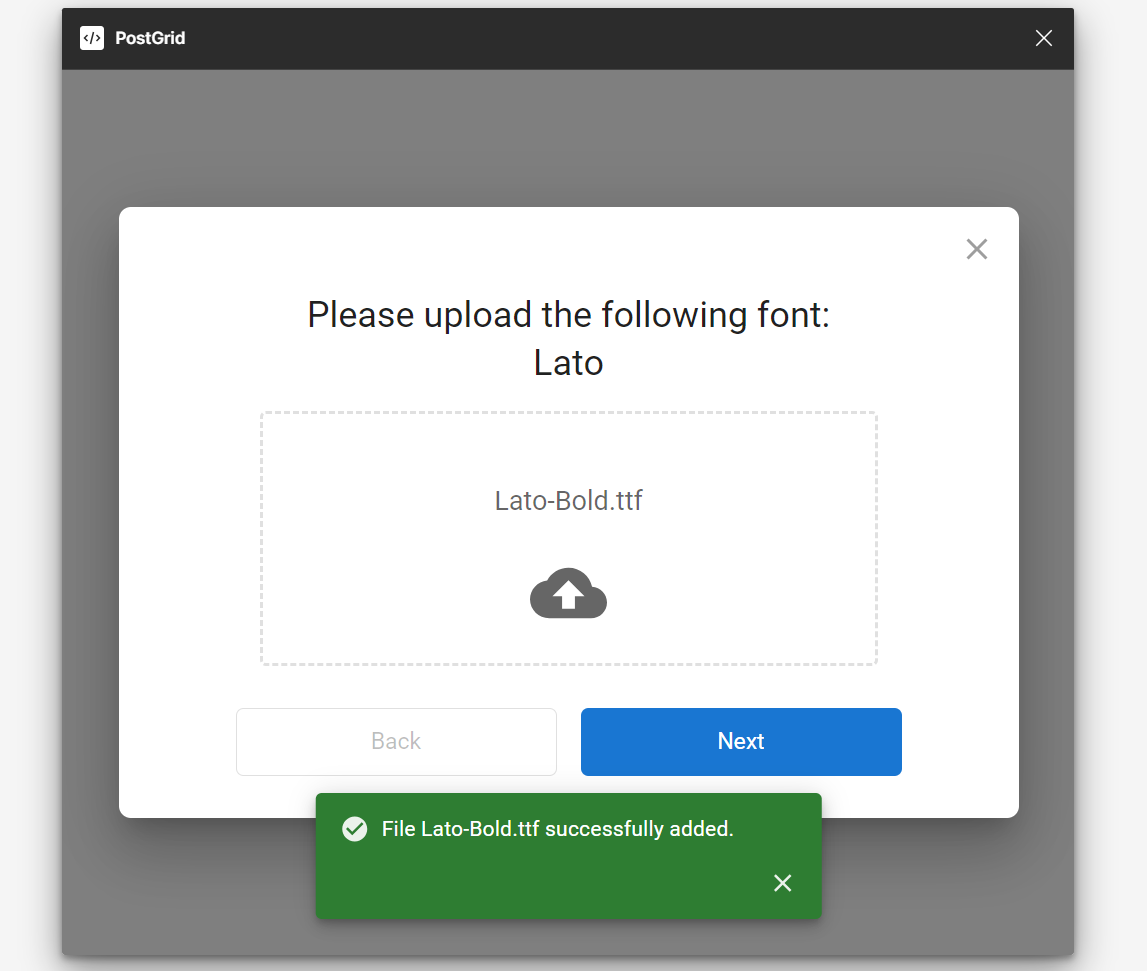
- If the system detects custom fonts in your design, you will see a prompt to upload the custom font and click on "Next".
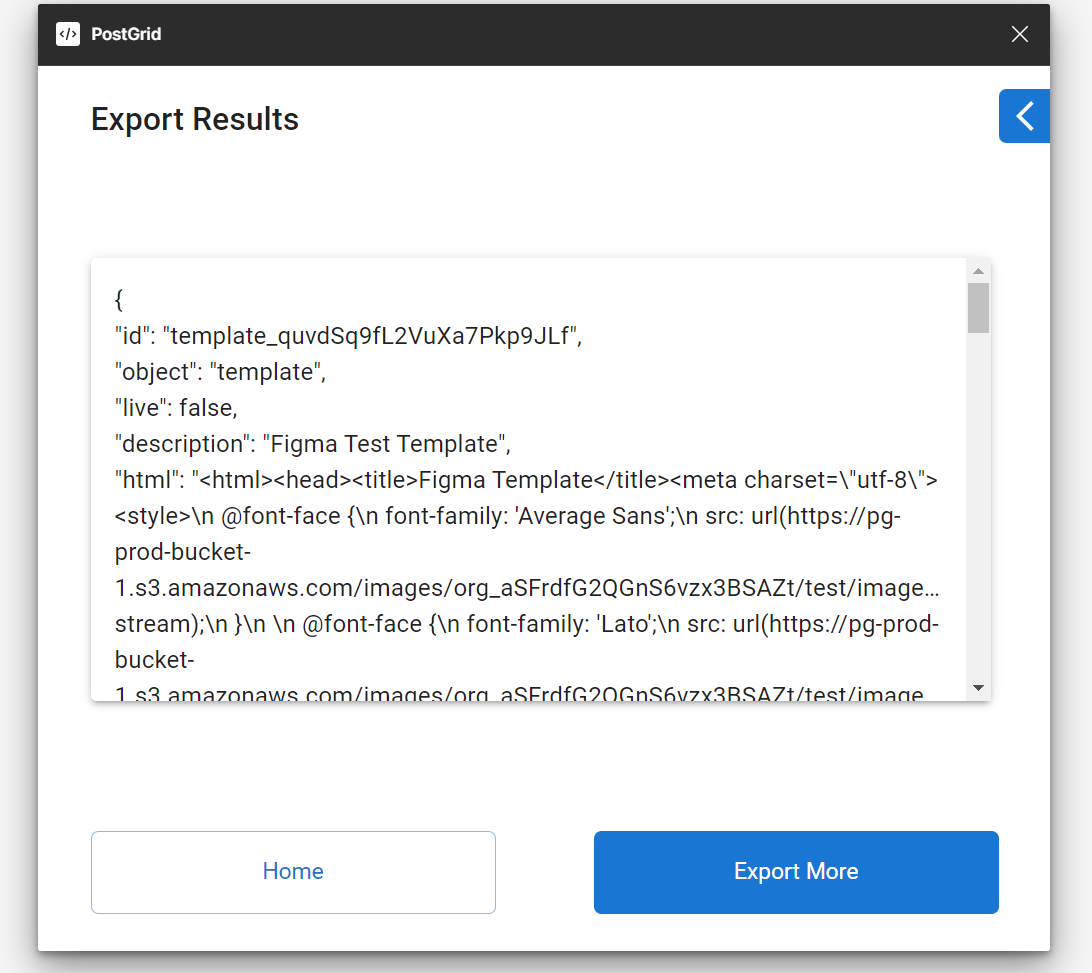
- You will see the final Export Results, and you can find the template on the PostGrid dashboard under Templates.
Here's a quick video guide for more help -
Updated 3 months ago