QR Code & PURL Trackers
Trackers allow you to track user interactions in your orders with the use of personalized URLs and QR codes
Tracking user interactions is simple by integrating Trackers into your orders. Trackers can be incorporated into orders in the form of QR codes or personalized URLs (PURL) to monitor interactions. Information such as unique and total visit count, the interacting device, IP address and associated order can be found on visits to a Tracker.
Creating a Tracker
This section will provide an overview on how to create, view, manage Trackers via the dashboard.
Viewing & Editing Trackers
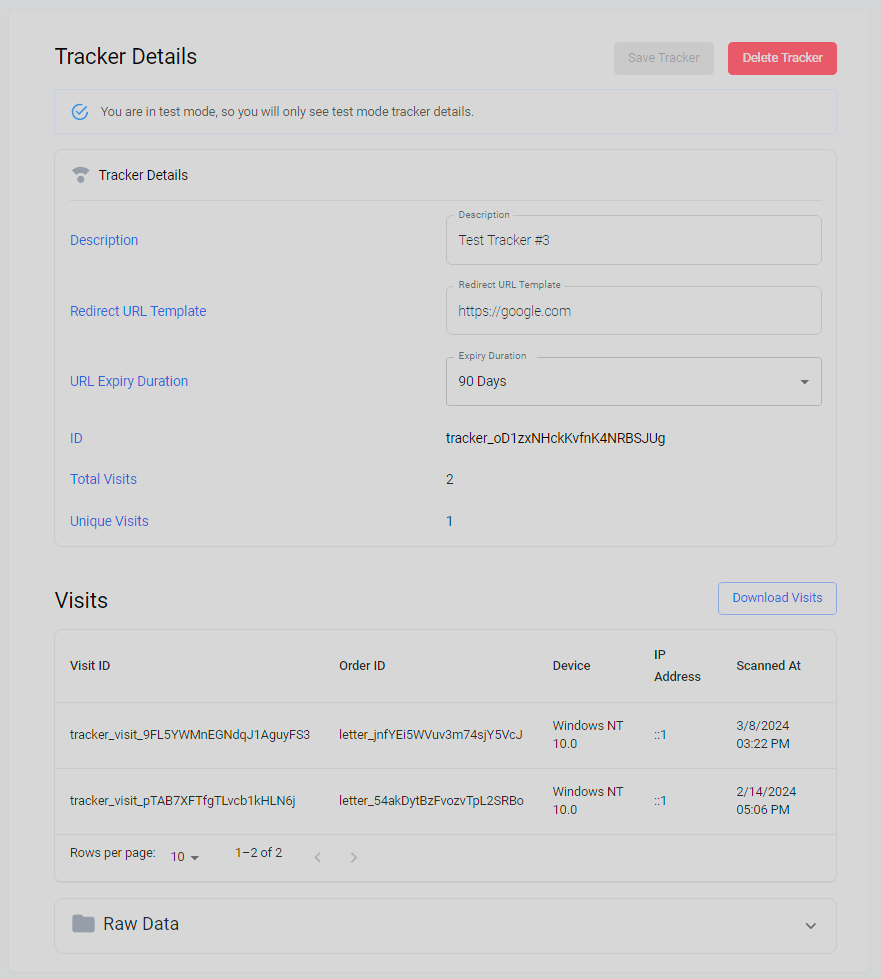
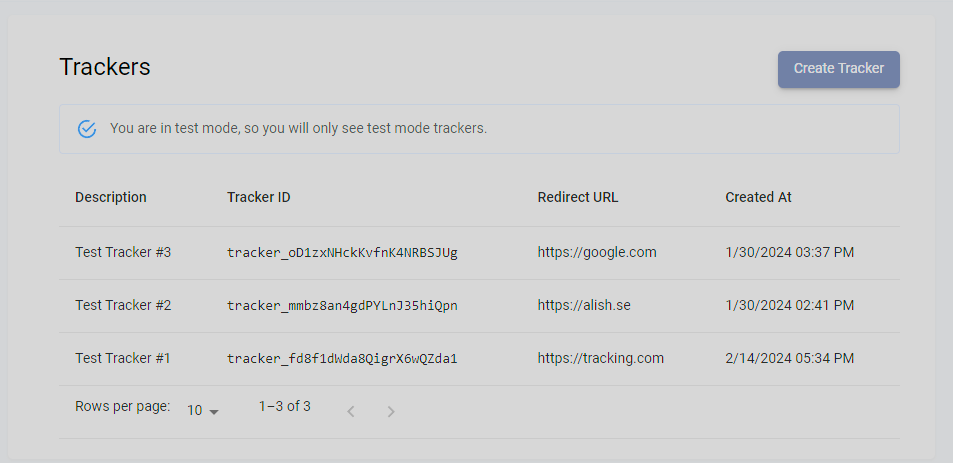
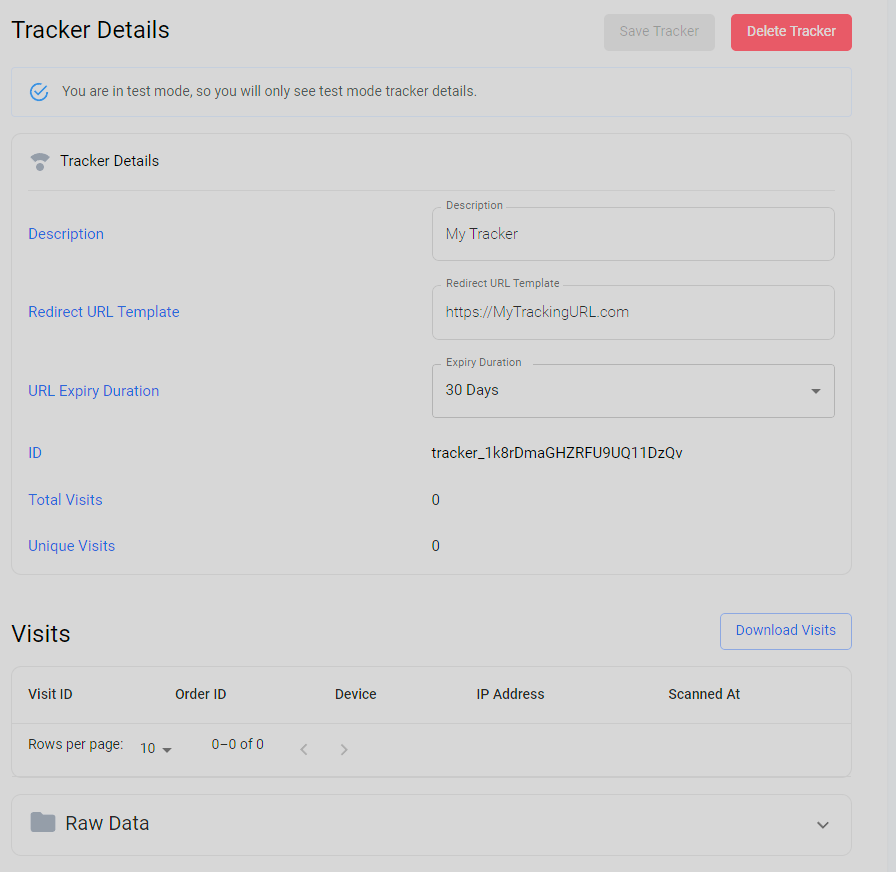
Navigate to the Trackers tab under Resources to see all the created trackers, their IDs, redirect URLs, and other attributes.
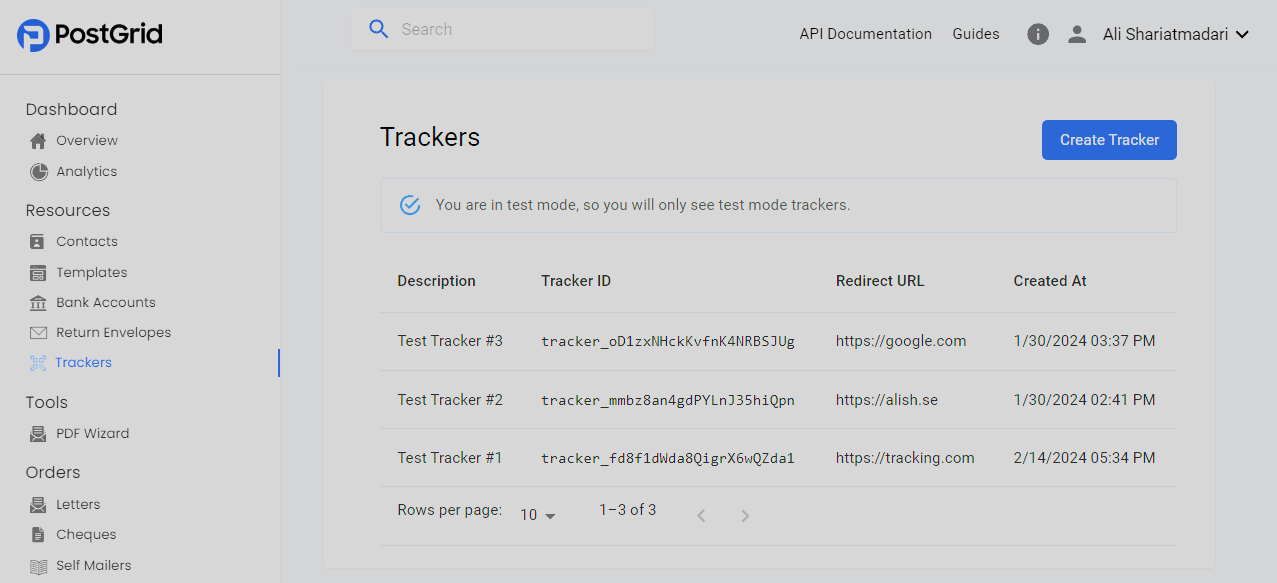
You can view and edit the description, the redirect URL template, and expiry duration of a Tracker by clicking on it. Below the details, you can view a detailed log of each visit, what order they came from, and the time and device the scan took place.
This data can be exported for further processing in csv format by clicking the Download Visits button.
Creating a Tracker
From the Trackers tab, you can click on 'Create Tracker' to get started in the process of creating your very own tracker!
Here you can fill out different attributes for your tracker.
- Description: A name given to the tracker for easy identification on the dashboard
- Expiry Duration: This tracker can be used to generate personalized URLs. This expiry duration specifies how long these personalized URLs are active. The longer the duration, the longer the generated URL will be.
- Redirect URL Template: The URL which the scanned code will take the user. Can be combined with merge variables for a richer tracking experience. (i.e.`mytracking.com/{{to.firstName}})
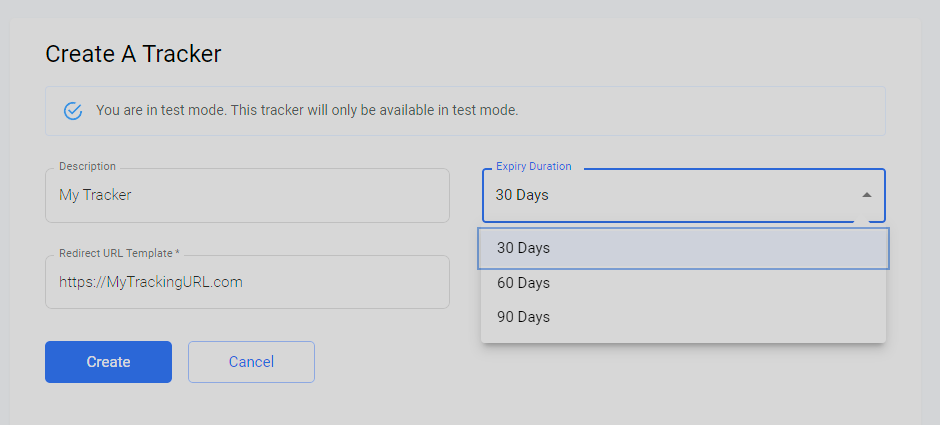
Once you are happy with your selection, click on 'Create' to create a new tracker for use within orders and templates.
Deleting a Tracker
You can delete a tracker by clicking on the tracker from the resources view, and then clicking on 'Delete Tracker' on the top right corner.
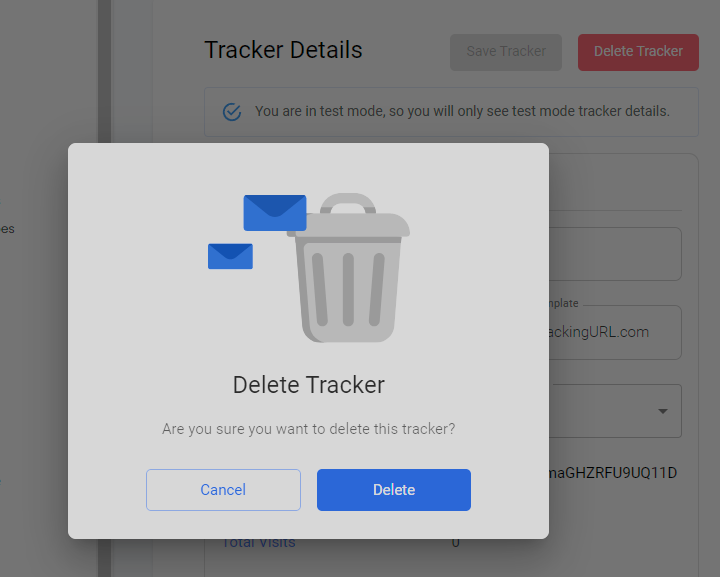
You will then be met with a confirmation prompt, and after confirming your intentions to delete, your tracker and its corresponding data will be deleted forever.
Adding a Tracker to the template
This section will provide an overview on how to add Trackers to the Template using created using the Template editor on the dashboard
Refer to Design and Templates for detailed instructions on how to create templates.
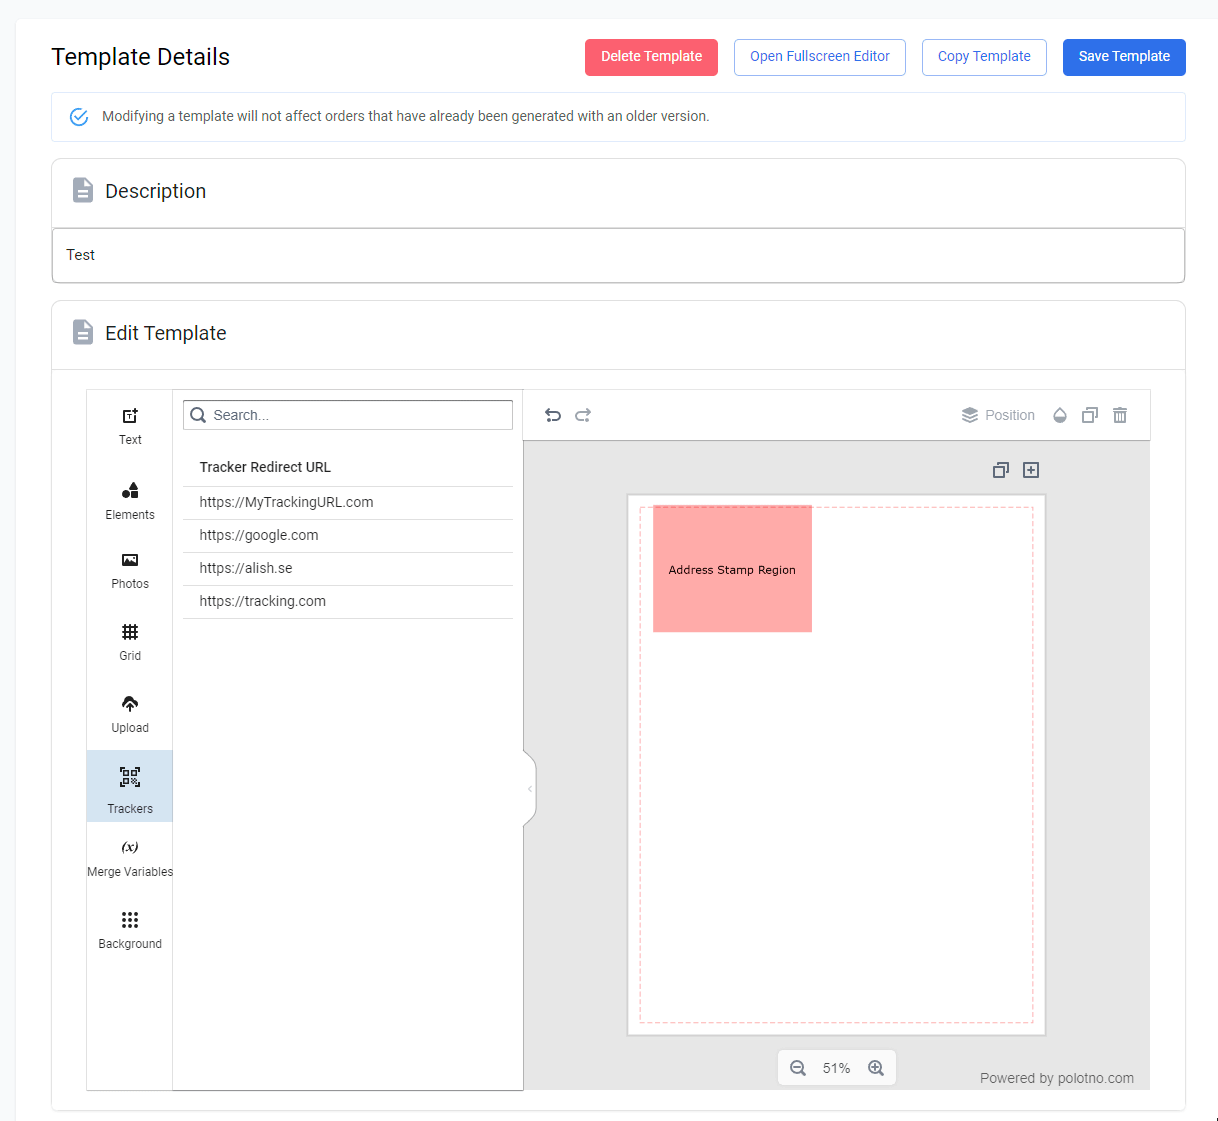
By navigating to the Trackers tab in the Template Editor, you can view a list of the top 100 recently created/edited trackers. You can search for more trackers using the search bar.
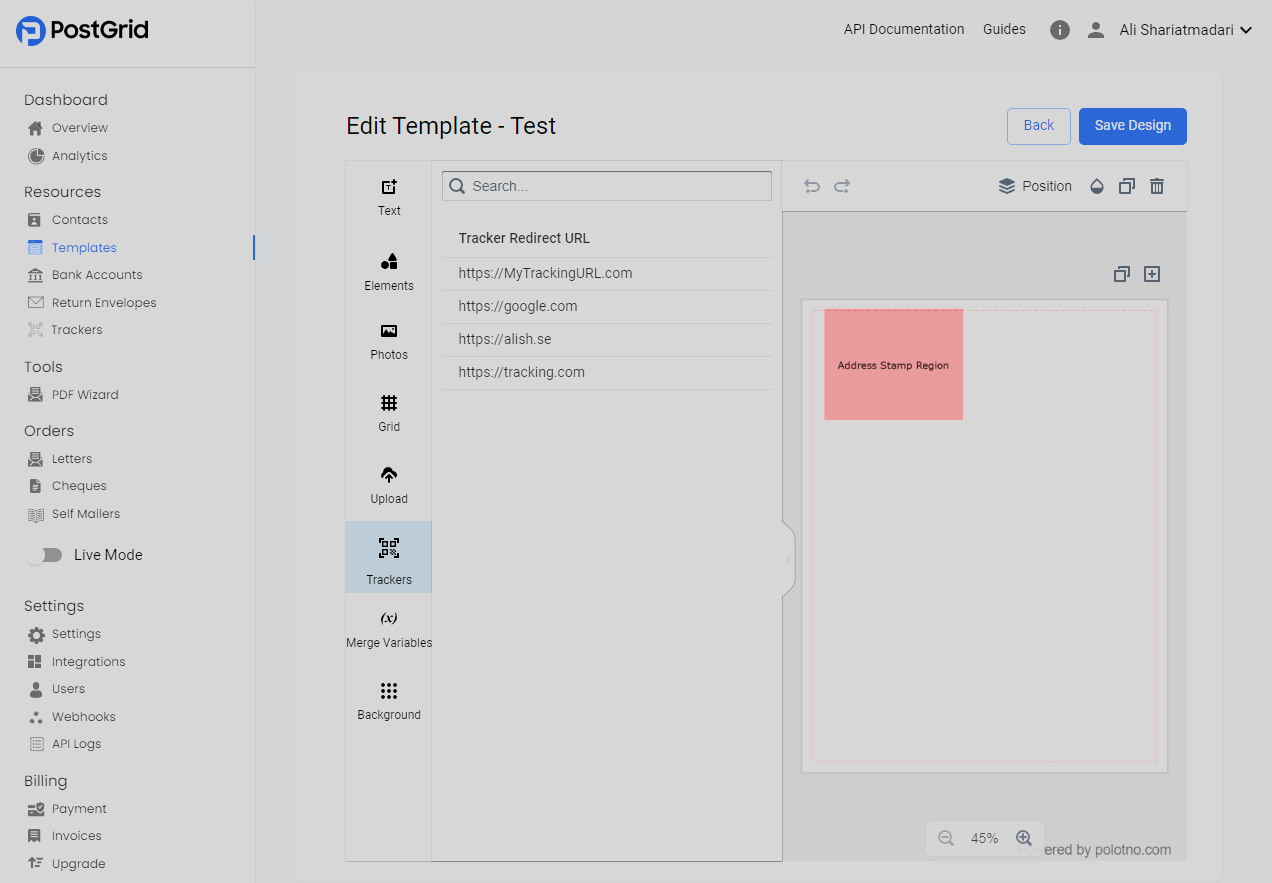
You can click or drag one of the trackers into your template, position it and adjust the sizing accordingly using the handles or the size attribute in the toolbar. The tracker's ID is also displayed in the toolbar. By default, scanning the preview QR Code will take you to PostGrid.com. Once you are happy with your positioning, you can click Save Design to save the template.
URL Shortening
When a Tracker is referenced in a template using the {{your_tracker_id.url}} merge variable, PostGrid automatically shortens the generated URL. You do not need to use a third-party link shortener — the personalized URL (PURL) produced for each recipient will already be a short, compact link.
This is particularly useful in printed mail where space is limited and long URLs are difficult for recipients to type manually. The short URL will redirect to the Tracker's configured redirect URL template, with any merge variables resolved for the specific recipient.
Editing Placed Trackers
By clicking on a tracker, you can view its ID in the toolbar. Clicking on 'Open Tracker' will take you to the page associated with that specific tracker so you can view and edit its attributes.
Updated 5 months ago