Sending bulk mailers using Campaigns
Overview
The PostGrid Campaigns Tool makes it easier than ever to launch and manage bulk direct mail campaigns. Whether you’re reaching hundreds or thousands of customers, this tool takes the complexity out of the process so you can focus on results.
Currently in beta, Campaigns supports sending letters, with postcards and self-mailers coming soon to give you even more ways to connect with your audience.
Launching your first campaign involves four simple steps:
- Select Collateral – Choose the collateral you want to use.
- Upload and Configure the Mailing List – Add your recipients by uploading a properly formatted list.
- Configure the Creative – Personalize and finalize the details of your mail piece.
- Review the Campaign – Check the preview and all campaign details before launching.
With PostGrid Campaigns, launching your first campaign is fast, simple, and effective.
Accessing the Campaigns Tool
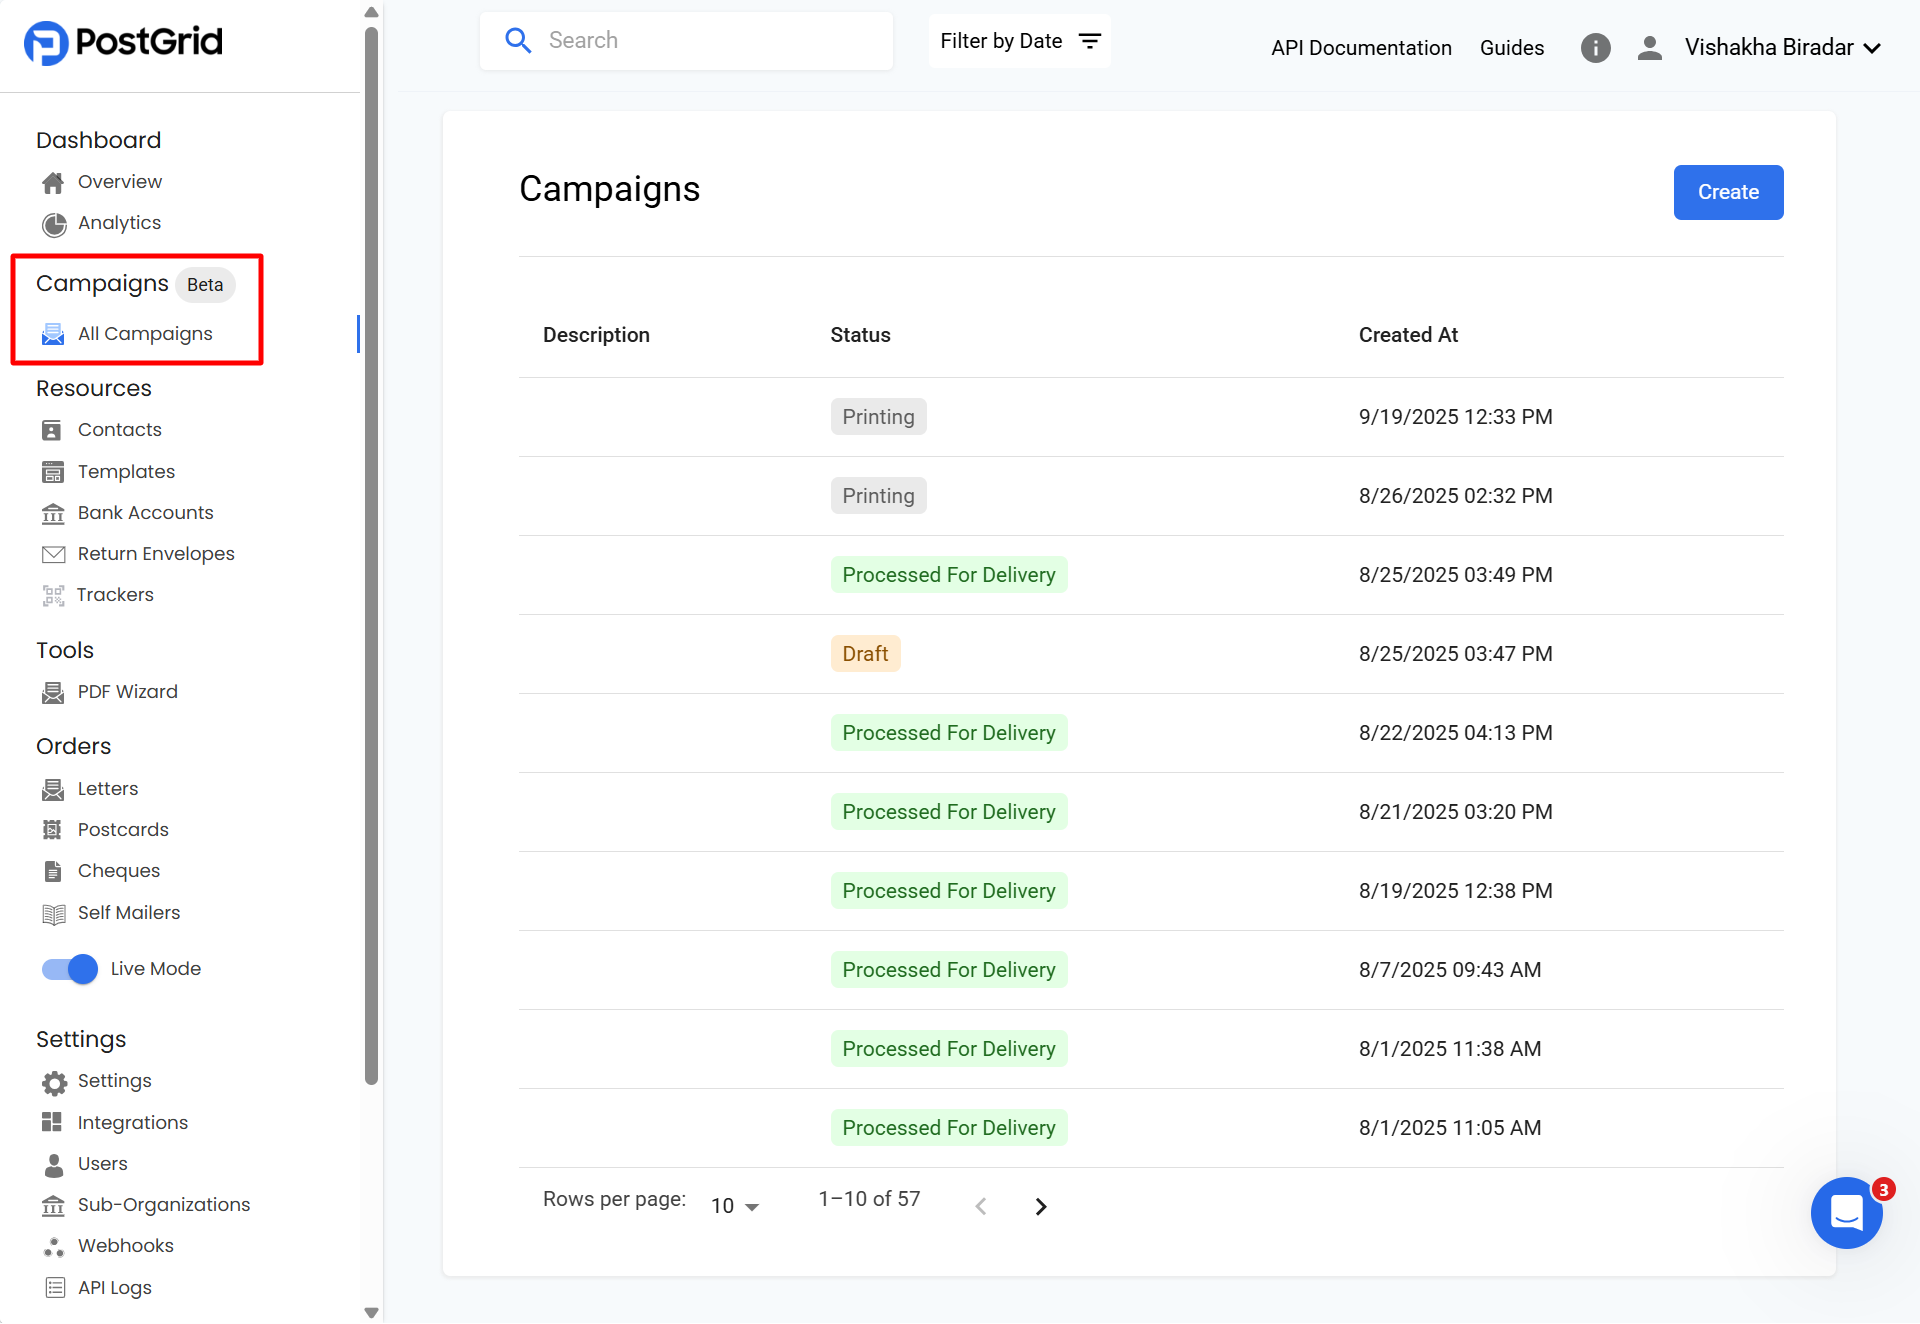
To get started, navigate to the Campaigns (Beta) section in your PostGrid dashboard.
- On the left-hand panel, locate Campaigns (Beta).
- Click on All Campaigns.
This will take you to the Campaigns dashboard, where you can:
- View all your existing campaigns along with their statuses (e.g., Draft, Printing, Processed for Delivery).
- Create a new campaign by clicking the Create button.
Once you’re on this page, you’re ready to launch your first campaign.
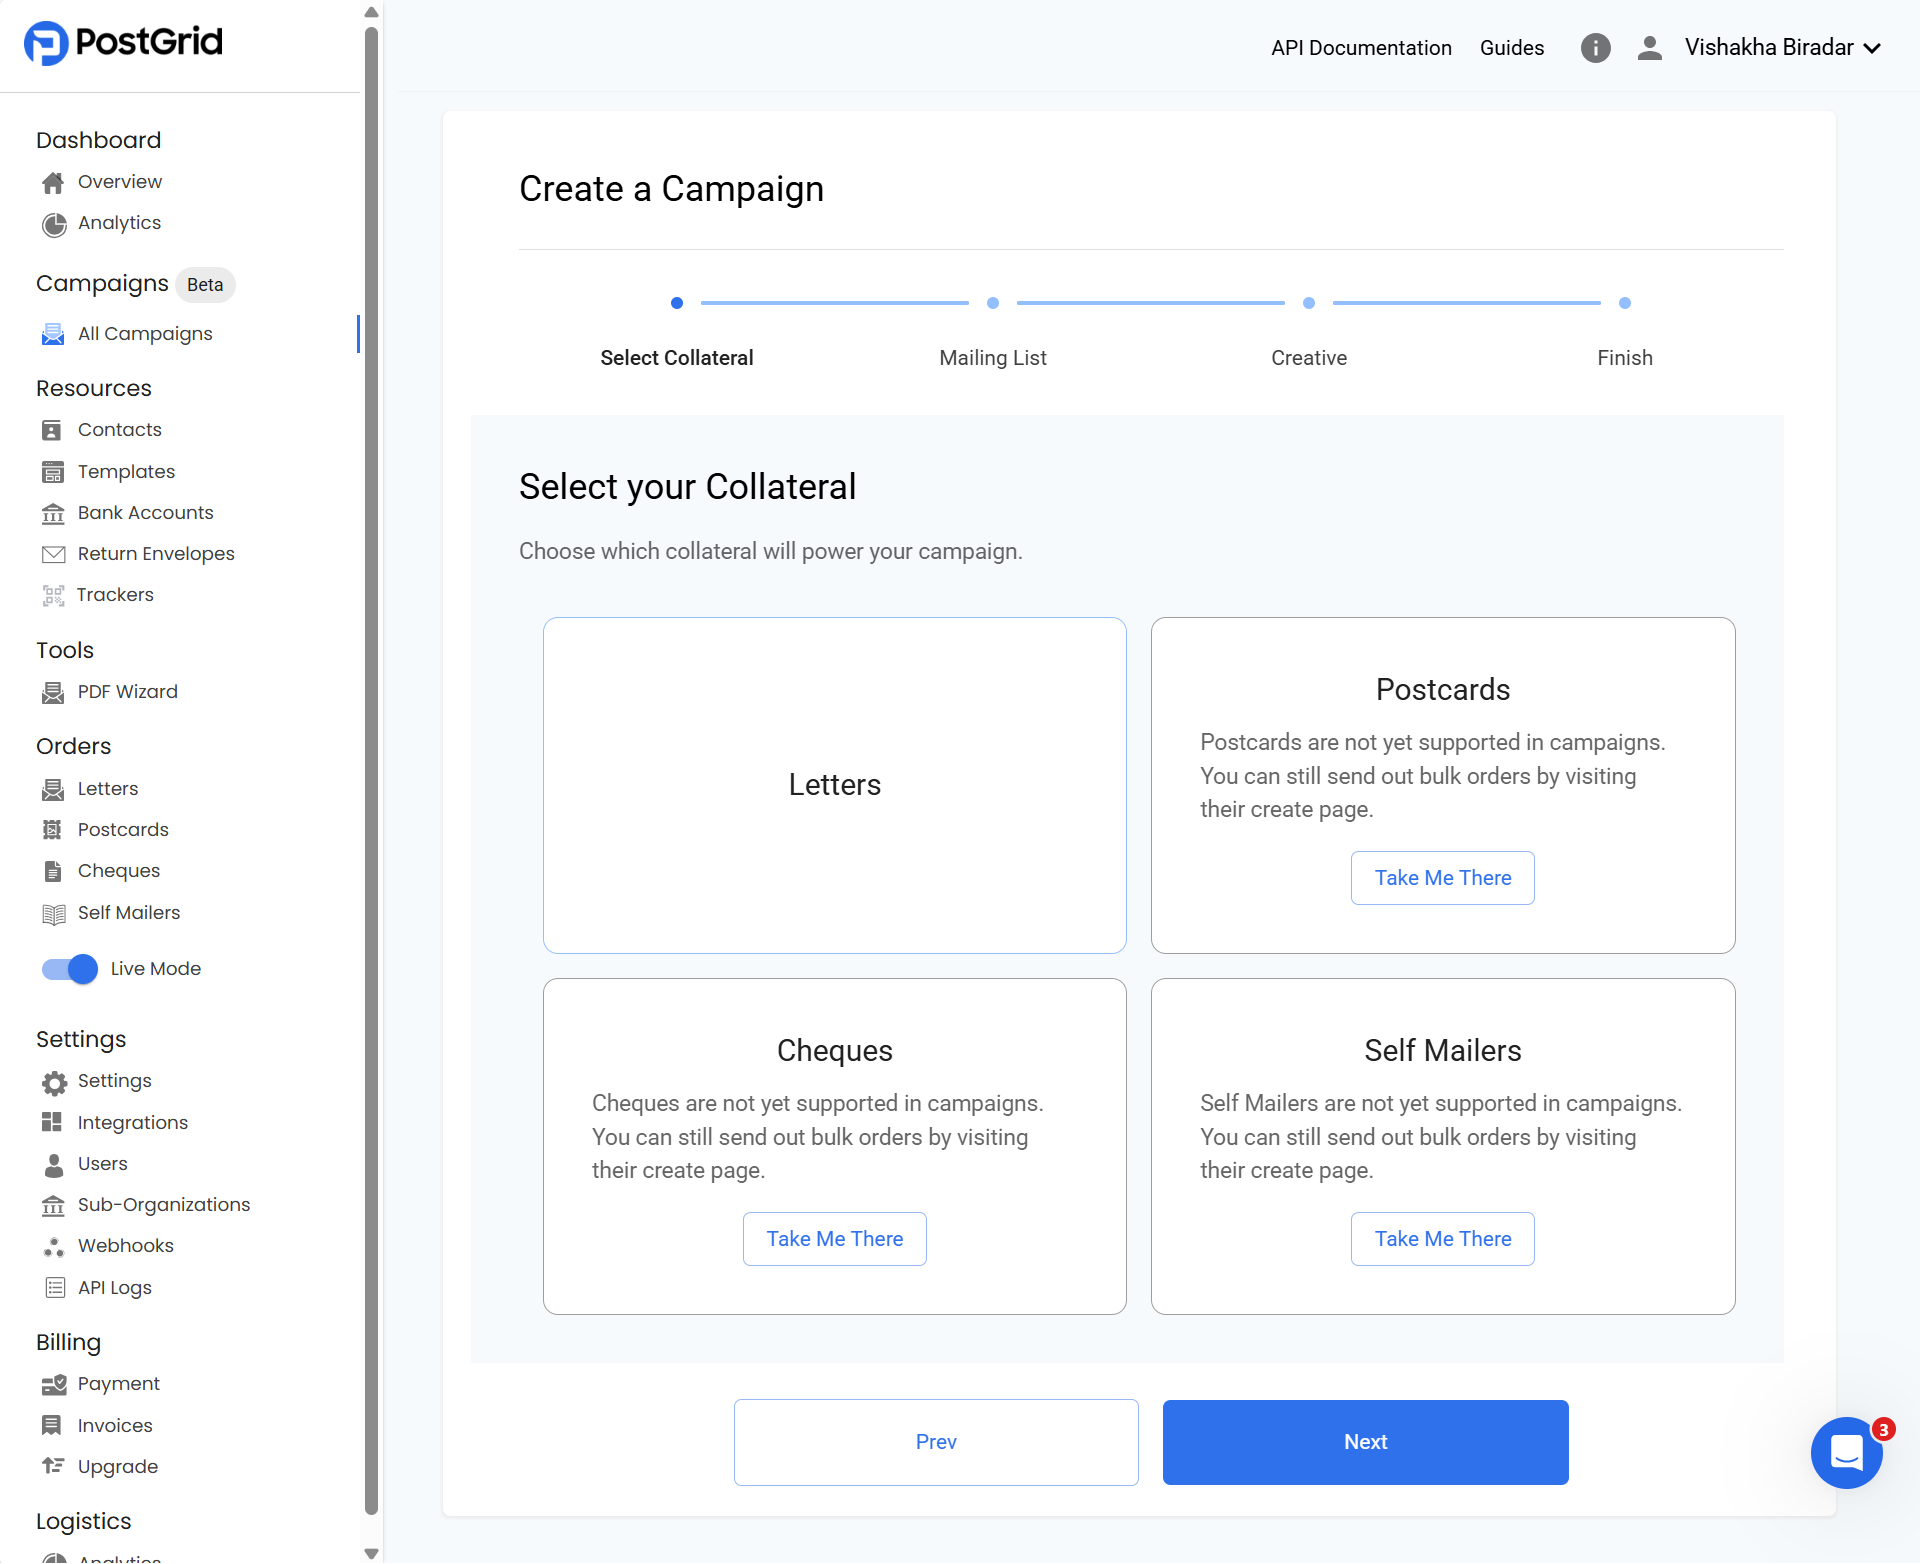
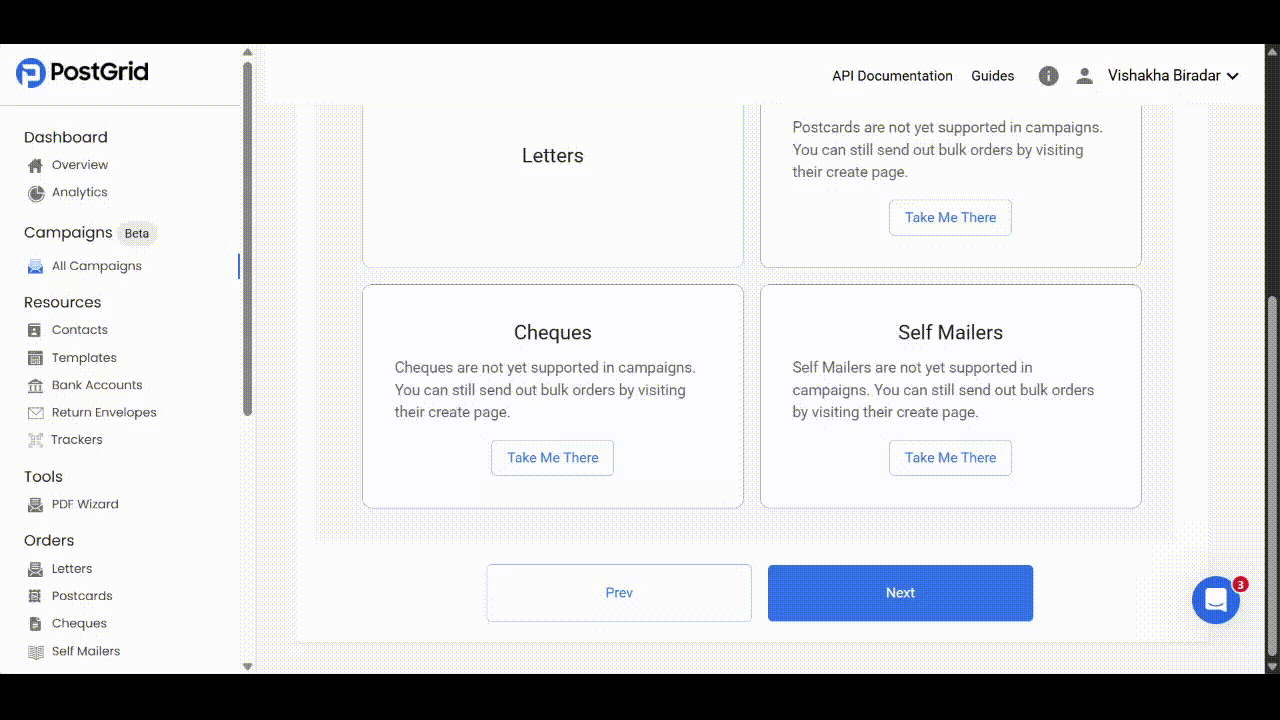
Step 1: Select a Collateral
The first step in creating a campaign is choosing the collateral that will power your campaign.
Currently, Letters are supported in the Campaigns (Beta) tool. Other formats such as Postcards, Cheques, and Self Mailers are not yet available within campaigns but can still be created and sent out individually from their respective workflows.
After selecting Letters, use the navigation buttons at the bottom of the page:
- Prev will take you back to the Campaigns dashboard
- Next will move you forward to the Mailing List step
Step 2: Upload and Configure the Mailing List
Uploading the Mailing List
Your mailing list should be in a CSV format and include all the recipient details for your campaign.
- Prepare your CSV file with the required contact information.
- Drag and drop the file into the upload box, or click to browse and select it.
- Once the file is uploaded, click on Next to move to the configuration step.
👉 Sample Mailing List Template: Open Sample File
Tip: Make sure your CSV includes all required fields (such as name and mailing address) to ensure successful campaign creation.
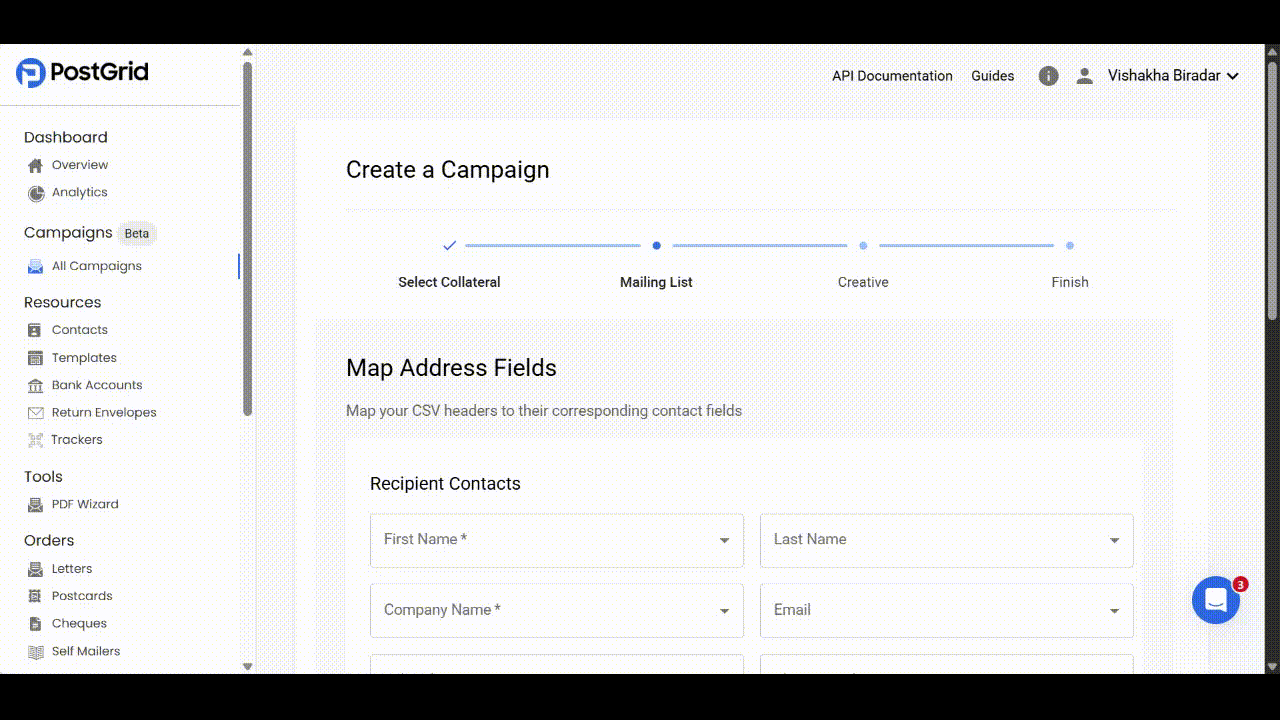
Configuring the Mailing List
After uploading your CSV, the next step is to configure your mailing list. This ensures your recipient data is correctly mapped and ready to be used in your campaign.
1. Map the address fields
Each column in your CSV needs to be mapped to the correct contact field in PostGrid. Mandatory fields are marked with an asterisk (*):
- First Name
- Company Name
- Address Line 1
- Country
Other optional fields such as Last Name, Email, Job Title, Phone Number, Address Line 2, City, Province/State, and Postal/Zip can also be mapped for more personalization and accuracy.
Important: If you do not map City, State, and Postal/Zip as separate fields, you can instead map a full free-form address to Address Line 1. However, it is strongly recommended to map the optional fields whenever possible to ensure higher address accuracy and deliverability.
2. Adding and Mapping the merge variables
You can map custom merge variables (e.g., Loyalty ID, Account Manager Name, Coupon code etc.) to corresponding CSV headers. These variables can then be inserted into your creative to personalize the content of each mail piece.
Notes:
- For merge variables, the variable name in your template does not need to match the CSV header. When setting up, you can assign any name to the merge variable and then map it to the appropriate CSV column.
- In the template, you only need to include the merge variables in the correct format as mentioned here.
3. Select Sender Contact
Finally, select a Default Sender Contact from your saved contacts. This will serve as the sender for all mailings in the campaign.

Once all fields are mapped, merge variables configured, and a sender contact selected, click Next to proceed to check the preview of the uploaded mailing list.
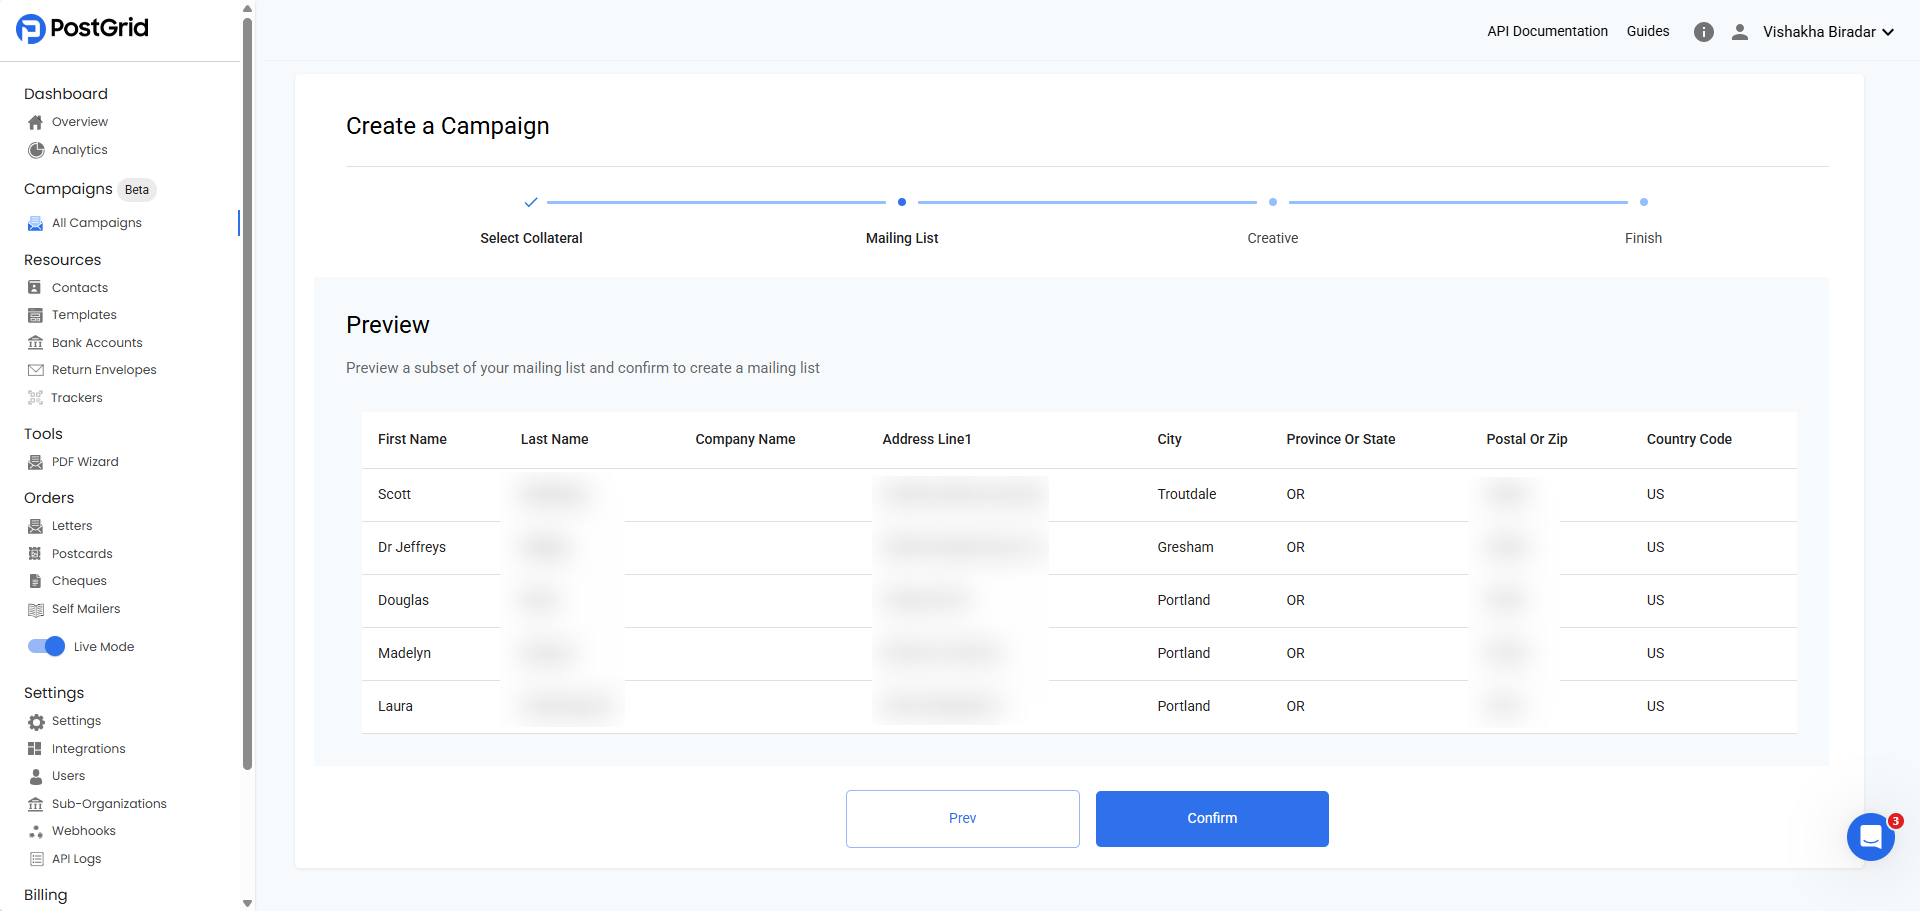
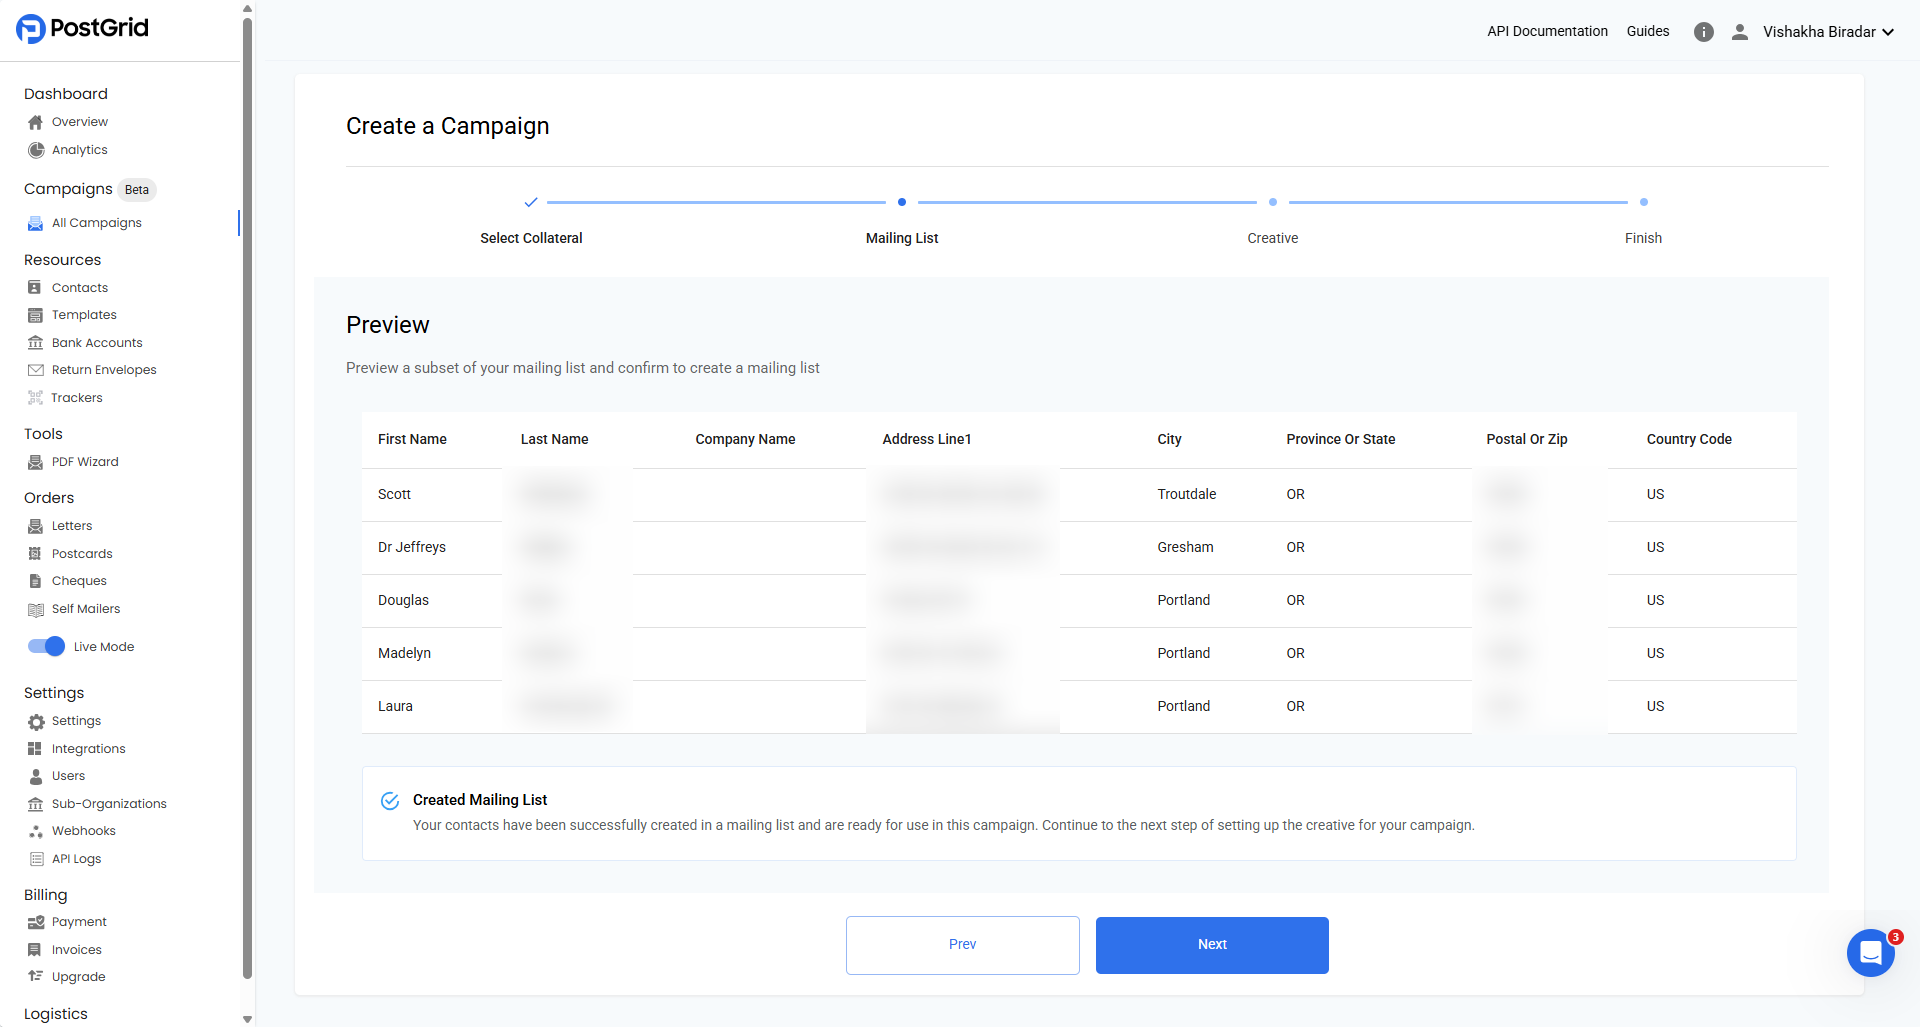
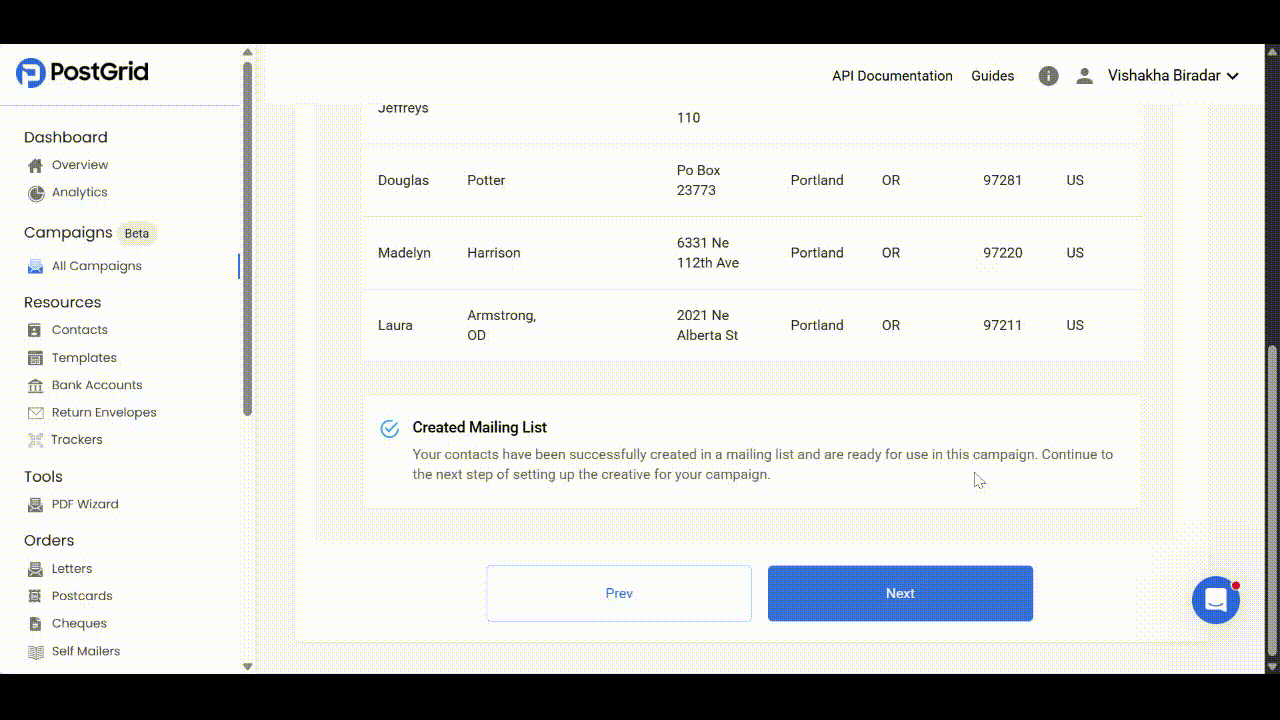
3. Preview and Confirm the Mailing List
After you finish mapping fields, setting merge variables, and selecting the sender, the Preview screen shows a subset of your list in a table (First Name, Last Name, Company Name, Address Line 1, City, Province/State, Postal/Zip, Country).
Use this view to confirm that required fields are populated, columns are mapped correctly (no unmapped columns), and address parts sit in the right fields. If anything looks off, click Prev to adjust mappings or replace the CSV; if everything checks out, click Confirm to save the list and proceed to configuring the campaign.
Step 3: Configure the campaign
Once you have created the mailing list, you can proceed to configure your campaign. Fill out the below inputs to complete the configuration.
-
Description: Short, searchable name for the order profile.
- Here’s what an Order Profile usually captures:
Setting Type Description / Purpose Mail Piece Type Whether it’s a letter, postcard, cheque, or self-mailer. Dimensions / Size The physical size (e.g. standard letter,different postcard sizes, etc.). Content / Template Template vs PDF upload Print Options Things like color vs. black & white, paper type, duplex, etc. -
Page Size: You can select the letter size based on the destination to which you are sending the mailing.
-
Mailing Class: By default, all mail is sent as First Class or the fastest non-express postage available in the destination country. This can be overridden by selecting a mailing class by clicking on the drop-down.
- Standard/Economy: Lowest cost, slowest delivery, little or no tracking; good for non-urgent marketing.
- Priority/Expedited: Faster delivery, often trackable. Costs more.
- Registered: High-security chain-of-custody for valuable/legal items; slow and expensive.
- Certified/Signature: Proof of mailing and recipient signature or delivery receipt; slower handling, extra fees.
- Neighborhood Mailing (EDDM-style): Route-level delivery, usually not list-based. Don’t use for this step unless your tool explicitly supports it with a separate flow.
-
Return Envelope: If you have pre-ordered return envelopes and they are available in stock, you can select the desired return envelope by clicking on the dropdown.
-
Envelope: If your organization has a default custom envelope, it will be automatically selected for your live orders. Otherwise, the Standard envelope (standard window envelope) will be used by default. You can also use the dropdown menu to search for other custom envelopes your organization has. If you're interested in setting up custom envelopes, please contact PostGrid Support at [email protected] to get started.
-
Additional Options: If you want to send a color letter, you can check the 'Color' checkbox. If you don't want the to and from address to overlap with your design/content, you can insert a blank page for the address. Similarly, you can click on other checkboxes based on your specific requirements.
Next let's choose a creative.
- Template: Select your template (e.g., Merge Variable Test). Make sure CSV headers exactly match your merge tags. Refer to the merge variable guide here.
- Upload a PDF: Use a static PDF (no personalization). Ensure fonts are embedded and margins leave space for the address/envelope window.
Click on Next.
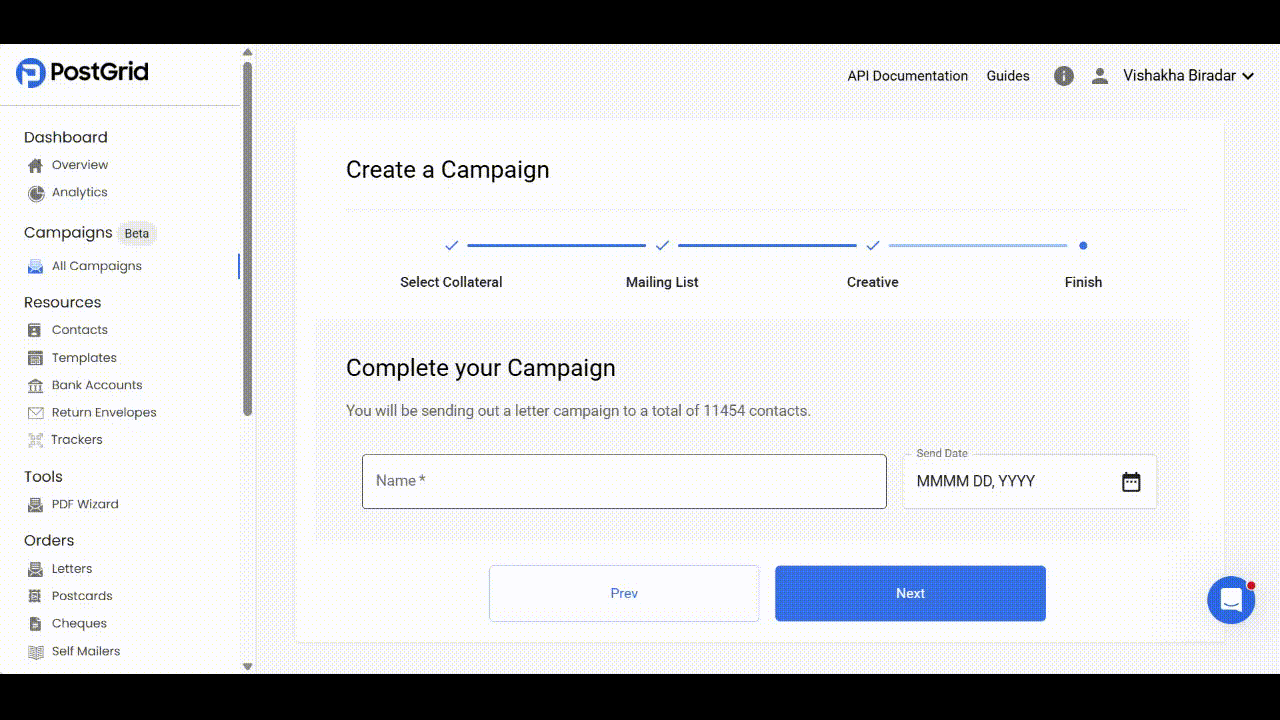
Step 4: Review the Campaign
Once you have configured the campaign details, it's time to review all the details and create the campaign.
- Before reviewing the details Name the campaign.
- Send Date: You can either schedule the mailing to be sent out on a future date, or by default, it will be sent out to the printer the next day for printing.
Click on Next.
The system will validate every contact and the required address fields. It then applies your field mapping and merge variables to the records. Finally, it generates a sample PDF preview that represents what will actually be mailed.
Preview Checks
- Confirm that the address block is fully visible and does not overlap any other content or the window area.
- Verify that all merge variables render correctly, no blanks and no {{Couponcode}} strings.
- Make sure fonts are embedded and readable with no reflow.
Click Confirm to finalize the campaign and queue it for the send date you selected; if you didn’t set a date, it will default to next-day submission to print.
Download Report
A downloadable CSV on the Review step that lists each planned mail piece as a single row, showing recipient and sender details, the standardized mailing address that will be printed, and any address validation issues detected before you confirm.
- To ID / To Name: Recipient contact identifier and name.
- To Address: The standardized/normalized recipient address string that will be used to print.
- To Address Error: Field-level issue found on the recipient address (e.g., “Unable to find a match”, “Missing street direction”). Blank = no issue flagged.
- From ID / From Name / From Address: Sender contact used for the piece.
- From Address Error: Validation issue on the sender address, if any.
- Order ID: A unique ID that will be created for that record when you confirm.
- Error Type: Reason code for why the address failed validation and the order won't be created.
- Error Message: Explanation of the failure in address verification with context to fix the record.
Additional Information
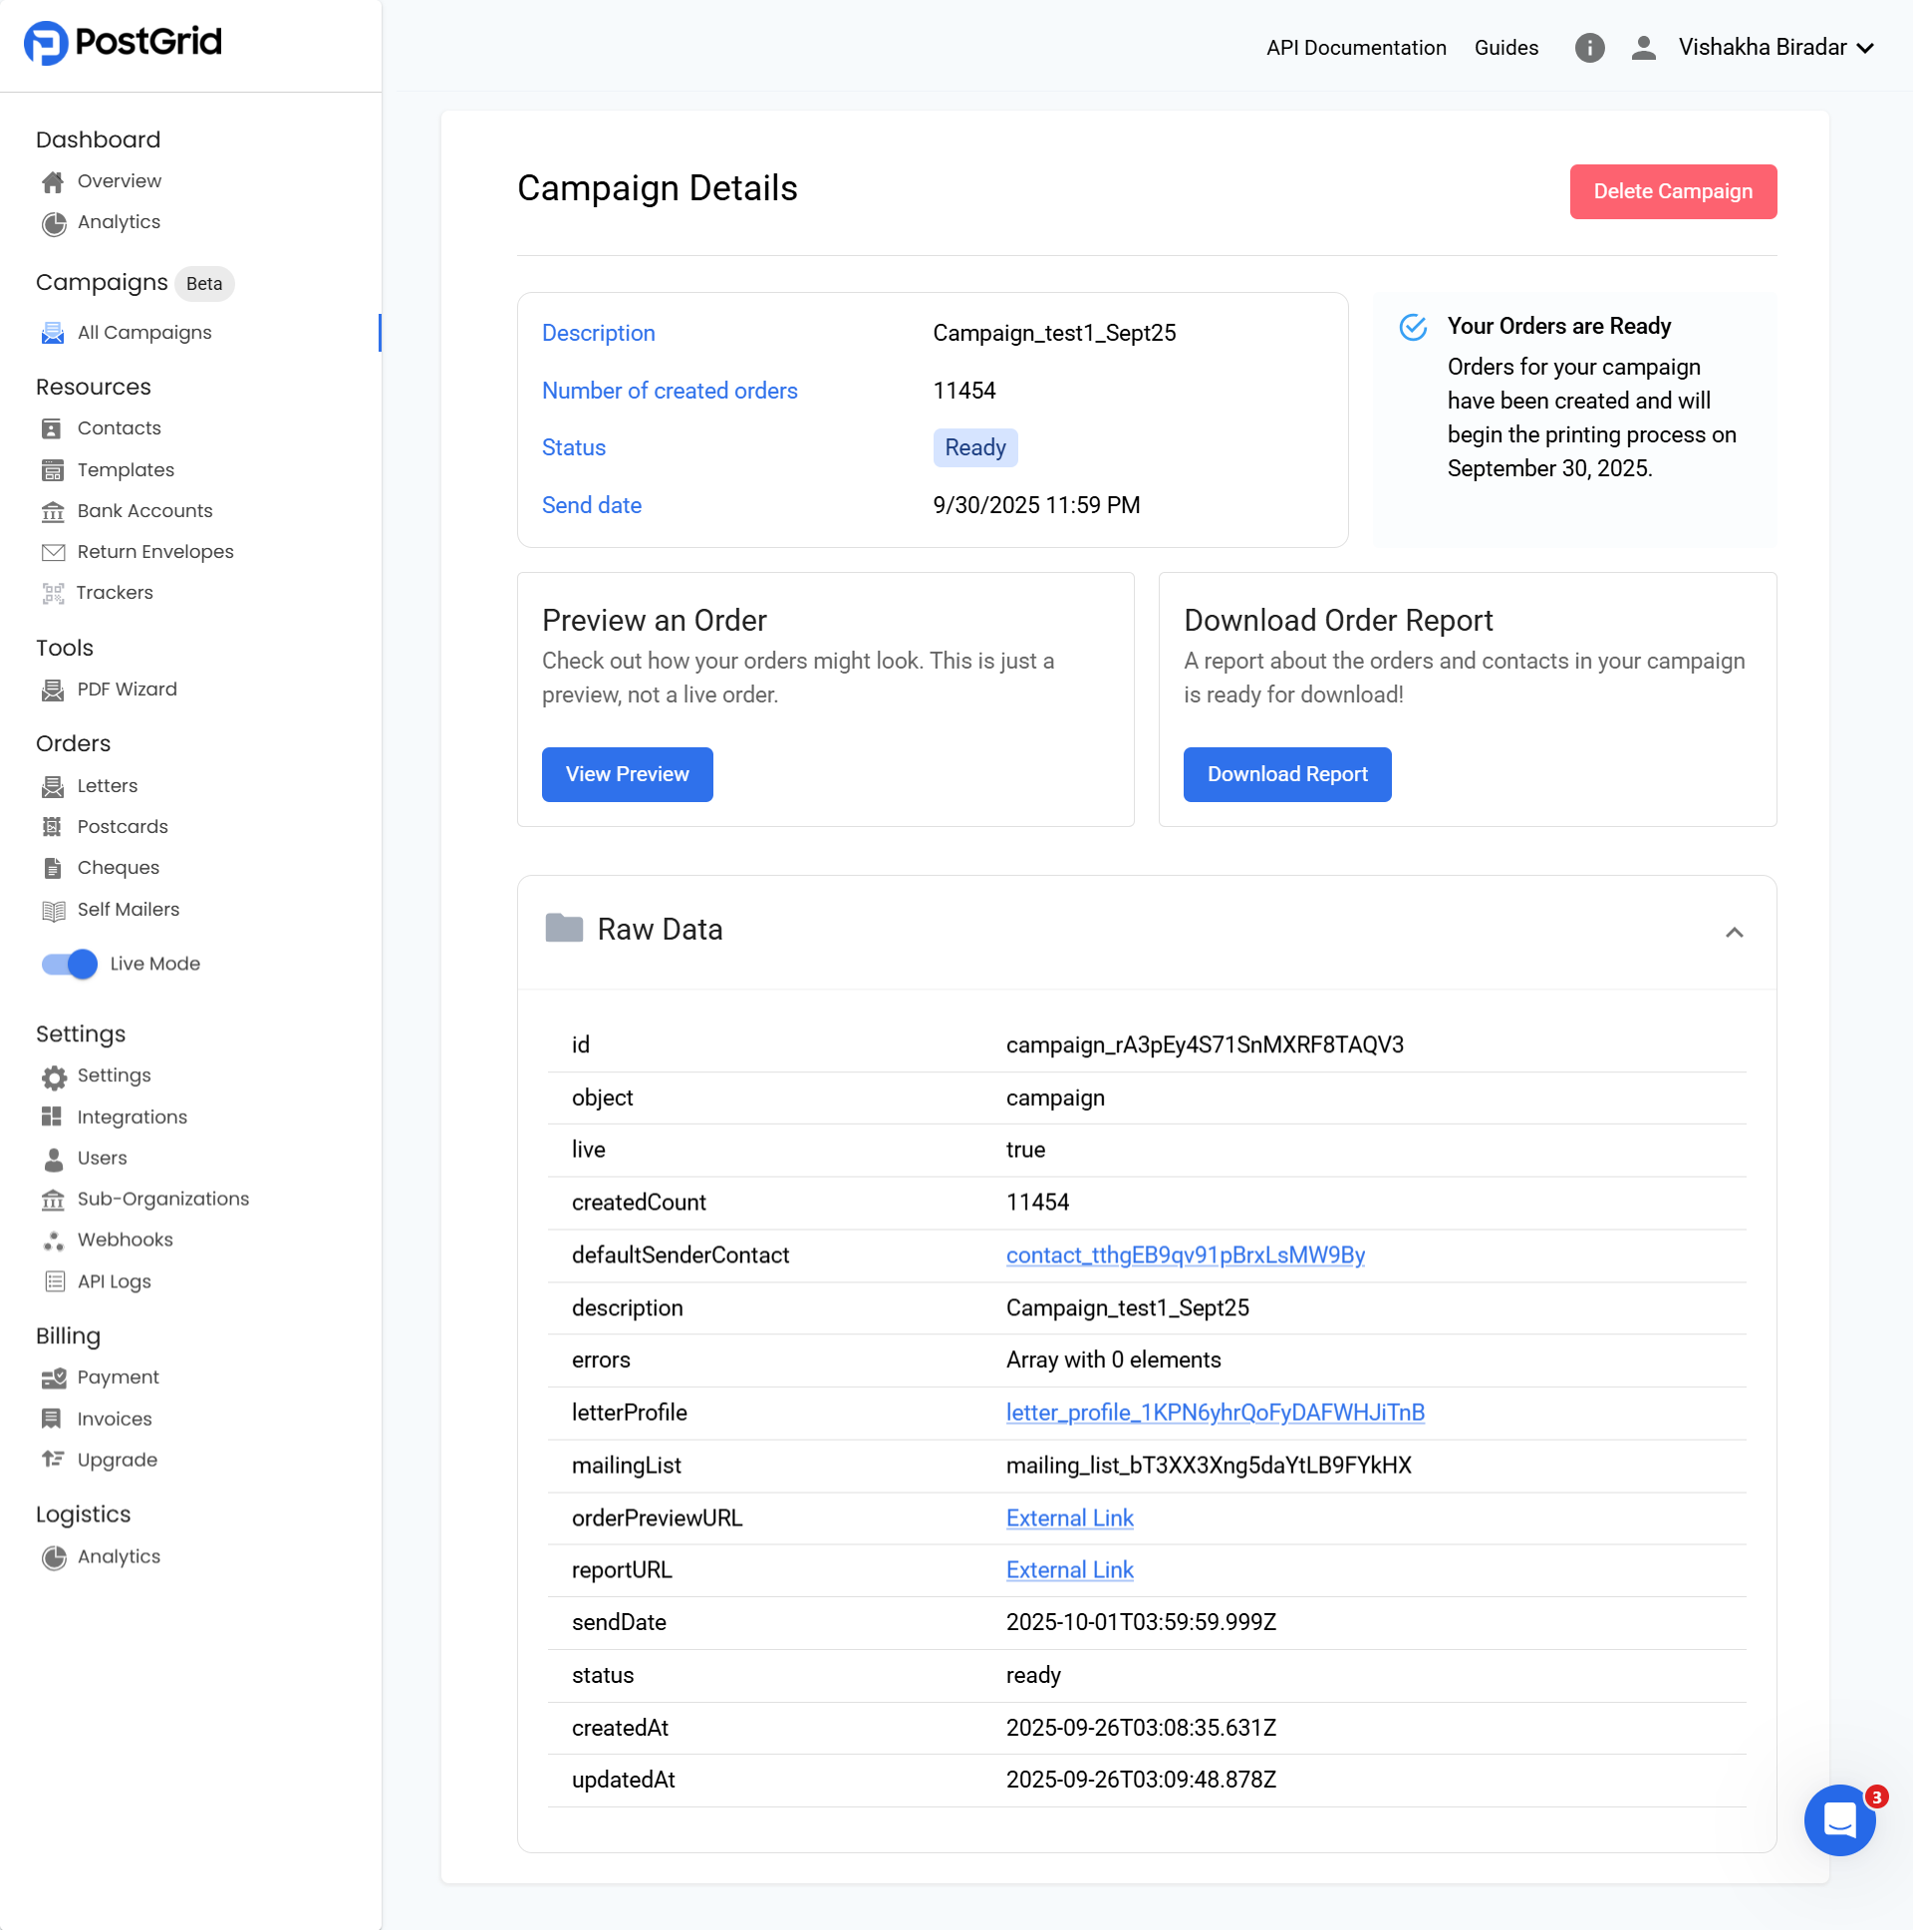
Campaign Details
This page shows the details about the campaign once the orders have been generated or in draft.
- Description: The campaign name you set.
- Number of created orders: Count of mail pieces created from the mailing list after validation/suppressions.
- Status: Current order state (e.g., Ready, Printing, Completed, or Failed if something blocked creation).
- Send date: When the batch is scheduled to be released to production.
Deletion rule: You can delete a campaign only while the status is Ready. As soon as the status moves to Printing, deletion is disabled.
- Preview an Order: Opens a sample PDF to show how a typical piece will print; this is a preview, not a live order.
- Download Order Report: Exports a CSV audit of all intended pieces (recipients, standardized addresses, sender, errors). Use it to spot and fix any issues after confirmation.
Campaign Status
drafting*: System is preparing the draft after creation.draft*: Draft complete and valid; you can send or modify.changes_required*: Draft failed validation; fix errors and re-submit.creating_orders: You triggered send; the system is building individual orders.ready: All orders were created and queued for production/printing.failed: Order creation errored; Click on the campaign to check the campaign’s errors.
*Currently, you can view these statuses for your campaigns but cannot make any edits or changes. These statuses will become fully functional in the next release.
Note: Statuses like Printing, Processed, Out for Delivery, Completed, etc., are per-order states, not campaign states.
Updated 9 months ago