Okta Configuration
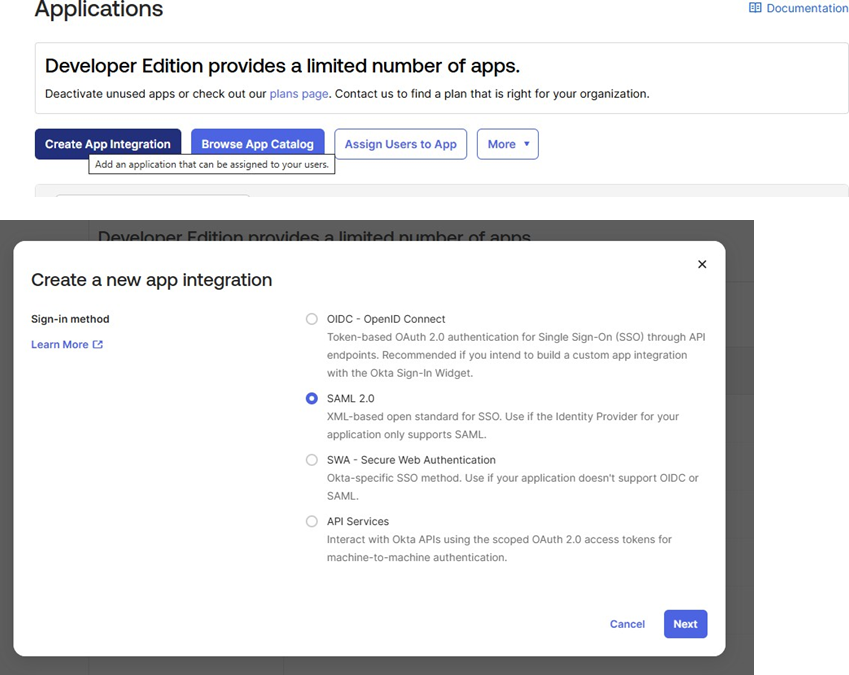
Step 1: Create New SAML 2.0 Application
- Log in to your Okta Admin Dashboard
- Navigate to Applications -> Applications
- Click Create App Integration
- Select SAML 2.0 as the sign-in method
- Click Next
Step 2: Configure General Settings
- Enter your application details:
- App name: PostGrid SSO (or your preferred name)
- App logo: (Optional) Upload your organization's logo
- App visibility: Configure as needed for your organization
- Click Next to proceed to SAML settings
Step 3: Configure SAML Settings
A. Enter PostGrid URLs
Using the URLs provided by PostGrid, configure the following fields:
- Single sign-on URL:
- Paste the URL provided by PostGrid
- Example format:
https://postgrid.us.auth0.com/login/callback?connection=... - ✅ Check the box: "Use this for Recipient URL and Destination URL"
- Audience URI (SP Entity ID):
- Paste the Audience URI provided by PostGrid
- Example format:
urn:auth0:postgrid:okta-saml-pg-dashboard-46185598

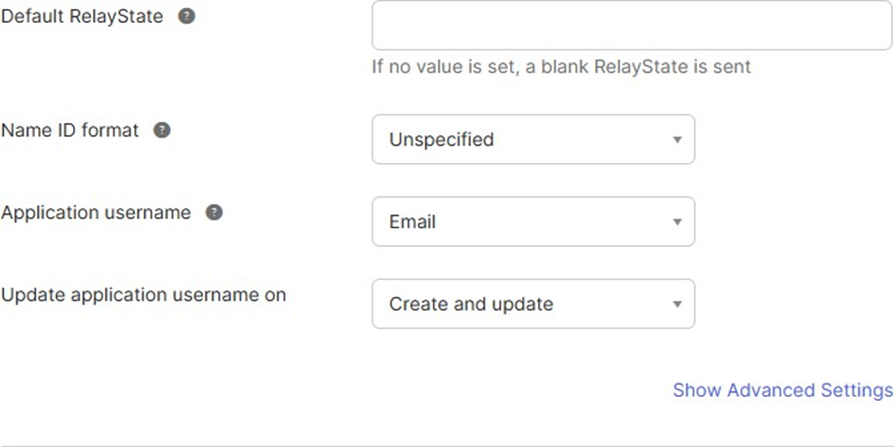
B. Configure Default SAML Settings
Leave the following fields with their default values:
Step 4: Configure Attribute Statements (Recommended)
Attribute Statements allow PostGrid to receive user details like name and email from Okta, enabling better user identification and personalization.
Why this is recommended: Passing user details eliminates the need for users to re-enter their information and improves the PostGrid experience.
Configure the following attributes:
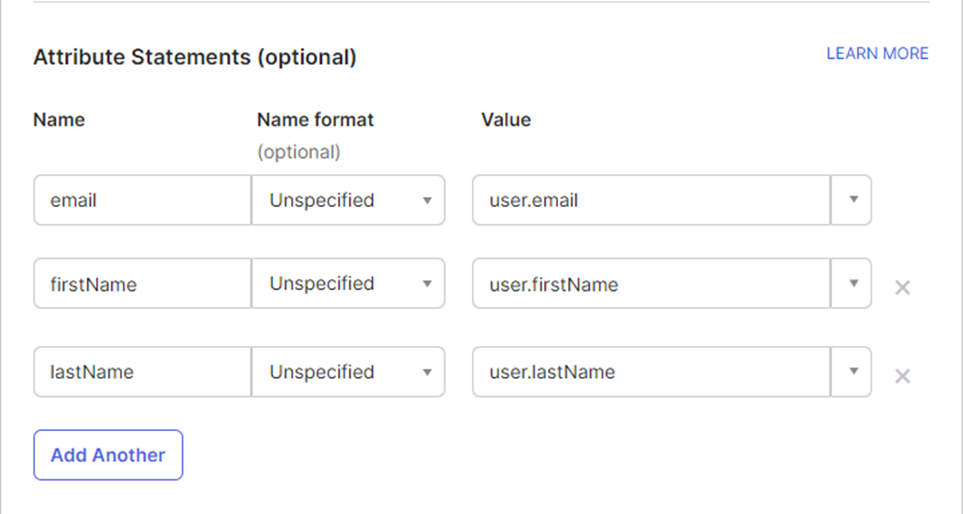
Tip: Click Add Another to add additional attribute rows if needed.
Step 5: Complete Feedback and Create Application
- Select the appropriate feedback option based on your use case:
- "I'm an Okta customer adding an internal app"
- "I'm a software vendor. I'd like to integrate my app with Okta"
- Click Finish to create the application
Step 6: Assign Users to the Application
Once your application is created, assign Okta users to enable their access to PostGrid.
- Navigate to the Assignments tab
- Click Assign > Assign to People or Assign to Groups
- Select users/groups who should have PostGrid access
- Click Done
Important: Users must be assigned to this application before they can sign in to PostGrid via SSO.
For detailed instructions on how to assign users or groups to your application, refer to the official Okta documentation: Assign app integrations - Okta Documentation
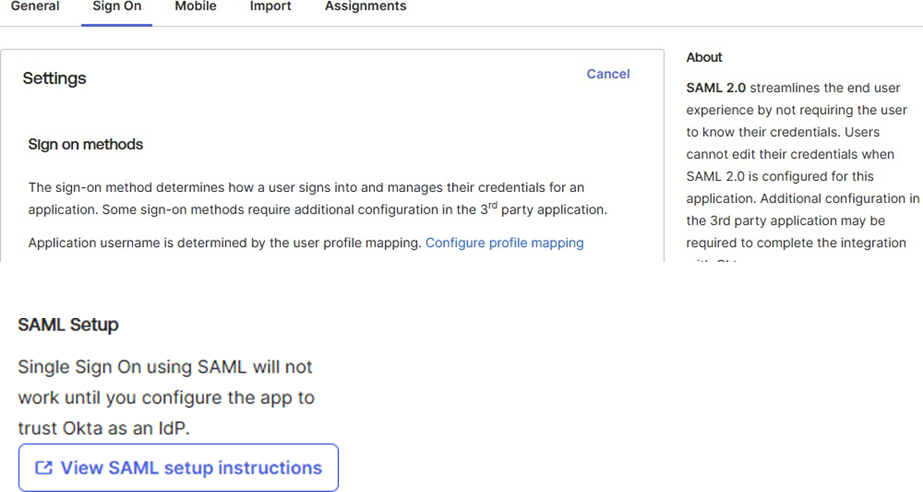
Step 7: Retrieve SAML Configuration Details
Retrieve SAML Configuration Details
PostGrid will require:
- Sign In URL
- X509 Signing Certificate
To find these details:
- Navigate to the Sign On tab in your PostGrid SSO application
- Find and click the link "View SAML setup instructions"
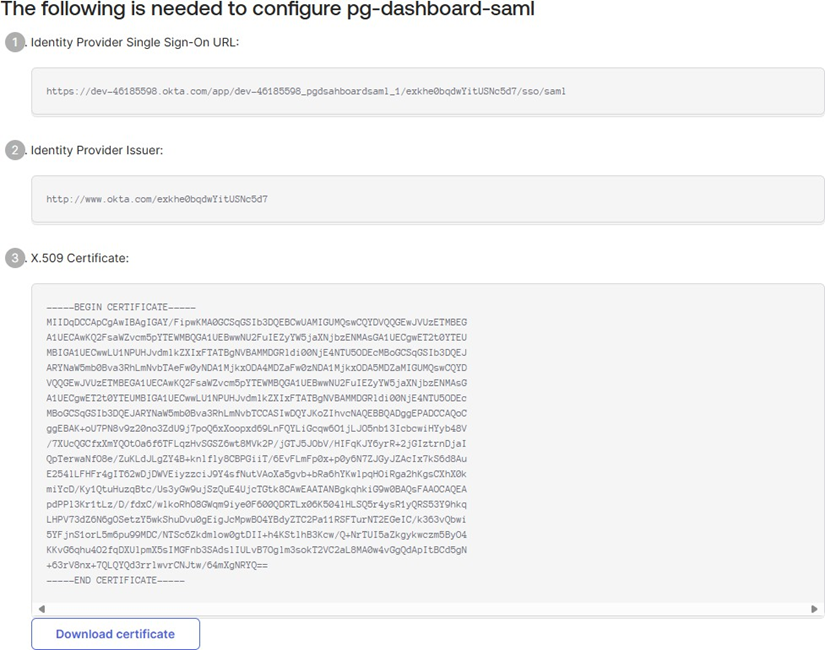
Step 8: Review the Configuration Details
Below is an example of the details you'll see:
- Identity Provider Single Sign-On URL
- Identity Provider Issuer
- X.509 Certificate (with Download certificate option)
Step 9: Forward Information to PostGrid
Please forward this information to either your account manager or a PostGrid engineer working with your team.
Best practice: For the certificate, simply forward the file.
Additional requirement: Please provide the email domain for which all logins will be scoped. This can be either one domain or a comma separated list.
Contact: [email protected] or [email protected]
Updated 6 months ago