Virtual Mailboxes
Automatically manage returned mail, forward business replies, and view scans of received items.
PostGrid's Virtual Mailboxes allow you to receive, scan, and optionally forward physical mail that is returned to a dedicated virtual address. This is particularly useful for managing returned mail, handling business replies, and maintaining a clear record of physical mail communications.
Please reach out to [email protected] for access to virtual mailboxes.
1. What capabilities do these mailboxes have?
Each mailbox provides a unique physical address where mail can be sent. When mail arrives at this address:
- Envelope Scans: The exterior of the envelope is scanned (this is a minimum requirement).
- Mailbox Items: These scans are then uploaded as "Mailbox Items" to your PostGrid dashboard, associated with your virtual mailbox.
- Webhooks: Notifications can be configured via webhooks to alert you programmatically when a new mailbox item is created.
- Mail Forwarding (Optional): You can choose to have any mail received at the virtual mailbox automatically forwarded to another PostGrid contact address.
This feature simplifies the process of tracking returned mail and other physical correspondence, integrating it digitally into your PostGrid workflow.
2. How can I use it?
Creating a Virtual Mailbox:
- Navigate to Virtual Mailboxes: From your PostGrid Dashboard, click on Overview under the "Virtual Mailboxes" section in the left-hand navigation.
- Click the Create Virtual Mailbox button.
- Internal Mailbox Name: Enter a descriptive name for your mailbox (e.g., "Test Mailbox 4"). This is for your internal reference.
- Country: Select the country for the mailbox. Currently, only US is supported, but more countries are expected in the future.
- Request Envelope Scans: This option is enabled by default and is a minimum requirement. It ensures you receive scans of the envelope exterior for returned mail.
- Request Mail Forwarding (Optional): Check this box if you want mail received at this virtual mailbox to be automatically forwarded to another address. If selected, you will need to choose a Contact to Forward To from your existing PostGrid contacts.
- Click Create.
Understanding Virtual Mailbox Status:
- Test Mode: In test mode, virtual mailboxes become Active immediately after creation. A test address will be available.
- Live Mode: In live mode, newly created virtual mailboxes will initially have a Pending Assignment status. They will be assigned to a physical mailbox in PostGrid's network based on selected capabilities and will become Active once ready. You will be notified when this happens.
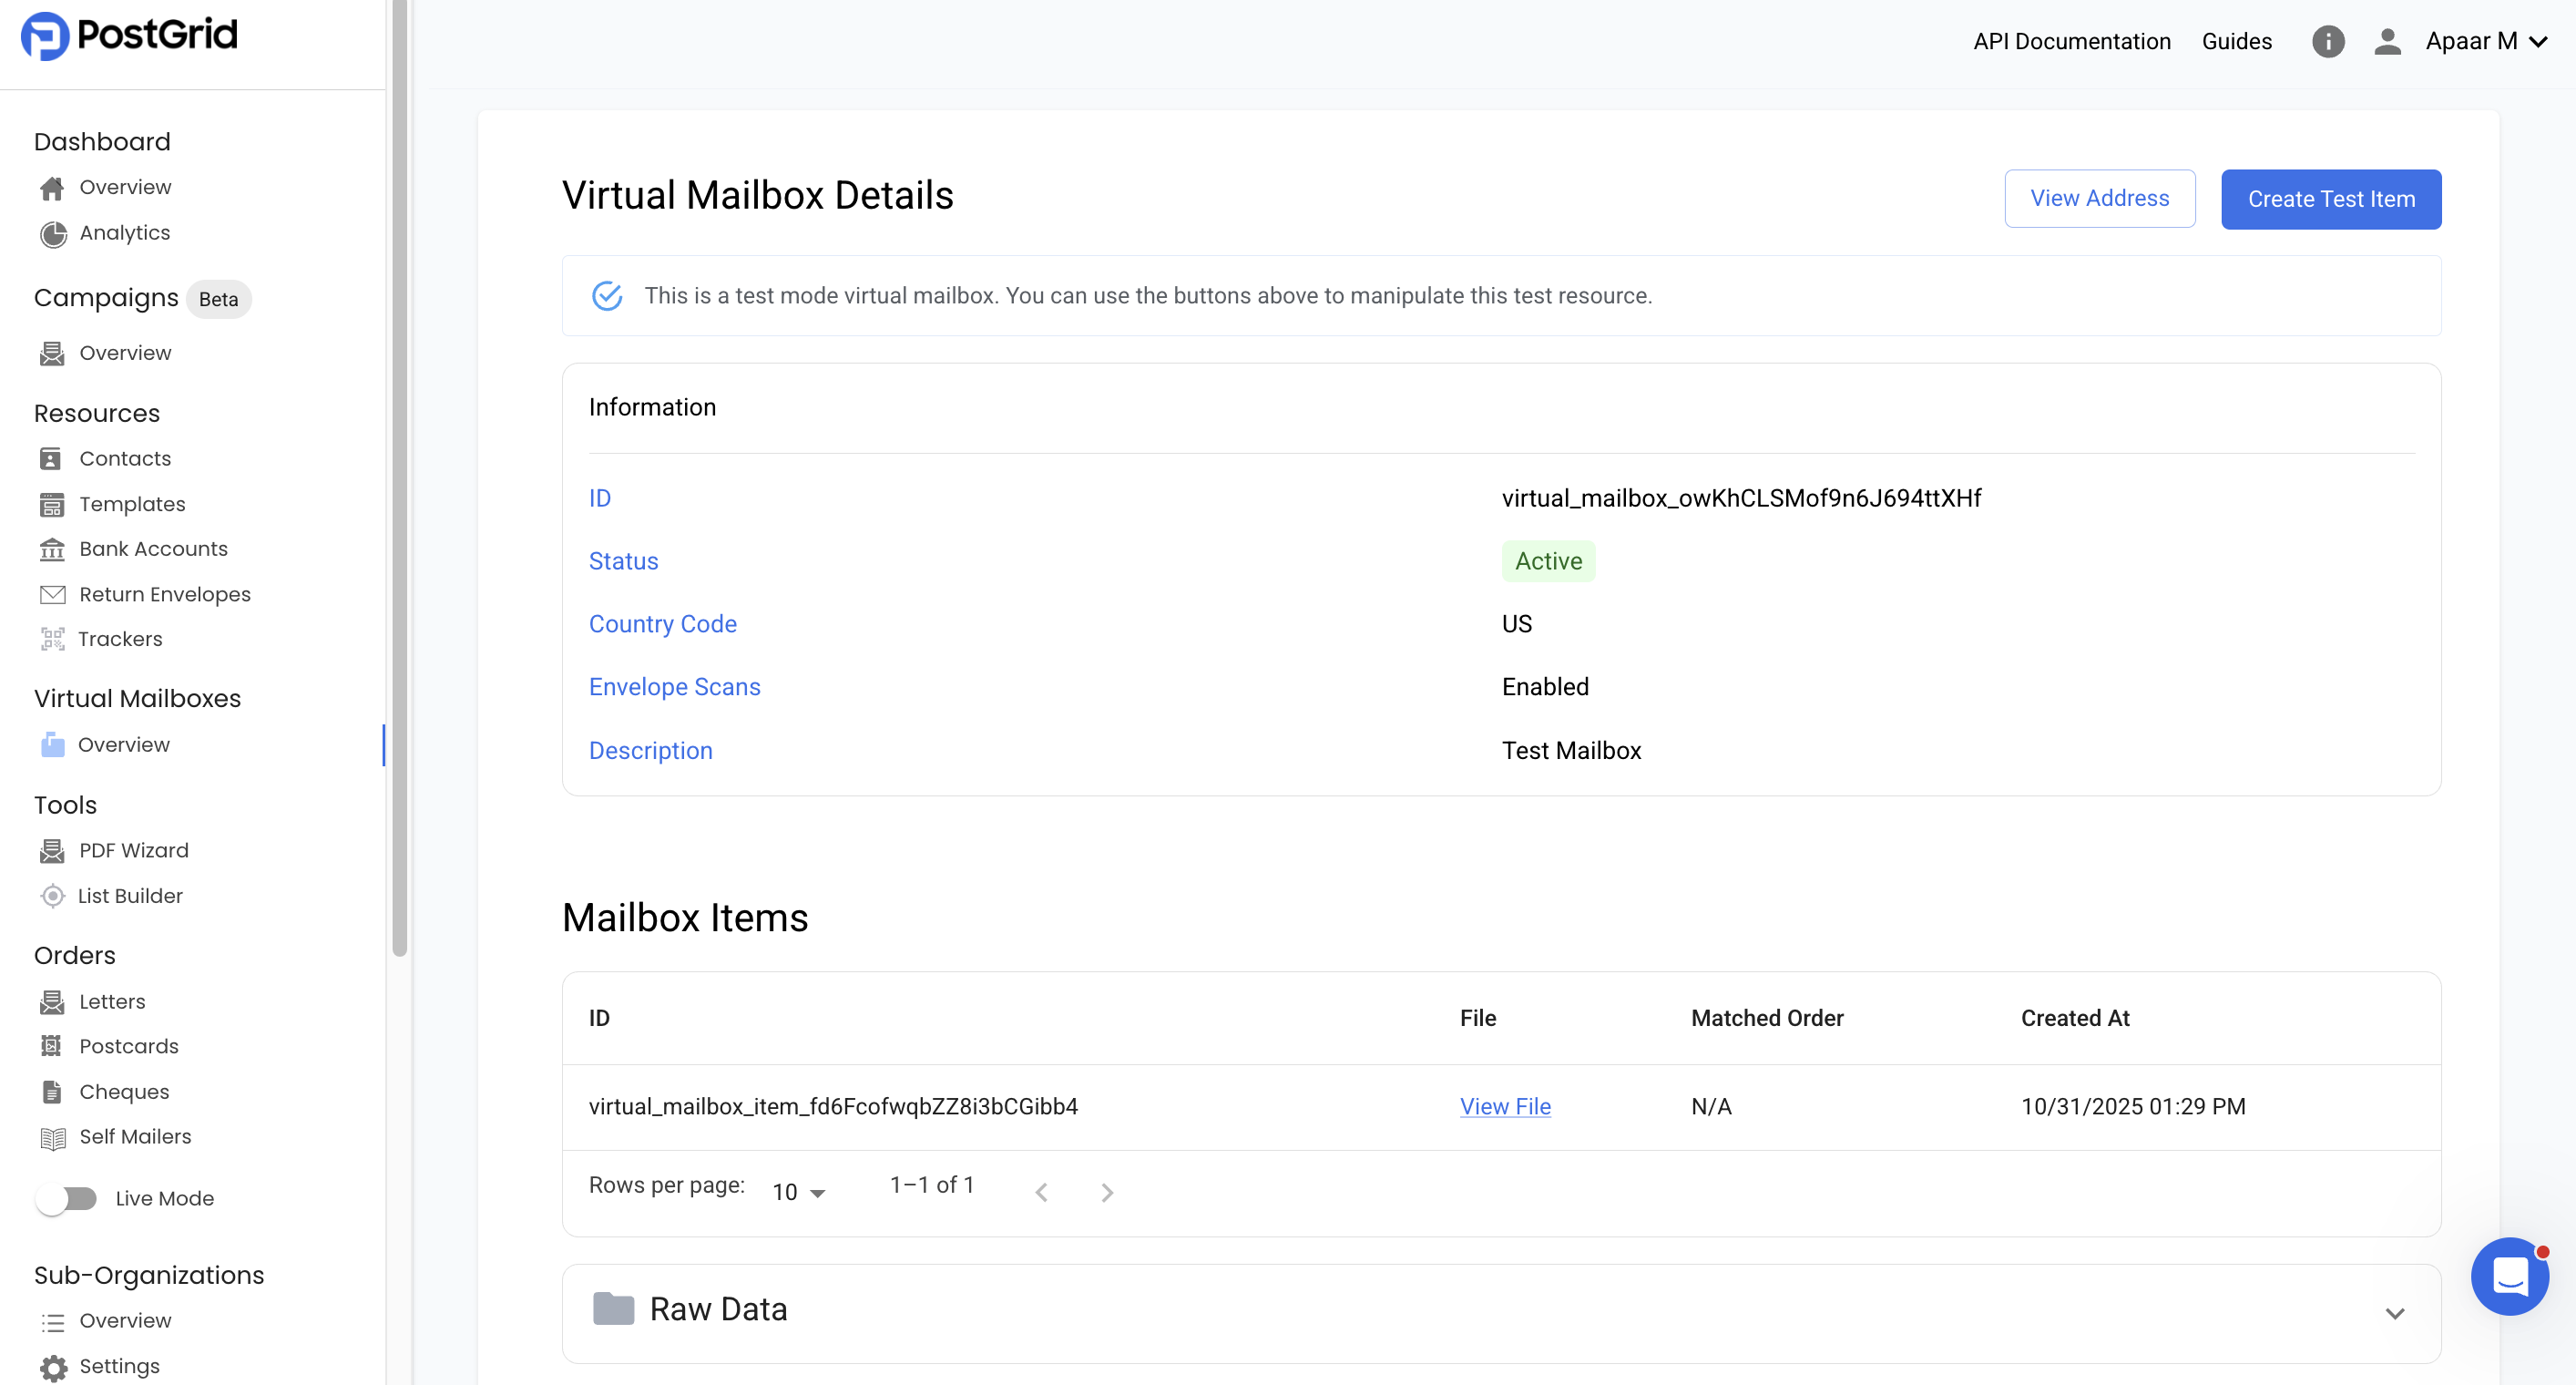
Viewing Virtual Mailbox Details:
- From the Virtual Mailboxes Overview, click on the name of a specific virtual mailbox to view its details.
- View Address: Click the View Address button to see the current address assigned to your virtual mailbox. PostGrid notes that this address may change in the future and you will be notified if it does.
- Note for API Users: Instead of directly using the mailbox address, you can use the virtual mailbox's ID when sending mailings to make it easier to manage returns.
- Mailbox Items: This section displays all mail received at your virtual mailbox.
- Each item will have an ID, a link to View File (the scanned envelope), a Matched Order (if applicable, linking it to an original PostGrid order), and the Created At timestamp.
Testing Virtual Mailbox Functionality (Test Mode Only):
- While viewing the details of an active virtual mailbox in test mode, click the Create Test Item button.
- Order ID to Match (Optional): You can optionally enter a letter order ID (e.g.,
letter_abc123) to simulate a returned mail piece corresponding to a specific PostGrid order. This helps in testing return mail workflows. - Click Create.
- A new "Mailbox Item" will appear in the list below, with a dummy file representing the scanned envelope.
Receiving Webhook Notifications:
- Go to Settings > Webhooks in the left-hand navigation.
- Create a new webhook or edit an existing one.
- Ensure the
virtual_mailbox_item.createdevent type is selected. - Configure your URL and Payload Format (e.g., JSON) to receive notifications whenever a new mailbox item is added to your virtual mailbox.
3. How do I get billed for it?
For specific pricing details, including costs for creating virtual mailboxes, envelope scans, mail forwarding, or storage of mailbox items, please contact your account manager or customer success manager directly.
4. FAQ
Q: What countries are supported for Virtual Mailboxes?
A: Currently, only the US is supported. PostGrid plans to add more countries in the future.
Q: What is the difference between Test Mode and Live Mode for virtual mailboxes?
A: In Test Mode, virtual mailboxes become active immediately, and you can create "Test Items" to simulate mail arrival and webhook triggers without actual physical mail. In Live Mode, mailboxes initially enter a "Pending Assignment" state while PostGrid assigns a physical mailbox address within its network. Real mail is required for items to appear.
Q: What are "Request Envelope Scans"?
A: This is a mandatory option that enables PostGrid to scan the exterior of any mail received at your virtual mailbox. These scans are then visible as "Mailbox Items" in your dashboard.
Q: Can I forward mail received at my virtual mailbox to another address?
A: Yes, if you select "Request Mail Forwarding" during virtual mailbox creation, you can specify a PostGrid contact to automatically receive forwarded physical mail.
Q: How do I get notified when new mail arrives at my virtual mailbox?
A: You can set up a webhook under Settings > Webhooks and subscribe to the virtual_mailbox_item.created event. This will send a notification to your specified URL whenever new mail is scanned.
Q: Can the physical address of my virtual mailbox change?
A: Yes, PostGrid states that the current address of your virtual mailbox may change in the future, and you will be notified if it does. For API interactions, using the virtual mailbox ID is recommended to manage this.
Q: How can I link a returned mail piece to a specific order I sent out via PostGrid?
A: When a mailbox item is created, if it's a returned mail piece for an order you sent, the "Matched Order" column in your Mailbox Items list will display the associated order ID, helping you identify the original mailing. In test mode, you can manually enter an "Order ID to Match" when creating a test item.
Updated 9 months ago